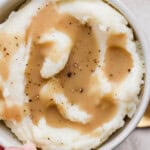
Gluten and Dairy Free Gravy
Gluten and Dairy Free Gravy - a quick and easy recipe that will be your next go-to gravy recipe!
Ingredients
- 4 tablespoons plant based butter
- 6 tablespoons gluten free flour
- 2 cups pan drippings
- 1 cup chicken broth
- kosher salt and ground black pepper to taste
Instructions
- Roux: In a deep skillet or medium saucepan, melt 4 tablespoons plant based butter on medium-high heat. Then add in 6 tablespoons gluten free flour and whisk to combine. This will create a sort of paste (called a roux) and it should have an almost nutty smell.
- Adding Liquid: Then slowly add in 2 cups pan drippings (about ⅓ cup at a time), whisking constantly. Continue adding and whisking until it is all added. Then do the same thing with 1 cup chicken broth, until it is all incorporated.
- Consistency: Assess the consistency of the gravy - if you like it a little thinner, add broth a little at a time, whisking to combine, until you have reached your desired consistency. If you want it a bit thicker, let it simmer (a soft boil) for a little bit and it will continue to thicken. Taste and add kosher salt and ground black pepper, as desired.
- Serve: Enjoy immediately! If gravy ends up having to sit for a bit and you feel it dries up a bit, just add a splash of broth and whisk to revive.
Notes
- Just Dairy-Free: if you only want a dairy-free gravy recipe use all-purpose flour instead of gluten-free.
- Just Gluten-Free: if you only want a gluten-free gravy recipe use regular butter instead of plant-based.
- Paleo/Whole30: for paleo/Whole30 you would want to see the Tapioca Method highlighted in the blog post above.
- Cast Iron Skillet: I find that gravy works best in a larger, flatter skillet which is why I am recommending to use this for that method.
- Storage: Keep leftover gravy in an airtight container in the refrigerator for 3-4 days. Freeze for up to 3 months.
Nutrition
Calories: 135kcal | Carbohydrates: 3g | Protein: 0.5g | Fat: 14g | Saturated Fat: 5g | Polyunsaturated Fat: 2g | Monounsaturated Fat: 6g | Trans Fat: 1g | Cholesterol: 10mg | Sodium: 118mg | Potassium: 4mg | Fiber: 0.4g | Sugar: 0.2g | Vitamin A: 0.4IU | Calcium: 3mg | Iron: 0.1mg
Did you make this recipe?Tag @thewoodenskillet on Instagram!
