My Photography Photo Shoot Checklist – save this one for later!
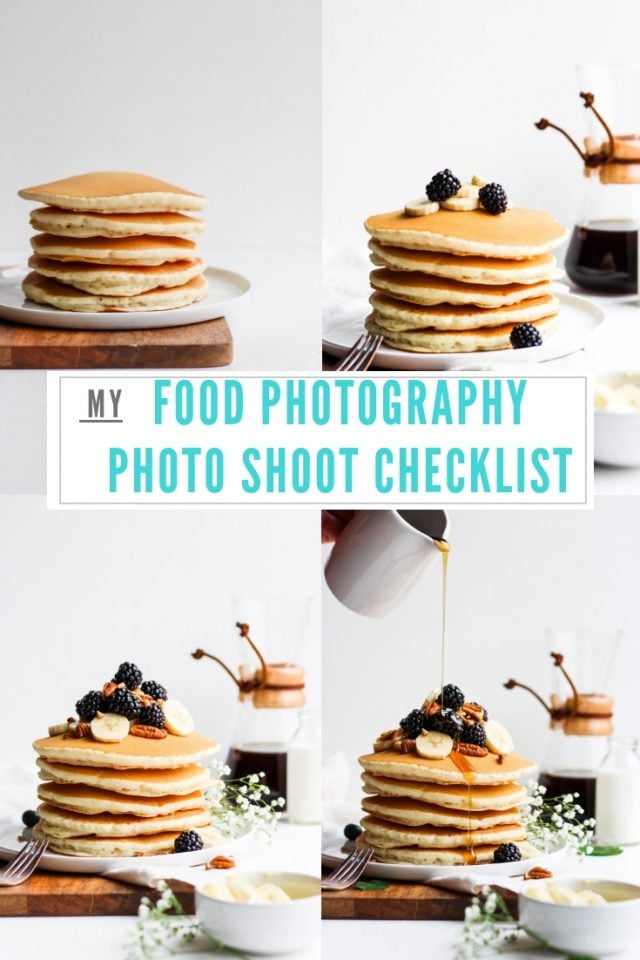
I get asked a lot of questions about my food photography so I thought I would share you with you guys a little behind the scenes of what I do!
I have been working on my food photography for over 3 years now. I have read countless book, taken numerous classes and really just done a ridiculous amount of learning through practice and scouring Pinterest and Instagram, learning from those I admire.
I still have SO much to learn and I am sure I will update this post countless times as I continue to learn, but I get enough questions about my food photography that I thought putting together some resources for all of you would be beneficial! So, this will be the first of many food photography resources up on the blog!
In this post I will simply walk you through my thought process when I am working on a photo shoot, giving you a list of things to at least think about as you are working your way through. It always amazes me when I break it down just how much goes into a shoot; how much thought goes into it. No wonder I am exhausted when I am done!!
So I hope you find this helpful and please let me know if you have questions!
Before Your Shoot (the day before):
- Think about your colors. What colors are you working with; are they complimentary (look at a color wheel for reference); are there any other colors you can bring in that will compliment the colors you are already planning on using; if the recipe is for your own blog, do the colors go with your general brand colors (if you have decided on some).
- Feeling. What kind of feeling do I want to evoke with this food; do I need any additional small props or linens to help create the feeling I am going for.
- Inspiration: Sometimes I know exactly how I want a photo to look, but once in a while I get stuck. If I need some inspiration I do a quick search on Pinterest, Google or Instagram – of course never copy what other people are doing, but sometimes seeing how other people approached a subject will just make something in my brain click or get you over that creative block.
- Draw out your set-ups. Think through your set-ups; sometimes I draw them out on paper (very roughly). I especially try and do this if I am working with ice cream or popsicles when I won’t have much time to really think about it while I am working. It is always so beneficial to come up with 2-3 different set-ups (they don’t need to be dramatically different) because you really never know what will ultimately end up looking the best in post-processing (aka editing). Doing this helps you think about your composition/movement beforehand so you aren’t sitting there at a loss during your photo shoot. I also think about what my “money shot” will be – I usually try and take at least one money shot, which usually involves some sort of movement, either the drip of some honey or the pour of some coffee creamer. Action shots just seem to speak to be people so I think about how I can incorporate those into my photo shoot. Here is a list of some potential shots you might want to plan for:
- Ingredient shots
- Step-by-step shots to really walk your view through the process (helpful if the recipe could easily be confusing, is especially challenging or there is some sort of “trick” you want to show
- Prep shot – just a before-you-cook-it shot
- Flat-lay – an overhead shot of almost a table set up of your food; lots of elements
- Straight on
- 90 degree angle
- Overhead
- Action shot
- Messy shot – usually leave these for the last shot – usually involves taking a bit out of something, using a fork to cut into something, etc
- Double check your contract, if applicable. If you are working on a sponsored post (or you are shooting for someone else) – make sure you know what your deliverables are and get those done FIRST. You don’t want to be all done with your shoots and clean up only to re-read your contract and realize you forgot something – it can be an expensive mistake!
Set Up/Right before you shoot:
- Props: pick out a couple props that you think will help create the feeling you are going for. I generally go with fairy neutral props to allow the food to really stand out.
- Background: pick out your background – again, I generally advise using something fairly neutral and not too busy so it doesn’t pull away from your food. This doesn’t mean it needs to be white like mine generally are, but I (personally) think photos look best when backgrounds are white, grey or black – just depends upon your style and the colors you are working with.
- Lighting: I always use natural lighting and do everything I can possibly do to get my photo shoots done on a cloudy day. Even having a partly cloudy day will result in a substantially better photo than if it is a purely sunny day with a bright blue sky. If I don’t have a choice and I have to shoot on a blue-sky day, I try and do my shoots in the early morning and I use a diffuser. Otherwise, I am doing my photo shoots on a cloudy day, next to my sliding glass door and I have my board set up so the light is coming from the side. Sometimes I also have my photo back-lit, so the light is coming from the back of my board. Do not underestimate the difference good light can make on your photo. I have tried to “make it work” on sunny days and while you can fix quite a bit in Lightroom these days, it honestly just never quite looks the same. I have gotten to a point where unless am under a deadline or something and HAVE to do a shoot, I would rather just not do a photo shoot if I know it is going to be on a sunny, blue-sky day.
Set Up:
- Composition: Here are a few (list is non-exhaustive) compositional elements to consider when setting up your shoot. There are entire classes on these so I will just list out and briefly touch on the main ones that I generally think about:
- Rule of Thirds: imagine your photo is divided into 9 equal quadrants, separated by 2 vertical and 2 horizontal lines. The rule of thirds says that you should place the important parts of your photo along these lines OR place important parts of your subjects between the lines. (Iced Bulletproof Cold Brew Coffee – this shows important subjects between the lines)
- Balance: basically, if you have a majority of your subject in the lower left corner, for example, then you might want to consider putting something small (the corner of a linen even) in the upper right hand corner so that the photo looks balanced. (Cinnamon Cold Brew Cashew Latte)
- Framing: Sometimes it works to use a frame within a frame to elevate your photo. You already have your “frame” of your entire picture, but if you bring in a square cheeseboard and place your bowl on that, then the cheeseboard is also “framing” your subject and the effect can be very pleasing to the eye. (Chorizo & Seafood Wannabe Paella)
- Symmetry/Patterns: the eye also loves symmetry and patterns. Incorporate these into your photos whenever you can! (Lemon Lime Citrus Granita)
- Movement: (This is really part of composition, but it is so incredibly important I had to highlight it on its own.) You need to control where the eye movement of your view is going; look at some of your favorite food photos and you will notice that there is a natural path that your eye will take through the photo. This makes the photo more pleasing to look at and, thus, more popular. Use plates, food, utensils, linens, etc. to help your viewer’s eye to move naturally through your photo. This is something to think about when you are planning out your different set-ups. (Spicy Salmon Cauliflower Rice Sushi Roll)
- Change it up: Don’t do what I did in the beginning and take 100 photos of essential the same set-up. You are going to get your photo into Lightroom and very disappointed! Take a couple photos of your shot and then change 1 thing; then change another thing. These don’t have to be huge changes, but you never know what you will like after you get it edited. Move a fork. Add a linen; take it away. Add a garnish, take it away. Do a simple shot of just your bowl of food and then style the heck out of it and have a more full picture. You will thank yourself when you are editing AND you will have more variety in your blog post or in your deliverables to your client (if applicable).
- Walk away: You can’t always do this – if you are shooting ice cream or popsicles you are going to need to get your shots in fast – but to the extent you can just walk away from your shoot for just 5 minutes, change your focus for a minute and then come back, sometimes I get my best ideas when I look at it with fresh eyes (I do this with editing sometimes too).
- Camera settings:
- ISO: I generally keep my ISO between 100-200. I will go higher if I need to, but that is my preference. I set this first.
- Aperture: I keep mine pretty low – between 3.5 – 4.5. But I change it up throughout the photo. So, if I find a shot I really like, I will take a couple at 3.5 in hopes I can get that magically sharp photo (but sometimes it ends up being too blurry, especially I have have a lot going on in the photo), but then I will change it to 4.0 and then 4.5, taking a couple shots as I go. This way I won’t get to editing and realize my photos are too blurry because my aperture was too low and the camera was focusing on a tiny little leaf and nothing else. You can always upload your photos right after your shoot before you break it down (if possible with what you are shooting) and see how things are looking).
- Shutter Speed: I probably change this around the most with the change in lighting and I really don’t have a setting that I stick to. If I want to try and get keep my ISO at 100 and I need to use a higher aperture then I will drop down to 80 in my shutter speed, for example.
- Incremental distance photos: So when I get a shot I love I take a close up shot, then move back just an inch and take another, move back another inch and take another …. and so on. I do this so I have options at every distance so that when I edit them I can pick the distance that looks the best.
- Slightly under-expose: I always under expose my photos just a little bit during my photo shoot. I always used to try and get the “perfect” photo during my photo shoots. Slowly, I learned that when I got that perfectly exposed photo I couldn’t do much with it once I got into Lightroom. So, I started slightly under-exposing my photos during my shoots so I have more room for editing in post-processing.
- Shadows: I like to play around with shadows during my photo shoots. I take some photos without using a bounce board and then some with a bounce board. When I use a bounce board I usually keep it a good 12 inches from my actual set-up so that it provides some light reflected back, but doesn’t completely wash out my photos.
- Time is of the essence: If you are working with a subject that will only allow you a short period of time to get your shot (think ice cream, popsicles, a runny egg), then you need to make sure you have your shoot completely set up and styled before you bring your your subject. If you have some ice cream, for example, get your bowl out that you are going to use and maybe even put something that is the same color as your ice cream in the bowl, style your shoot and even take pictures of this set up to make sure your lighting and shadows are looking good. Then, when you know you love it, actually get out your food and take all of your photos.
Hopefully you guys find that helpful! If you have any questions, please let me know. Here are a few of my other blogging resources (more blogging and photography resources coming soon!):
Don’t forget to check out my Instagram account – Or give me a follow on Facebook or see what I am pinning on Pinterest! (FYI – check out my Instagram Highlights for a couple behind the scenes of my photo shoots!)
Love,
E
Thank you so much for reading & supporting The Wooden Skillet! This post contains affiliate links for products I actually use in my own home and personally recommend. Should you make a purchase using one of these links, The Wooden Skillet will earn a small commission at no extra cost to you, which helps me continue to bring you great original content. Thank you!


Zoe says
Thanks for the information. I sometimes struggle with these steps.
Vanessa says
This was so helpful! I am curious what you use for your white backgrounds and if you have any tricks in Lightroom to make sure it looks like a true white (vs a blue cast for example).
Erin says
Hi Vanessa! So glad you found it helpful! I usually use an off-white background from Erickson Woodworks or I have a marble slab from Crate and Barrel I use once in a while. I pull out a lot of the blue in Lightroom in the HSL panel! Once you reduce the blue/aqua, the background should end up being true white! Hope that helps!
Farah says
This was absolutely fascinating to read thank you! Do you mind my asking what type of camera you use/favorite lenses?
Erin says
Thanks, Farah!! So glad you liked it! I use a Canon Rebel SL1 with a 50mm lens! I love it!
Nara says
Hi Erin! thank you for the article, it’s very helpful. I love your photography style! What kind of presets do you use in lightroom? Is there a simple way to edit pictures to get that bring airy effect? Thanks much!
Erin says
Hi, Nara! Thank you! I don’t really use any presets currently – each photo can be so different based upon the lighting that day that I have found I still make so many adjustments anyway! One day I might make my own presets, but I haven’t yet! As for the “airy” effect, I think it really has to do with lighting (I do EVERYTHING I can to shoot on a cloudy day – it makes such difference for me) and some editing techniques. I will hope to develop more photography resources in the coming months so I will try to put together a resource that goes into that process more!!
Justin's Health Corner says
I was wondering what kind of camera would you recommend for someone looking to begin food photography… and also what would you recommend for someone who doesn’t have a lot of natural light… aka I live in New York lol
Erin says
Hi, Justin! I think I talked to you on IG about this :). But wanted to answer you here as well – I would highly recommend the Canon Rebel series as a starter camera and a 50mm lens. I found my second hand at National Camera Exchange for a very reasonable price and it was in great condition! If you really cannot get natural light, there are some good artificial lights out there and amazing artificial light tutorials! Its not quite the same, but with practice you will get pretty close!