
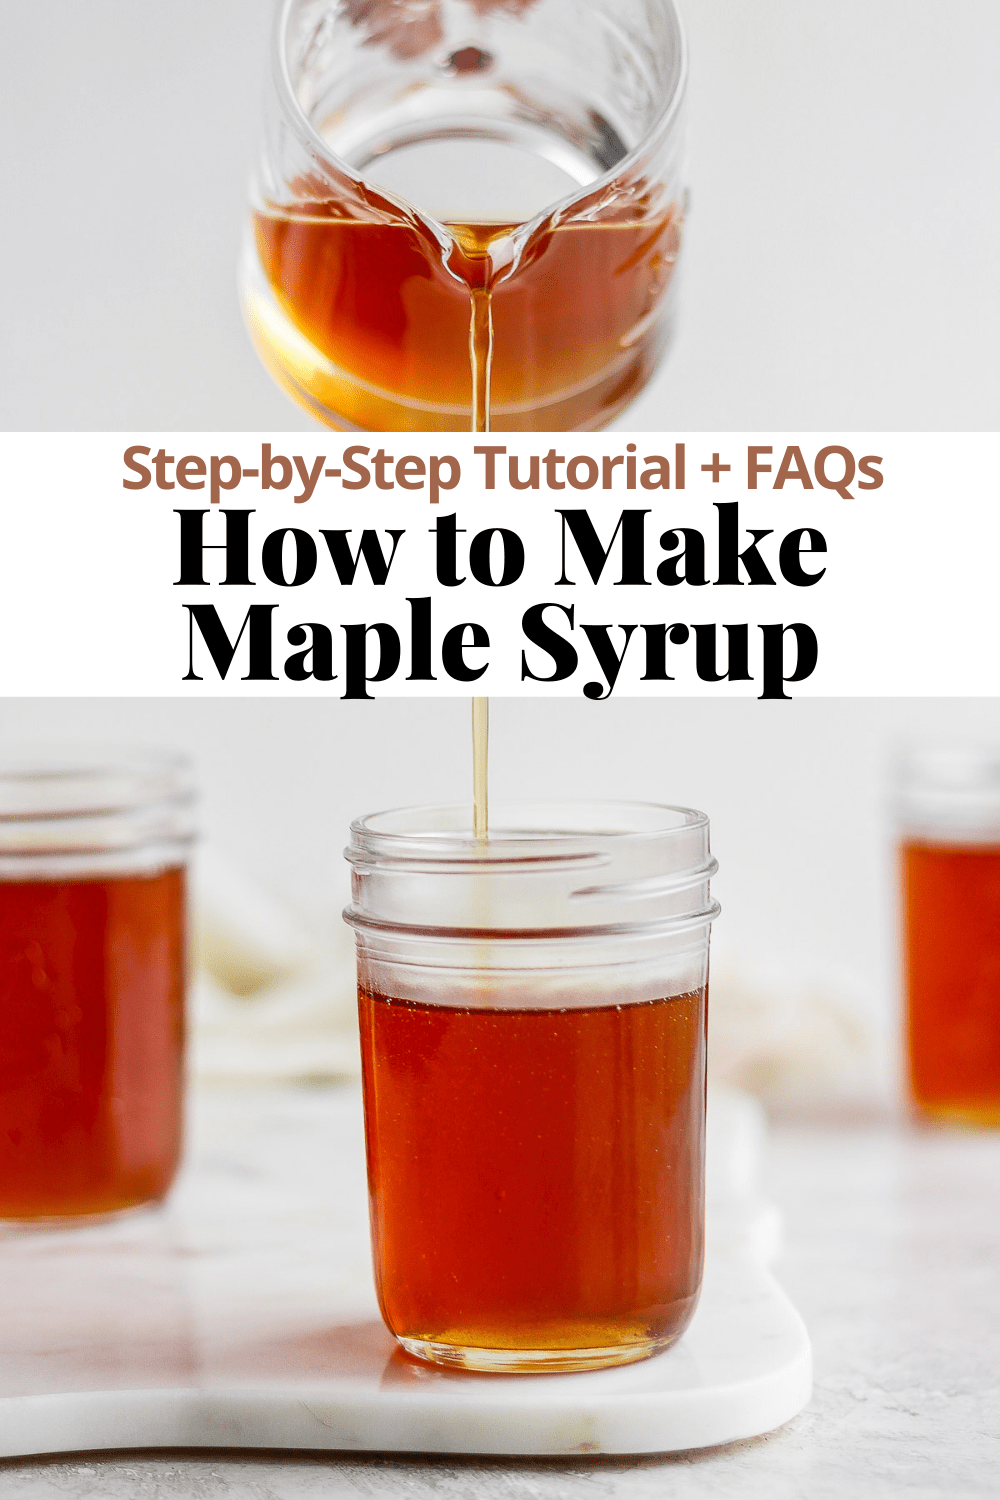
How to Make Maple Syrup – a step-by-step tutorial that shows you exactly how to make your own, homemade maple syrup!
What You Will Need to Make Maple Syrup
- Sap (See: How to Tap Maple Trees): Tapping maple trees requires a few pieces of equipment such as taps and bags. But just as an FYI – 5 gallons of sap usually end up resulting in approximately 16oz maple syrup. If you tap one sugar maple tree you will normally get about 10-20 gallons of sap in a season.
- Food Grade Buckets: Once you collect your sap in bags you will need a place to store it.
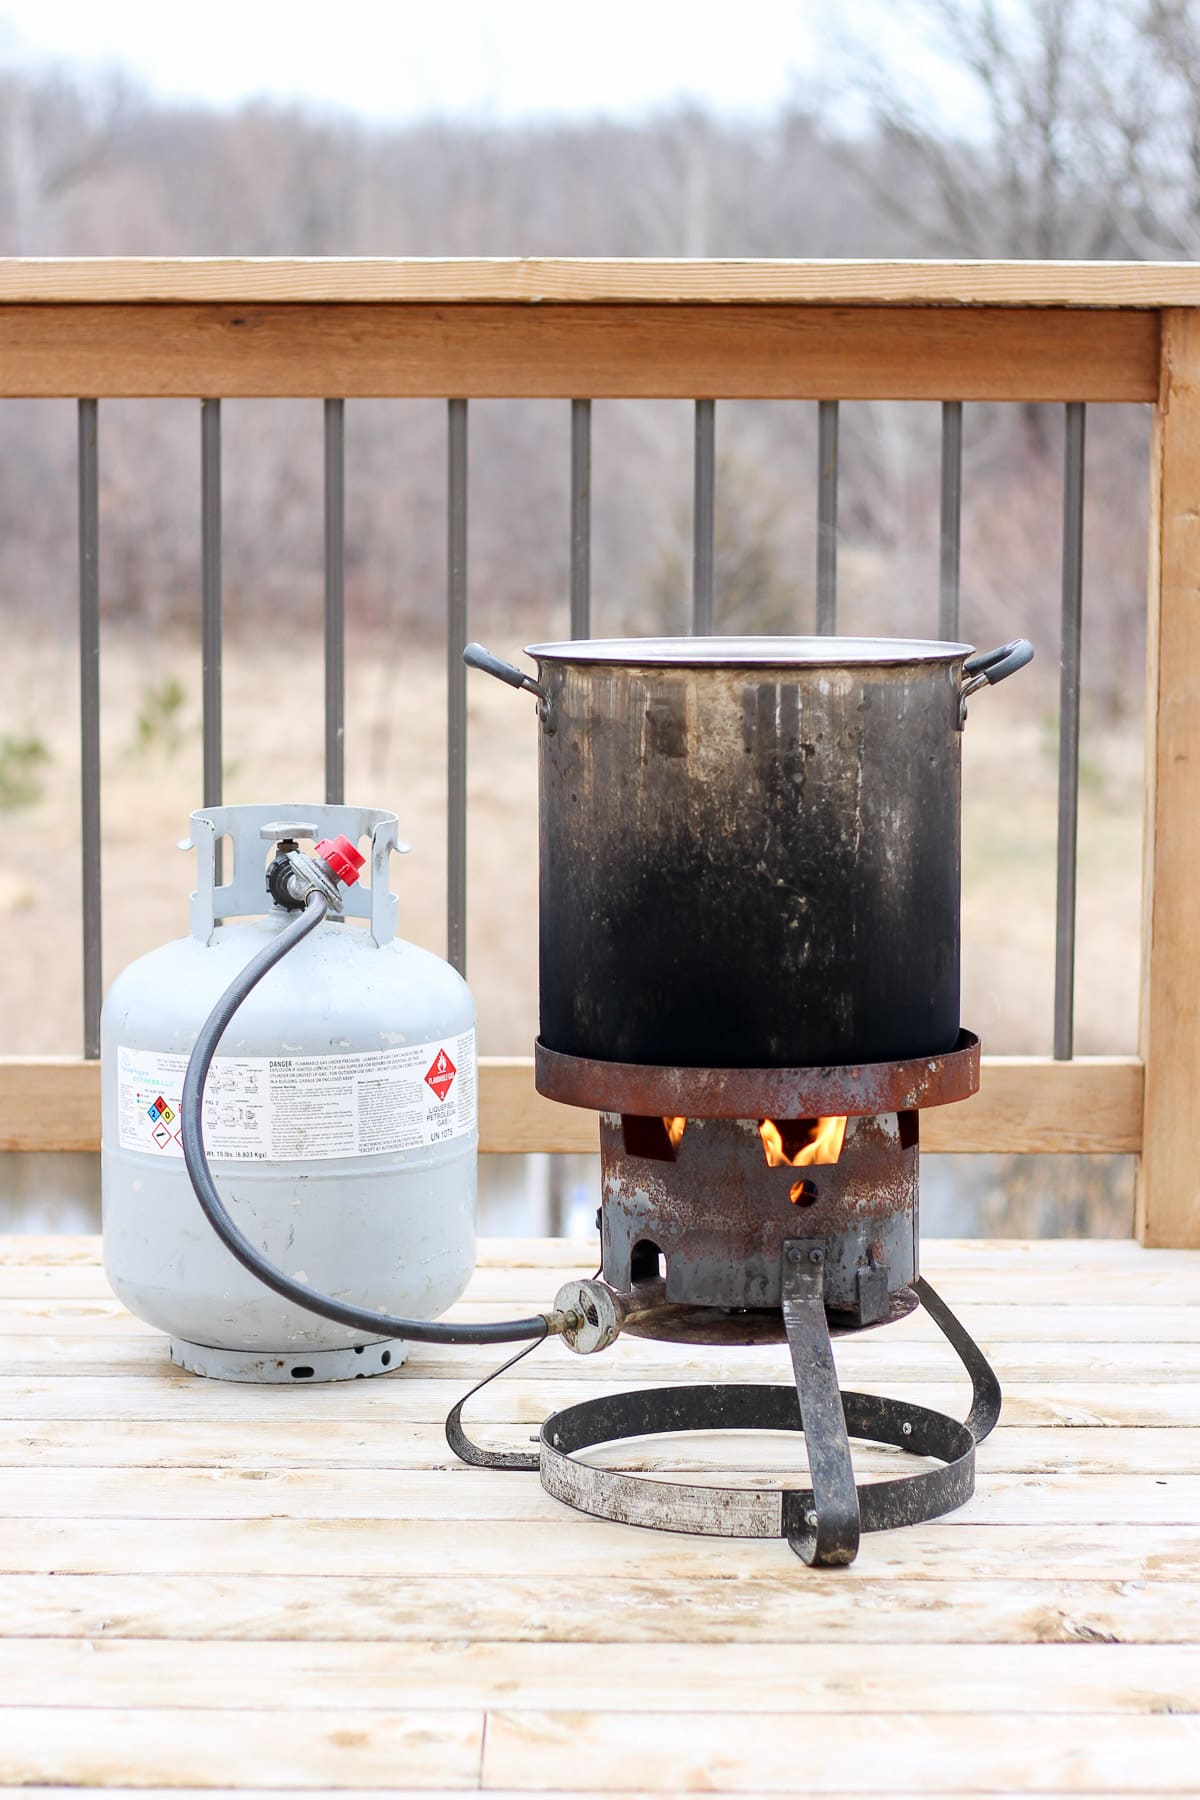
- Turkey Fryer + propane tank: This is where you will do your initial boil-down.
- Digital Thermometer: You can only really tell when your maple syrup is “done” by the temperature so this is definitely a must!
- Filter or Cheesecloth: You need to be able to filter out all the dirt, etc. from the pure sap.
- Large Pot: Once you are done boiling down in the turkey fryer you will move to the stove top and into a large pot/saucepan.
- Hydrometer (optional): This confirms the sugar content of your maple syrup. Not required, but it is nice to confirm you are in the right spot with your syrup.
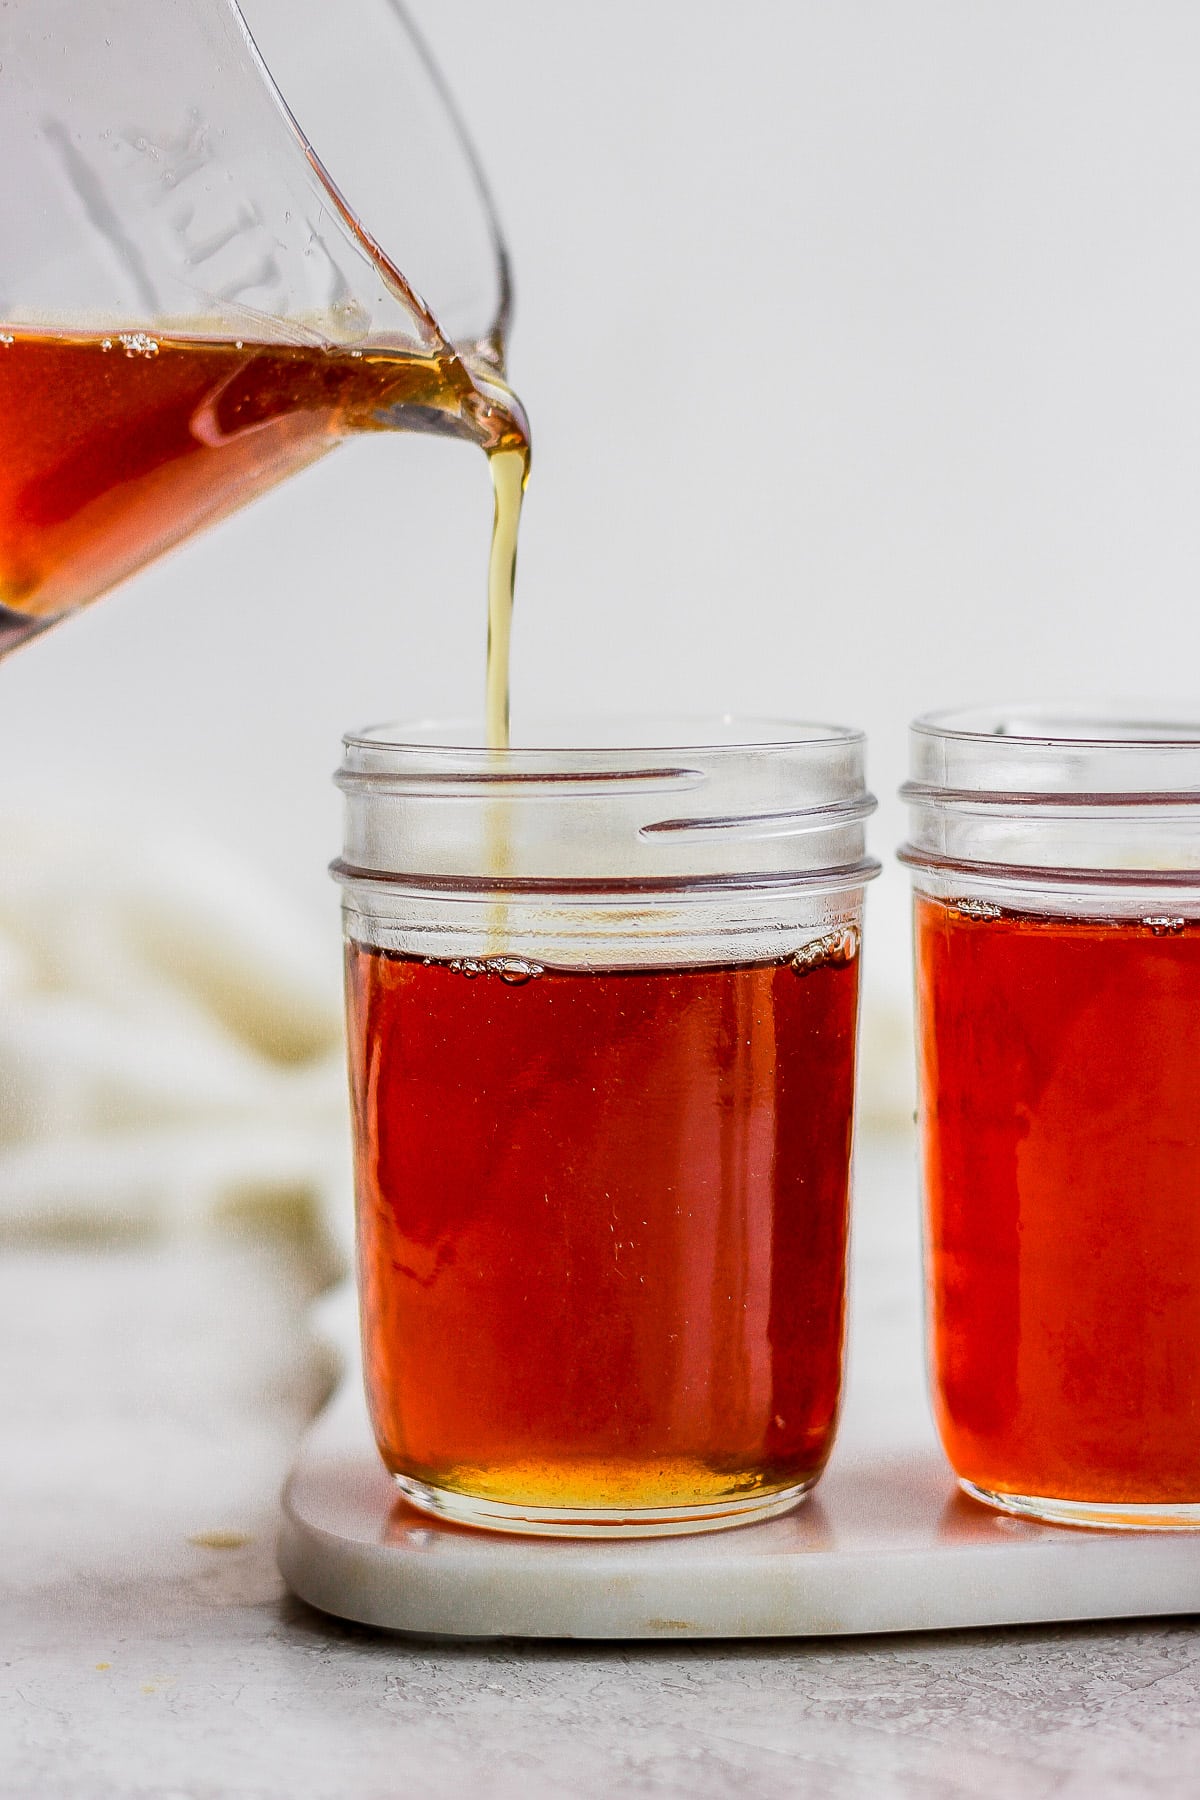
- Mason Jars: Sterilized mason jars are a great way to store your homemade maple syrup.
What Does the Set-Up Look Like
Get your turkey fryer set up and connected to your propane tank. Set your turkey fryer on top. Make sure it is on a flat surface and block the wind if it is particularly windy for you.
How to Boil Sap to Make Maple Syrup
Step One: The first step is to boil down your sap to a “reasonable amount,” which we will define as about 5 gallons (which is what will fit nicely into a turkey fryer pot. To do this you will simply need to set up your turkey fry and place your pot on top. Fill the pot with sap. Cover it initially in order to bring it to a boil. When it starts boil, remove the cover and let it continue simmering. It will continue to reduce as the water is boiled off the sugar content will get more and more condensed.
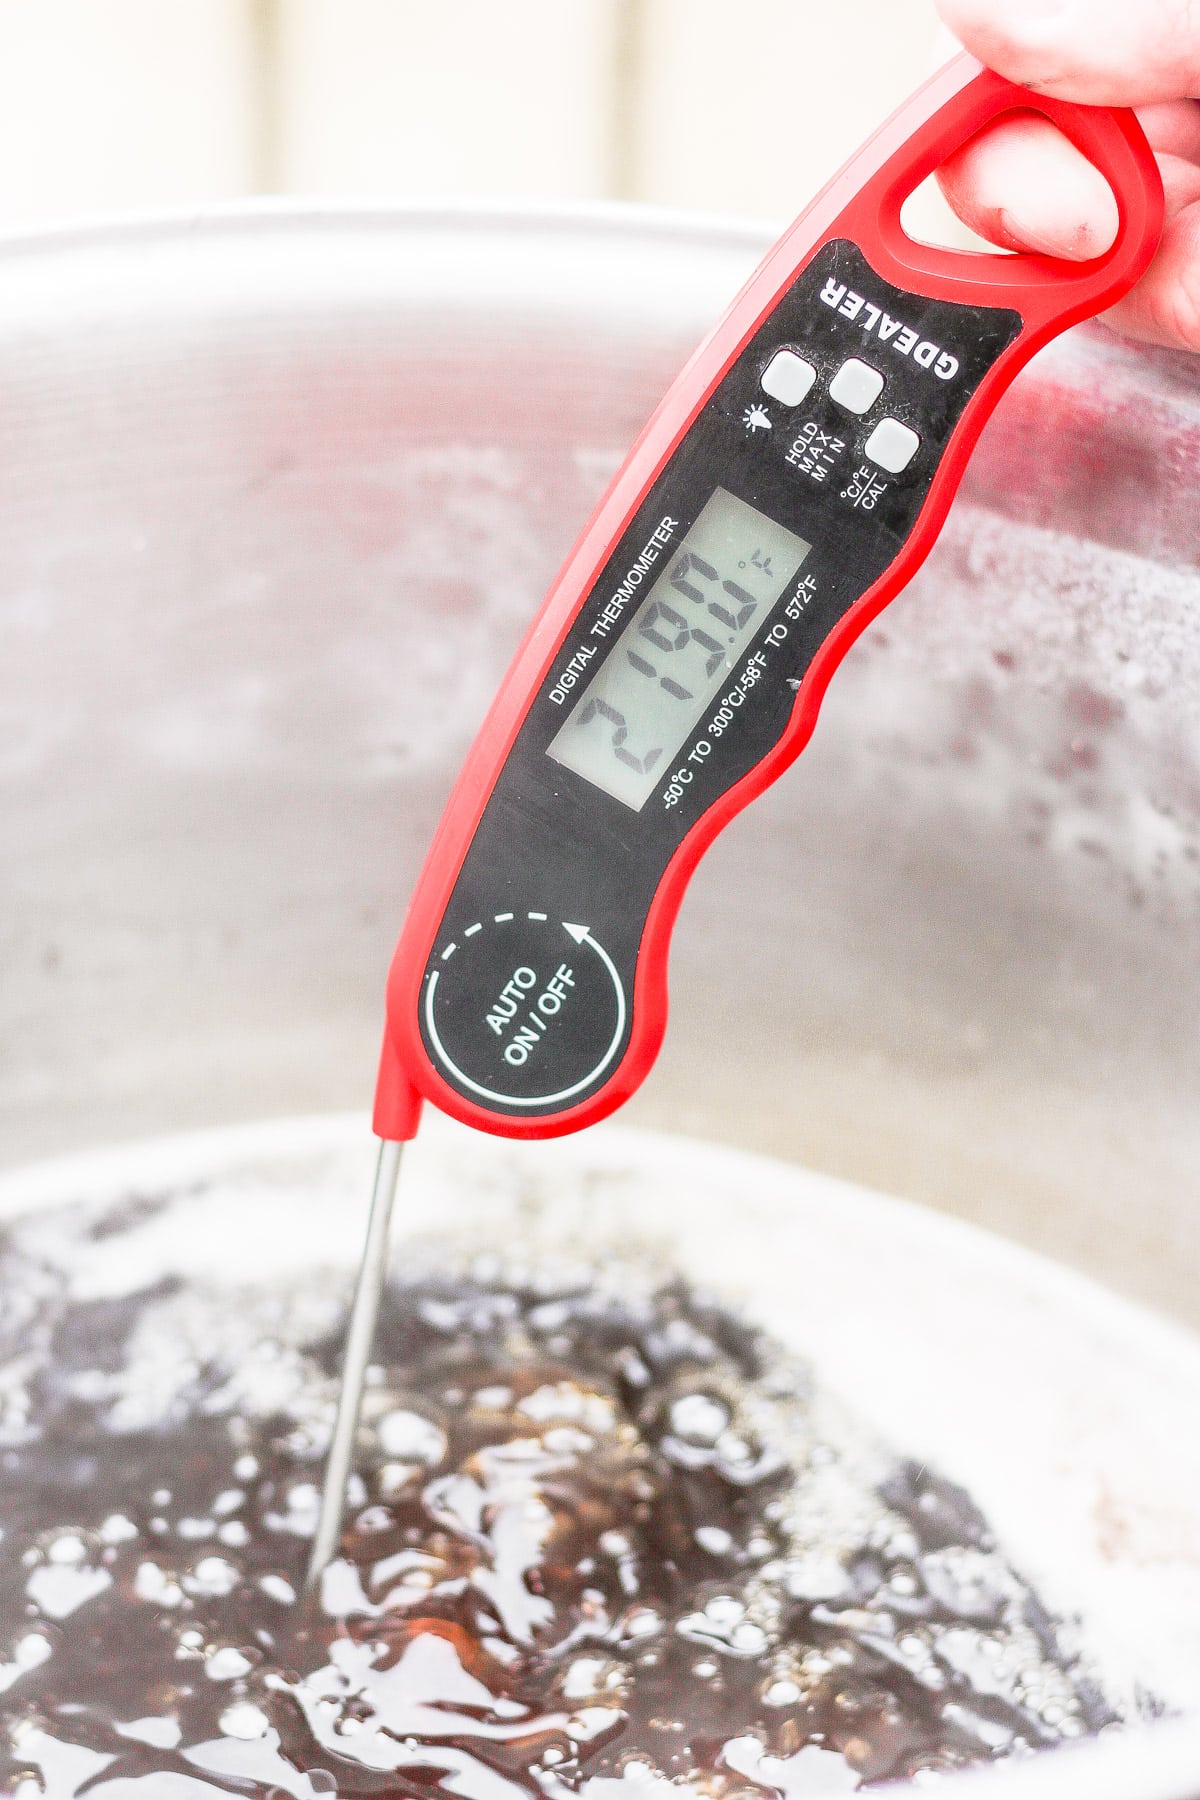
Step Two: Continue simmering until the sap reaches 219 degrees Fahrenheit.
Why: Water boils at 212 degrees Fahrenheit. So when you bring your initial container of water to a boil and put in your digital thermometer, it should read something around 212 degrees. As you continue to simmer your sap, water is continually being boiled off through the steam (which is why you leave it uncovered).
As the sap reduces, all of the sugar remains. As the sugar content of the remaining sap gets continually higher (because you are constantly loosing water) the boiling point of the sap increases.
So, if you keep checking the temperature of the sap you will notice it gets higher and higher. In order to reach the thickness or consistency of maple syrup, you want to keep boiling down your sap until the boiling temperature reaches 220 degrees Fahrenheit. BUT once you hit 219 degrees Fahrenheit the chances of the sap boiling over is VERY HIGH likelihood of boiling over (there is a very scientific reason for this at includes the fact that the surface area of sugar is greater than that of plain water). Once it reaches 219 degrees Fahrenheit simply turn off the heat to the turkey fryer.
Step Three: At this point you CAN filter the sap if you want, or you can wait until the end (it does have to be filtered at some point while it is still hot). There is no wrong way to do this, but we generally use these filters or you can use cheesecloth.
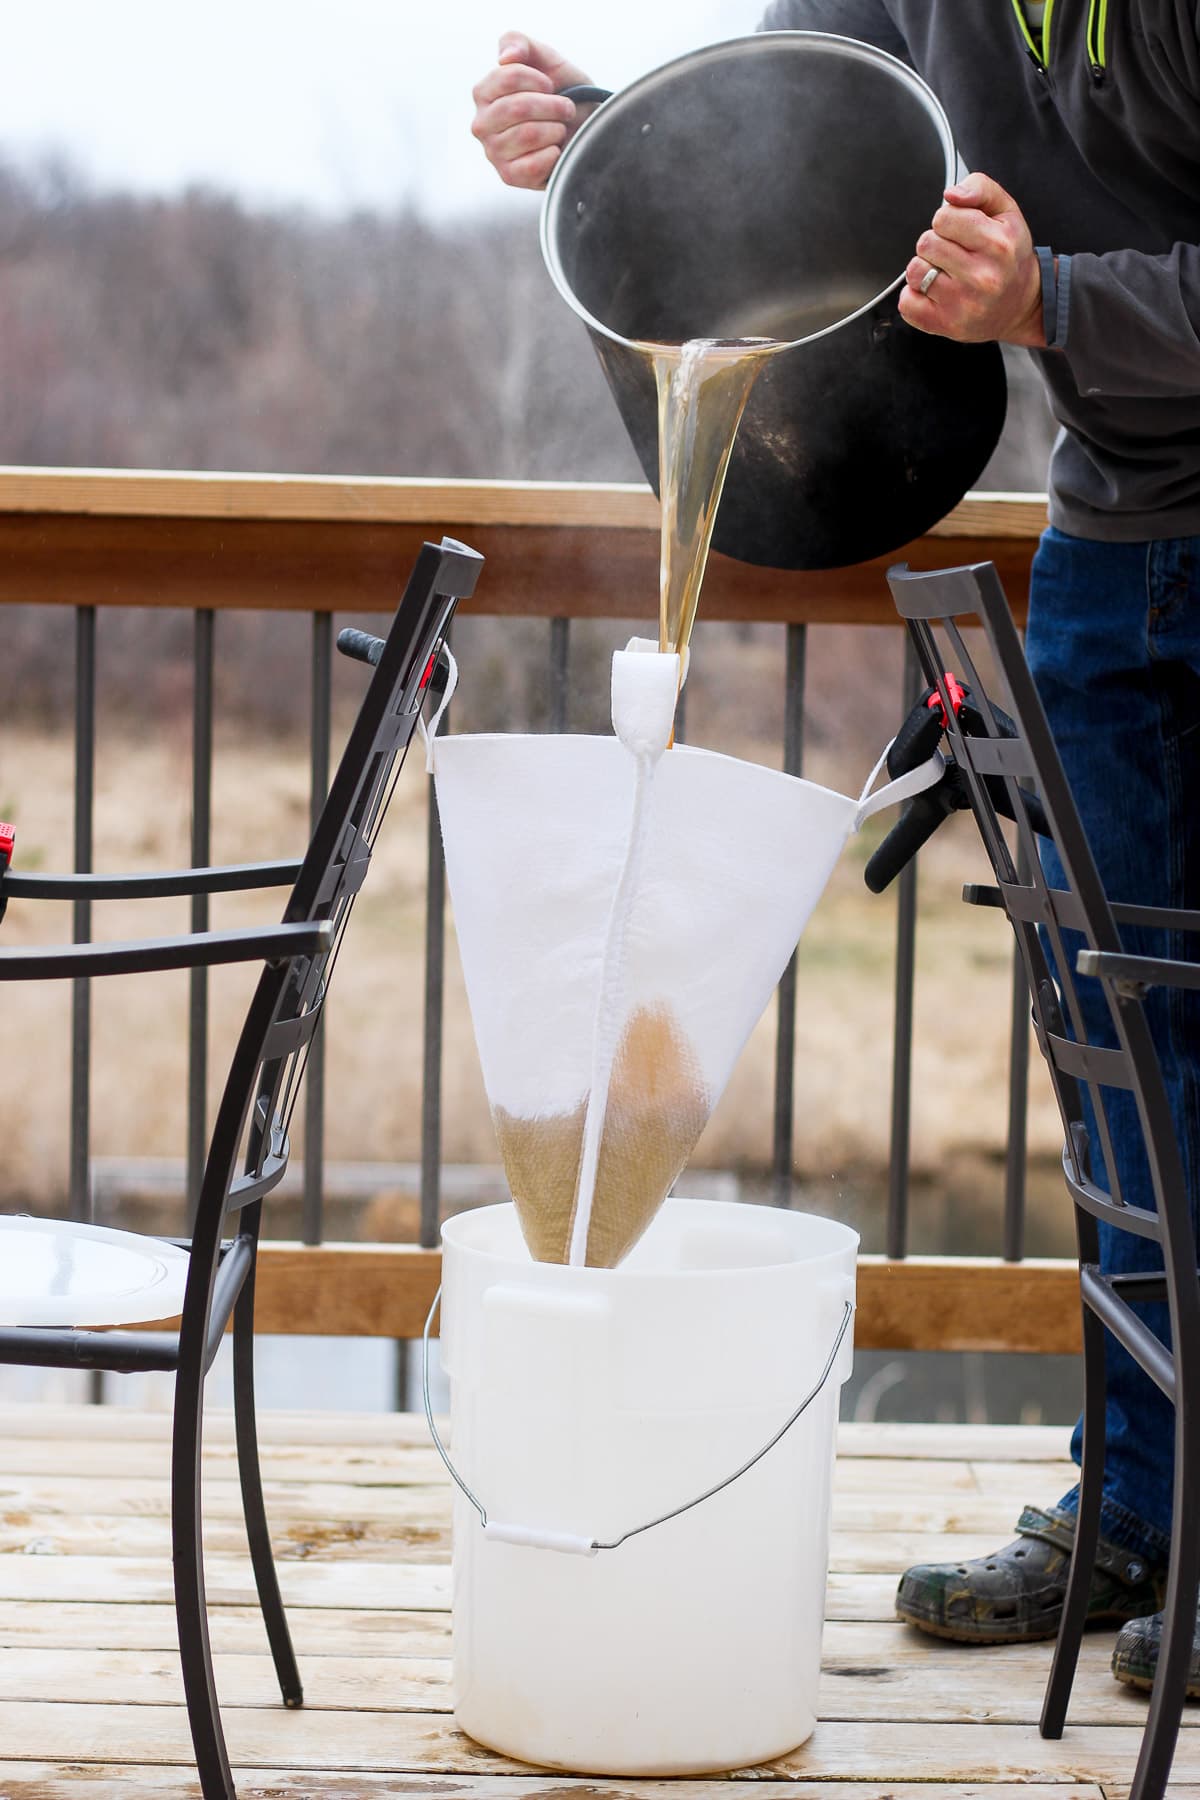
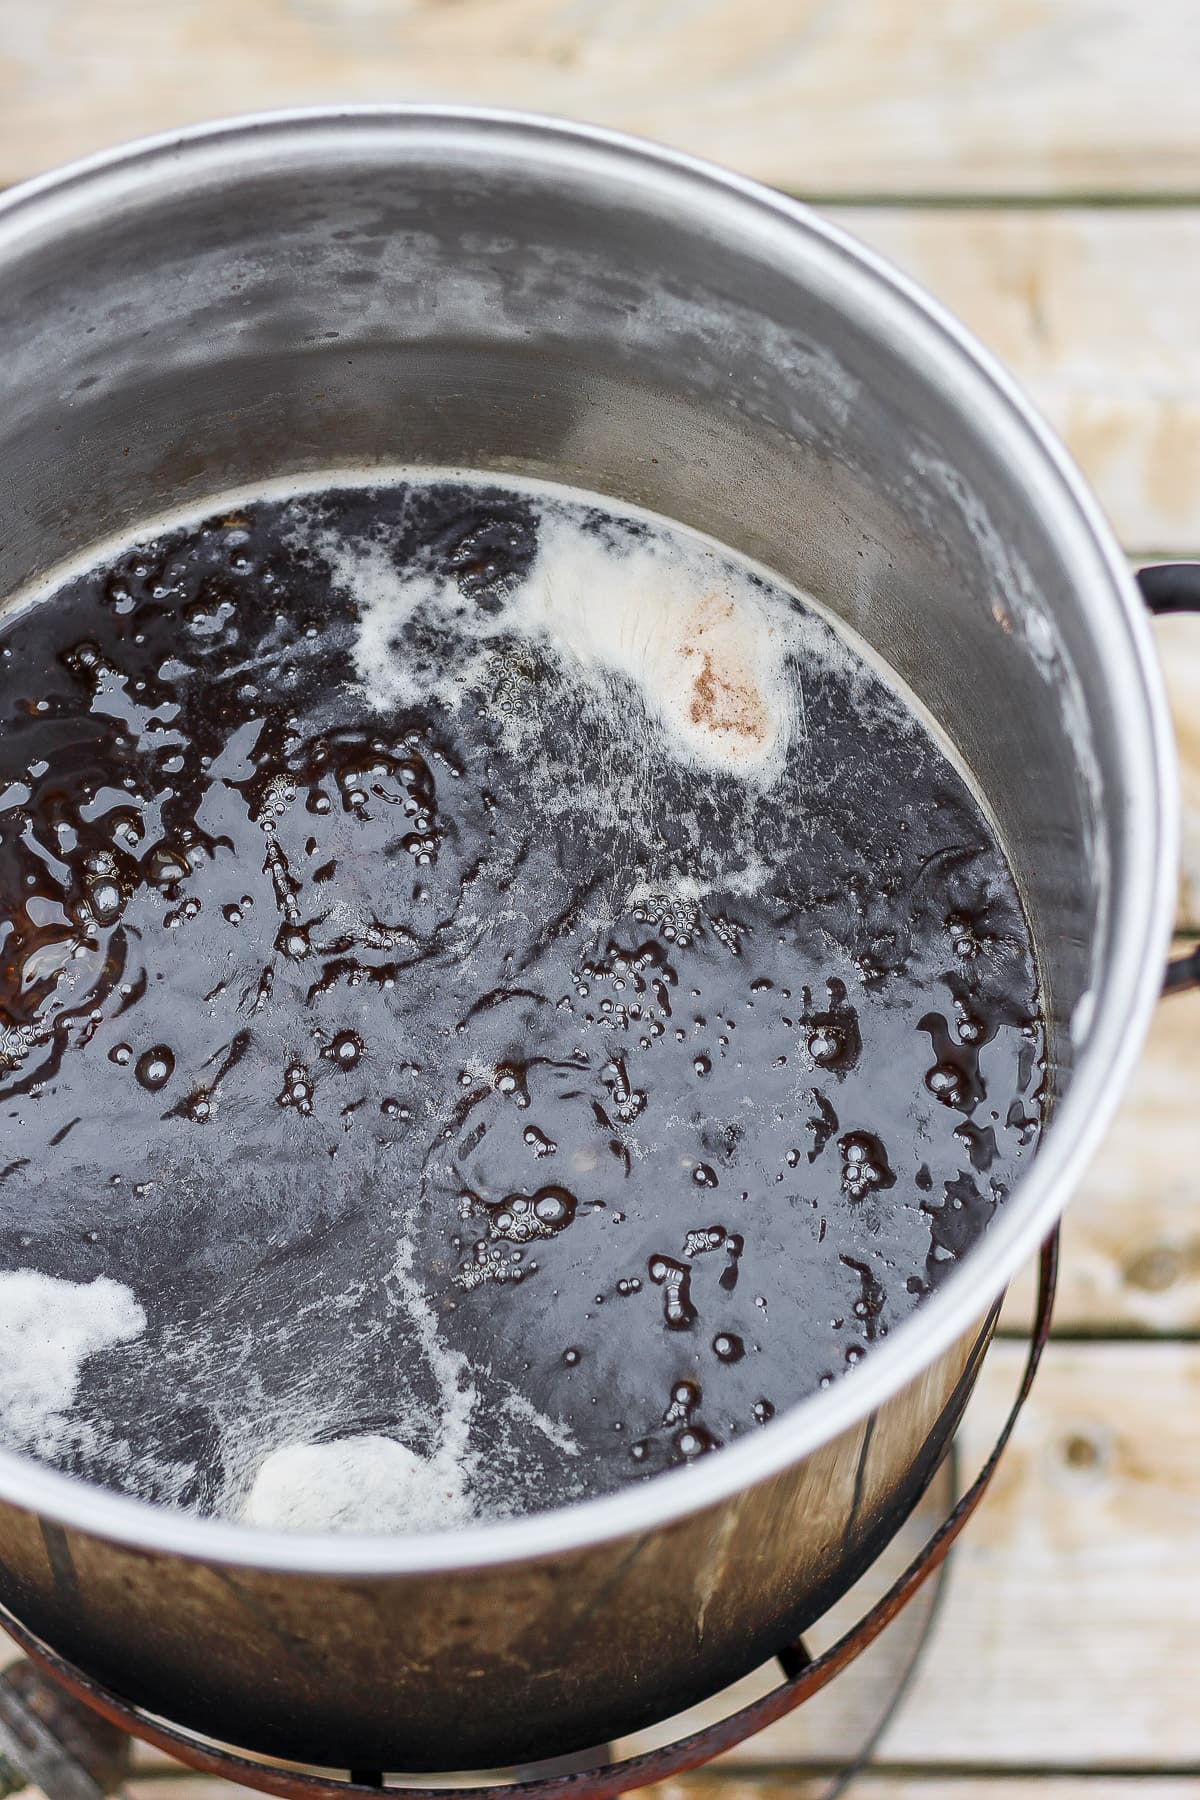
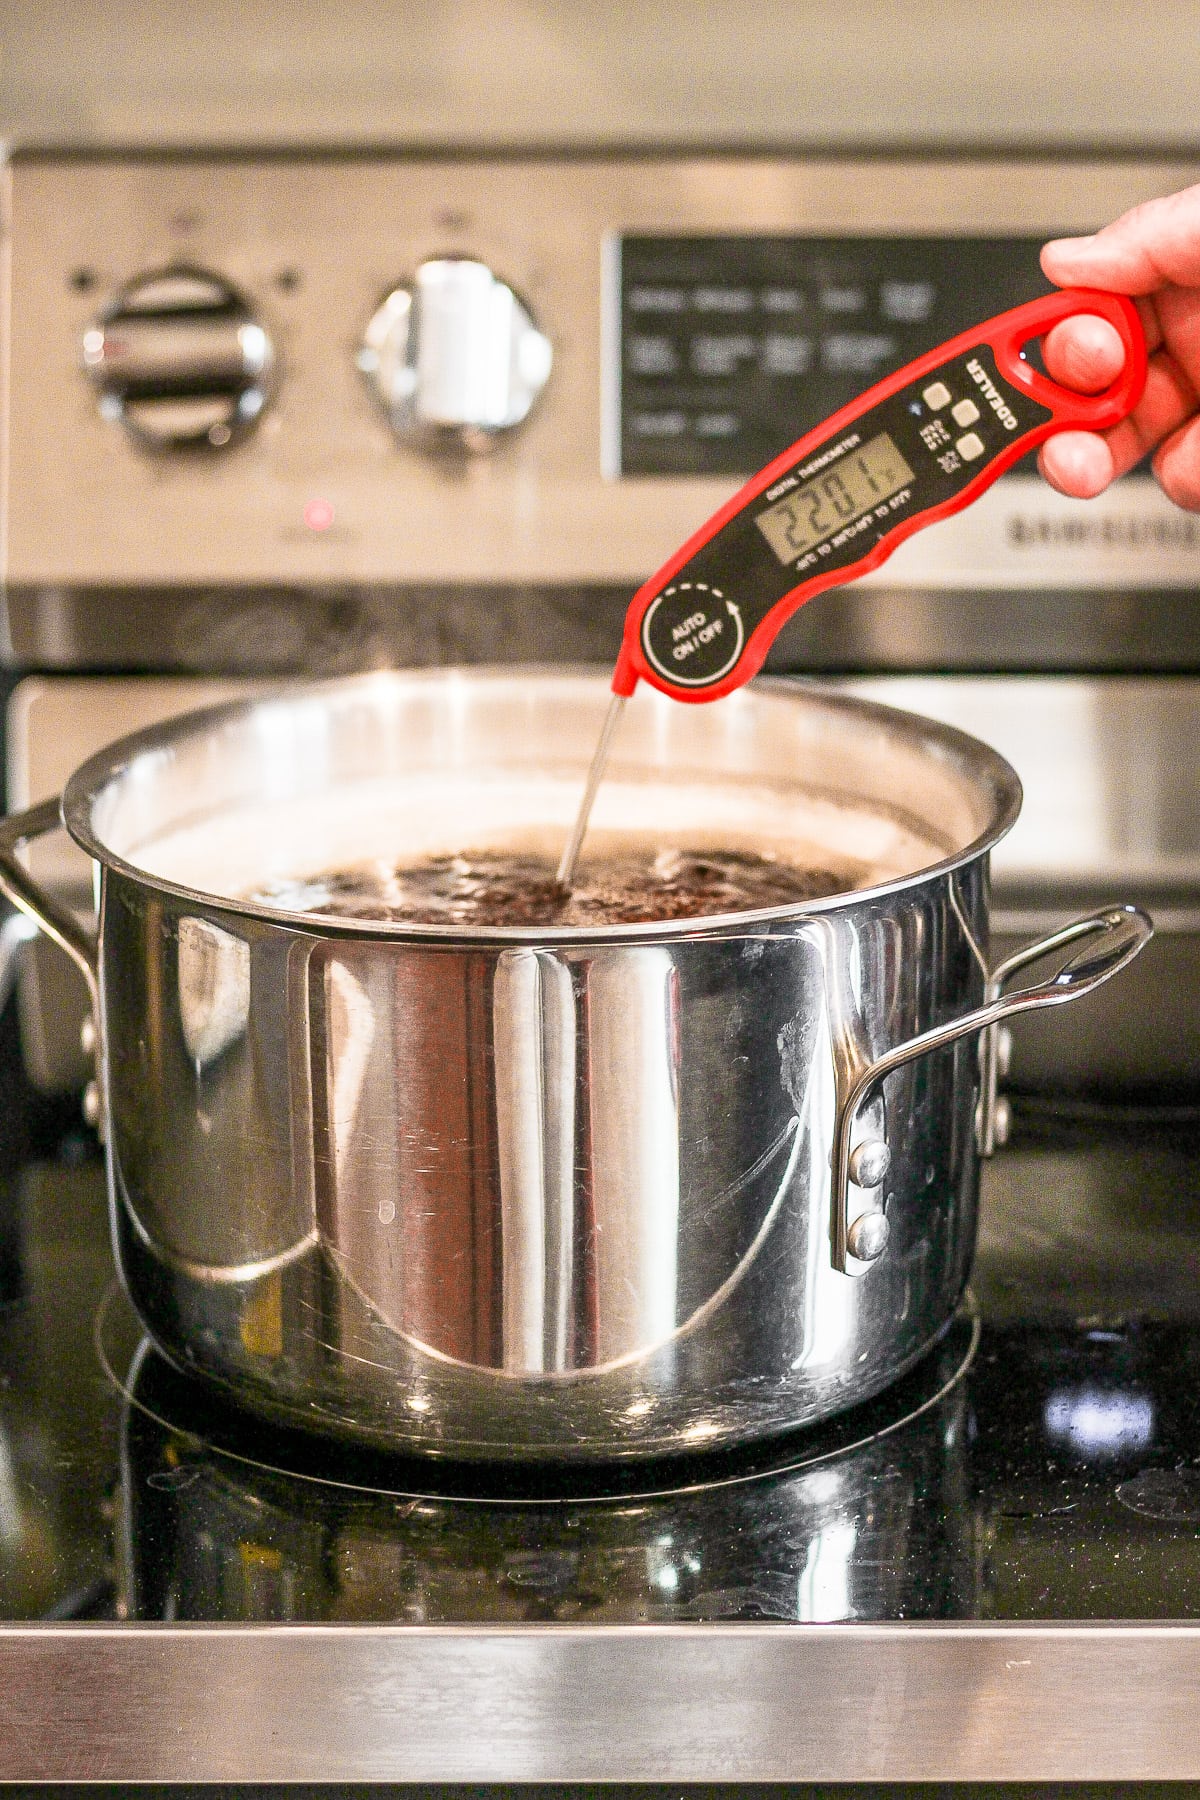
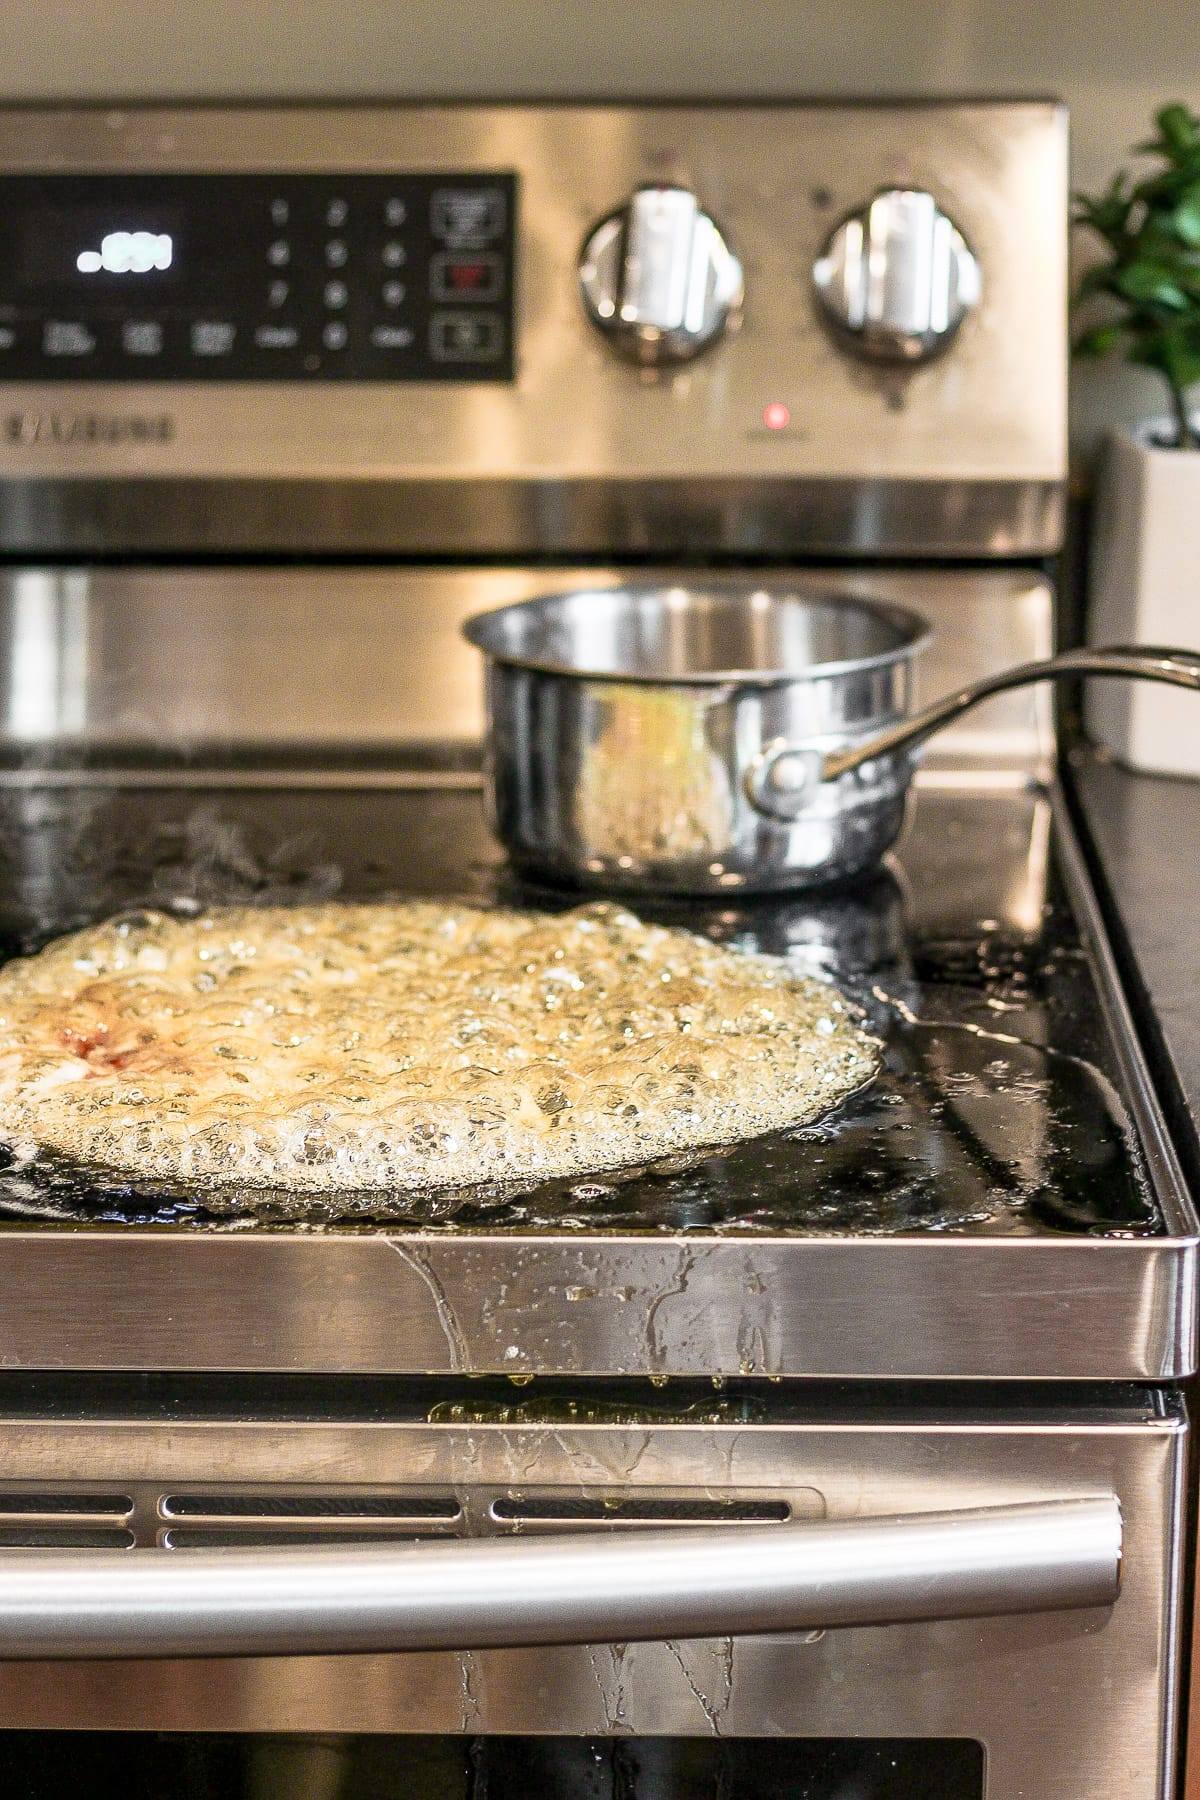
Step Four: Pour into a saucepan on the stove. You are still at risk of boiling over even though you moved inside, but the benefit of putting it on the stove is that you have more more control of the temperature and you can more easily keep it at a slow simmer. If it boils over, it happens REAL quick. This advice probably won’t make sense to you …. until it happens to you 🙂 Because it sucks! Bring the pot back up to a simmer and watch it closely until it hits 220 degrees Fahrenheit.
By the way, this is what it looks like when you boil over (it seriously happens so fast – look away for one minute!).
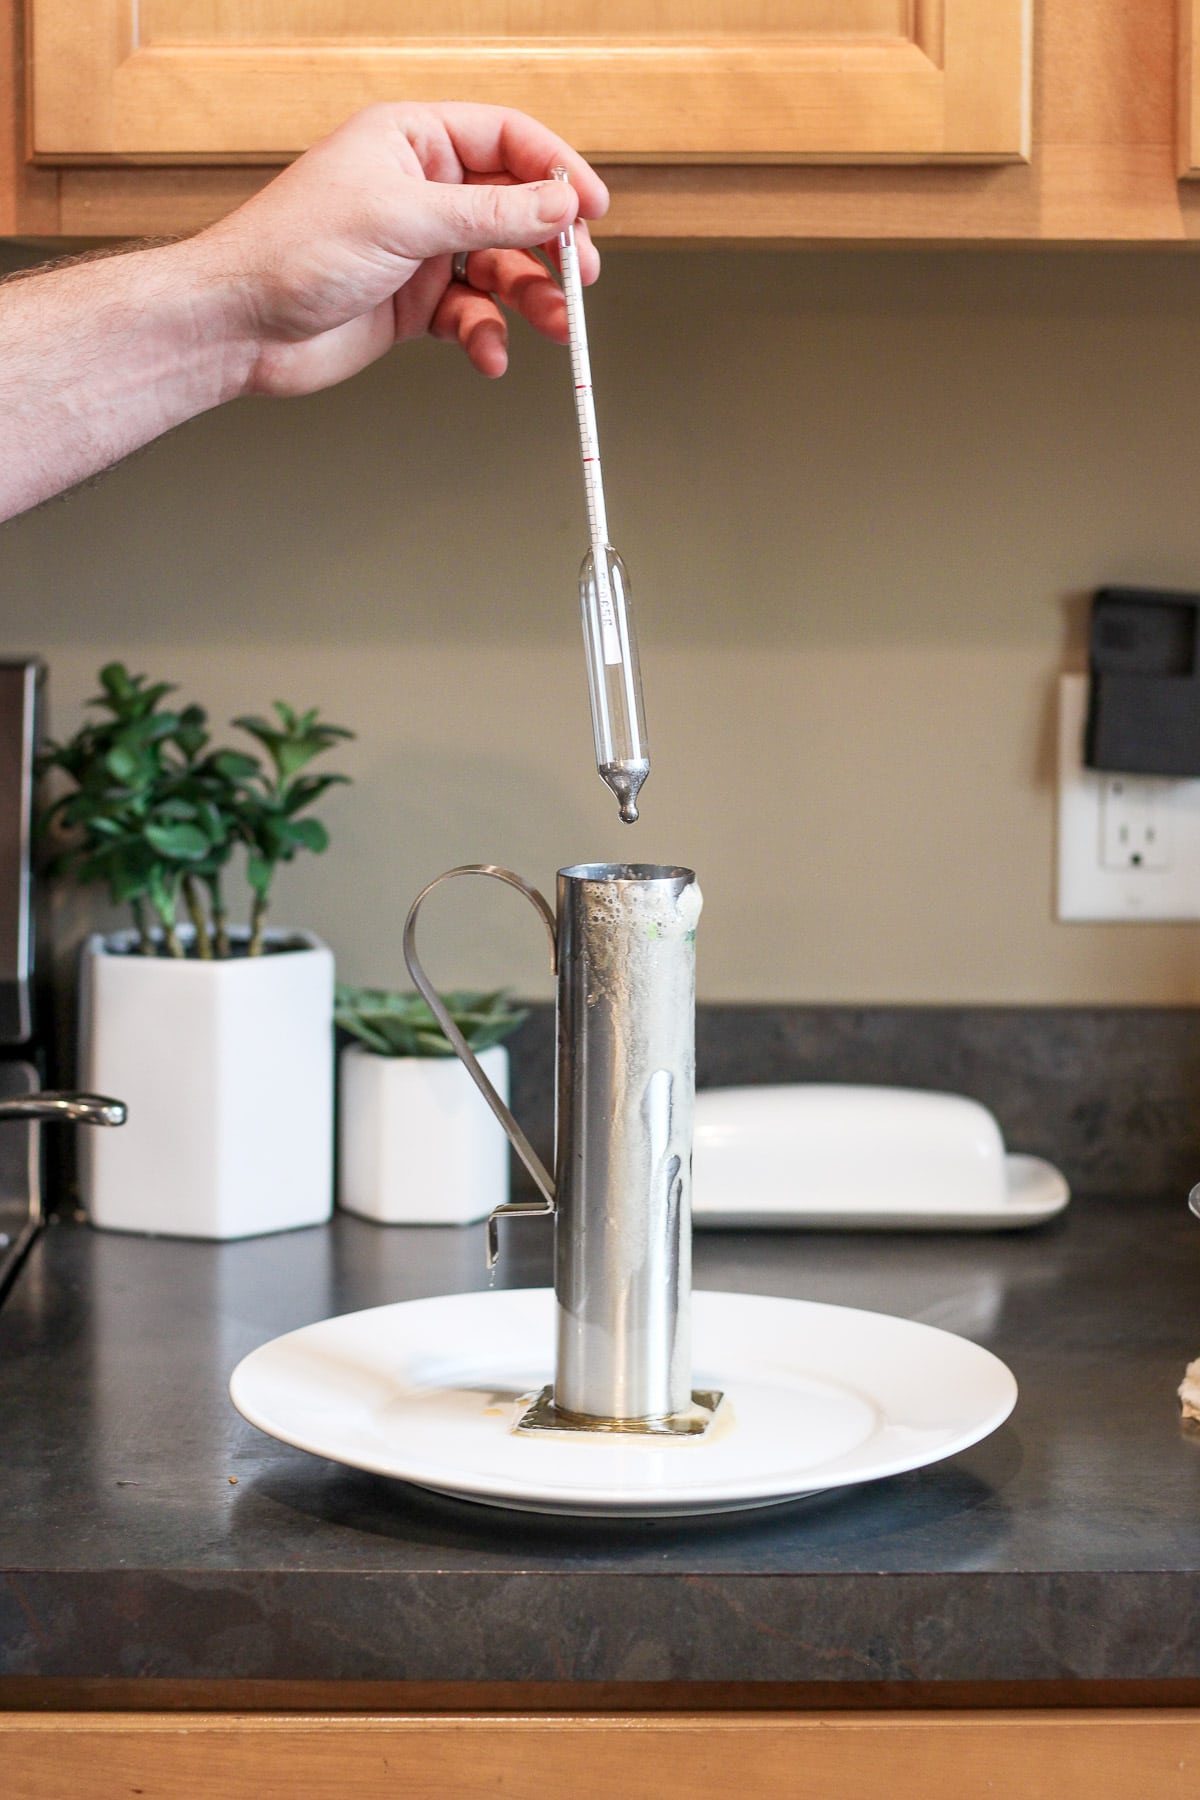
Step Five: Turn down the heat so you don’t risk boiling over and, if you are using a hydrometer, now would be the time to test the sugar content.
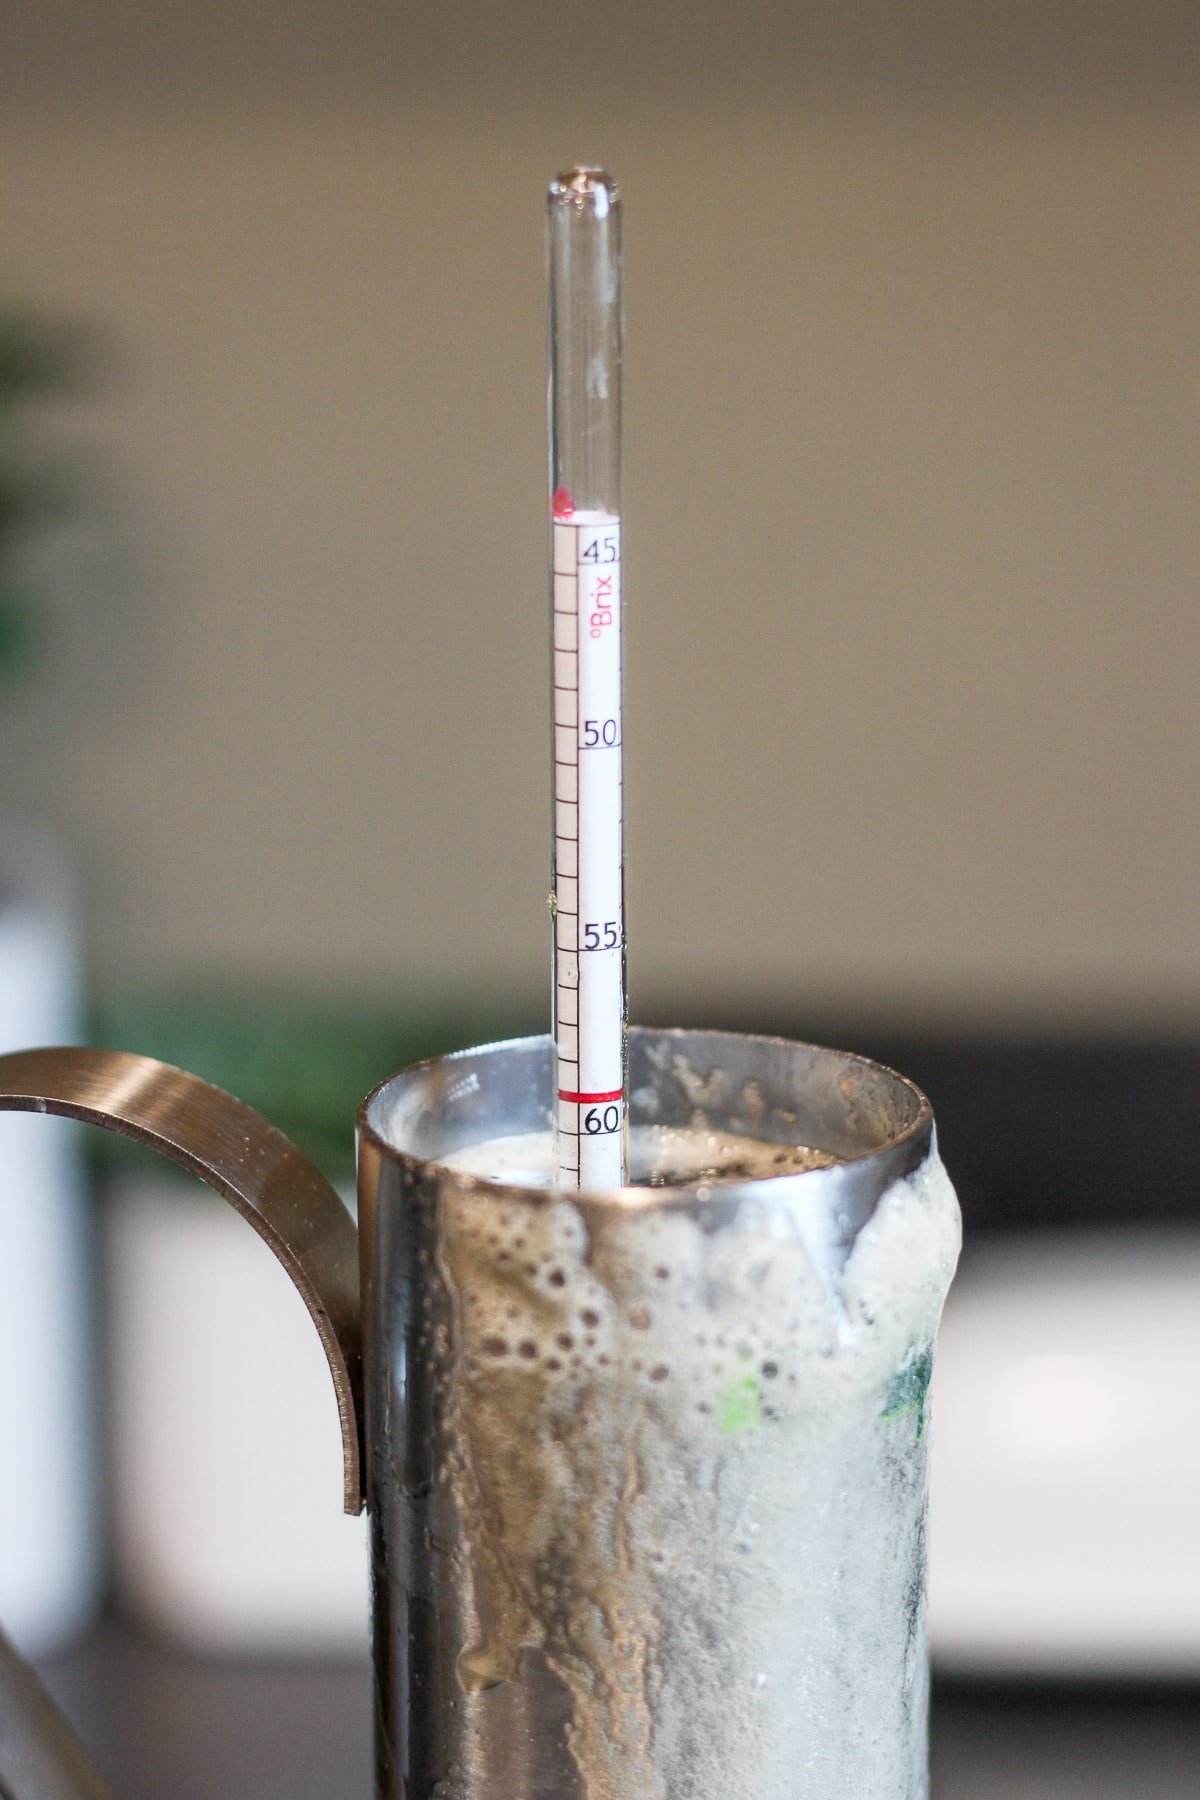
To use the hydrometer put a sample of your maple syrup (careful it is hot!) in the container then place the hydrometer into it (go slow, hydrometers are very fragile). We measure the syrup density in Brix and you are looking for a reading around 62 Brix to ensure you have the correct sugar content level. If reading is higher than 62 Brix then add in a little more sap. If the reading is too low, keep boiling.
If you don’t have a hydrometer … it’s okay. Ultimately if you are just making syrup for you and your family – it is really up to you as to whether the maple syrup is at the “correct” sugar content. You can simply eye-ball it and once you feel the syrup has reached a level you are happy with – go with that! We have made syrup for years without a hydrometer and were just fine. People who sell maple syrup have to be a little more exact with reaching that perfect level.
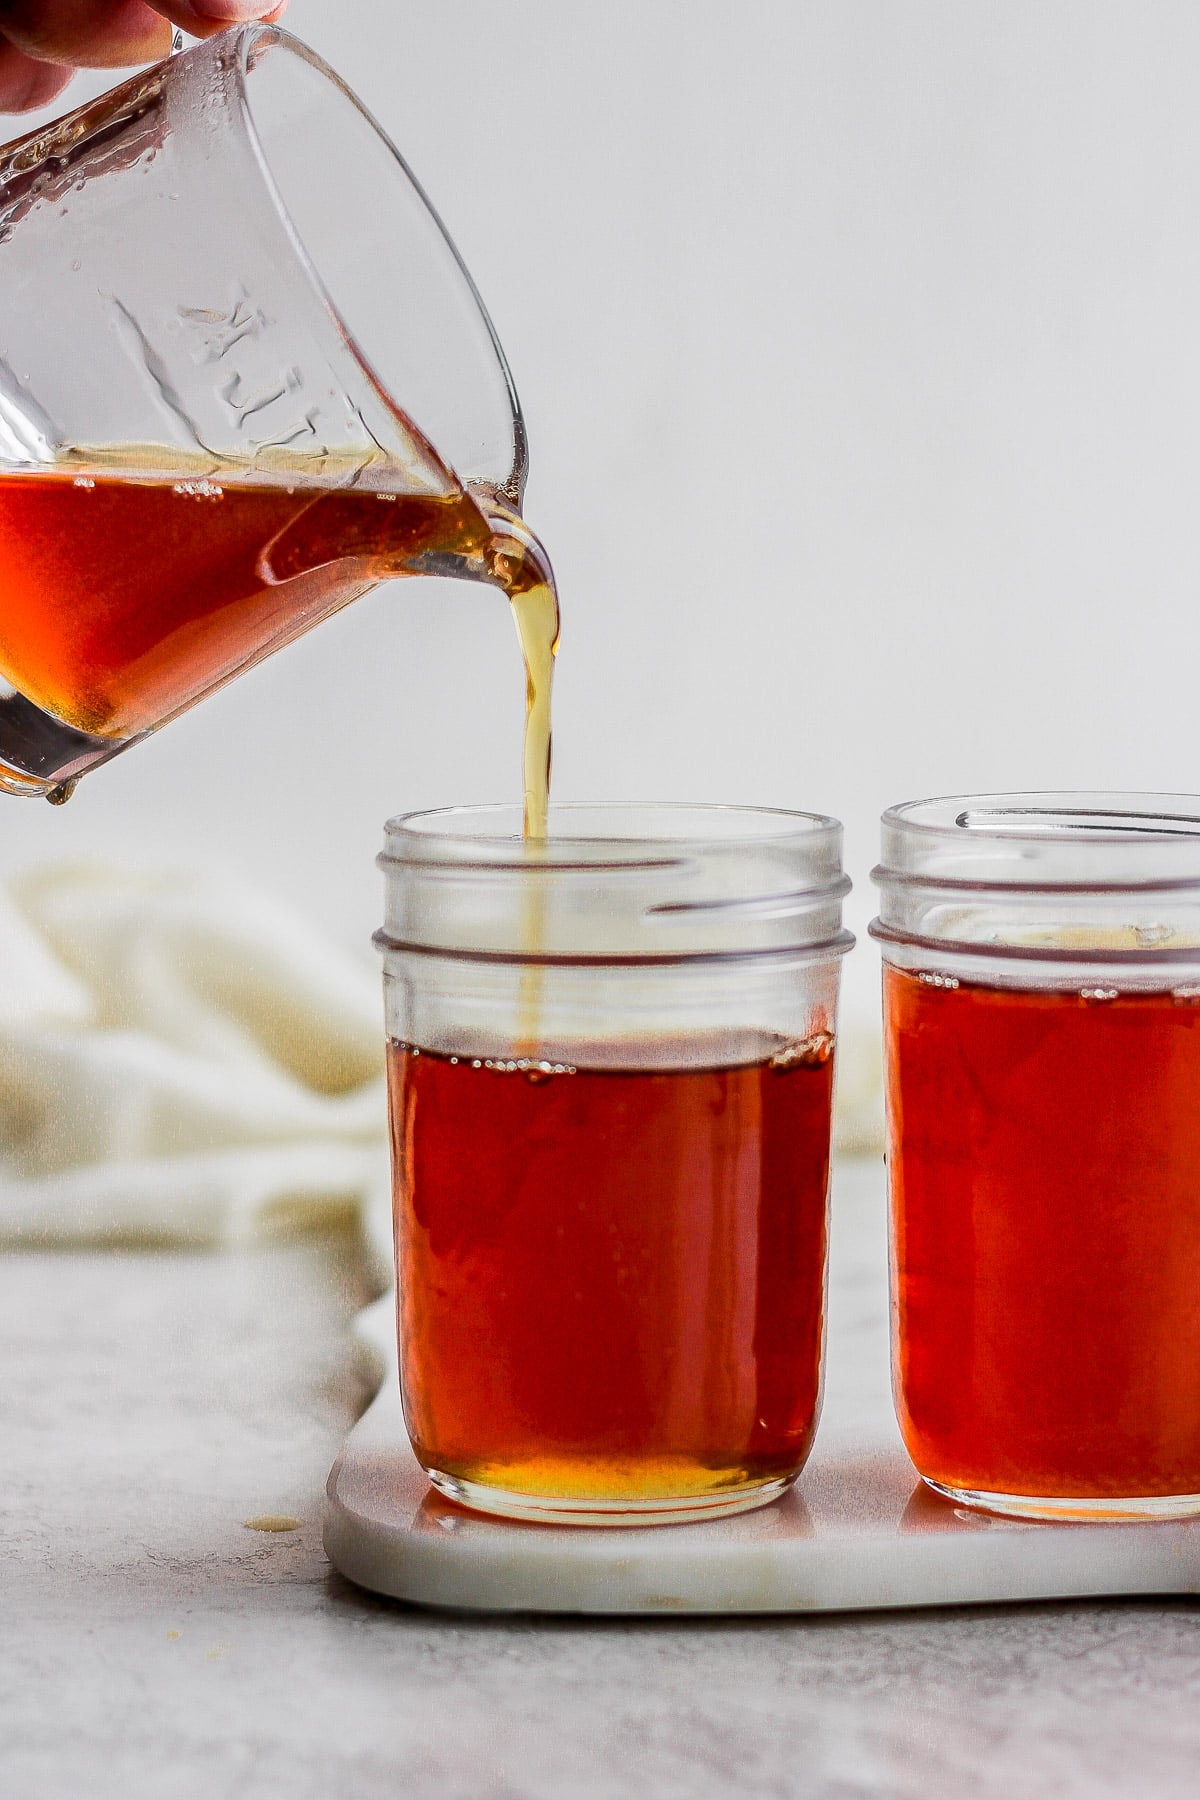
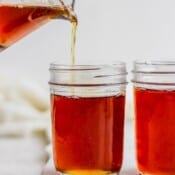
Step Six: Let it cool and then pour it into some sterilized mason jars. You can sanitize glass bottles by placing them in boiling water for 30 minutes or you can run them through the Sanitize cycle in your dishwasher.
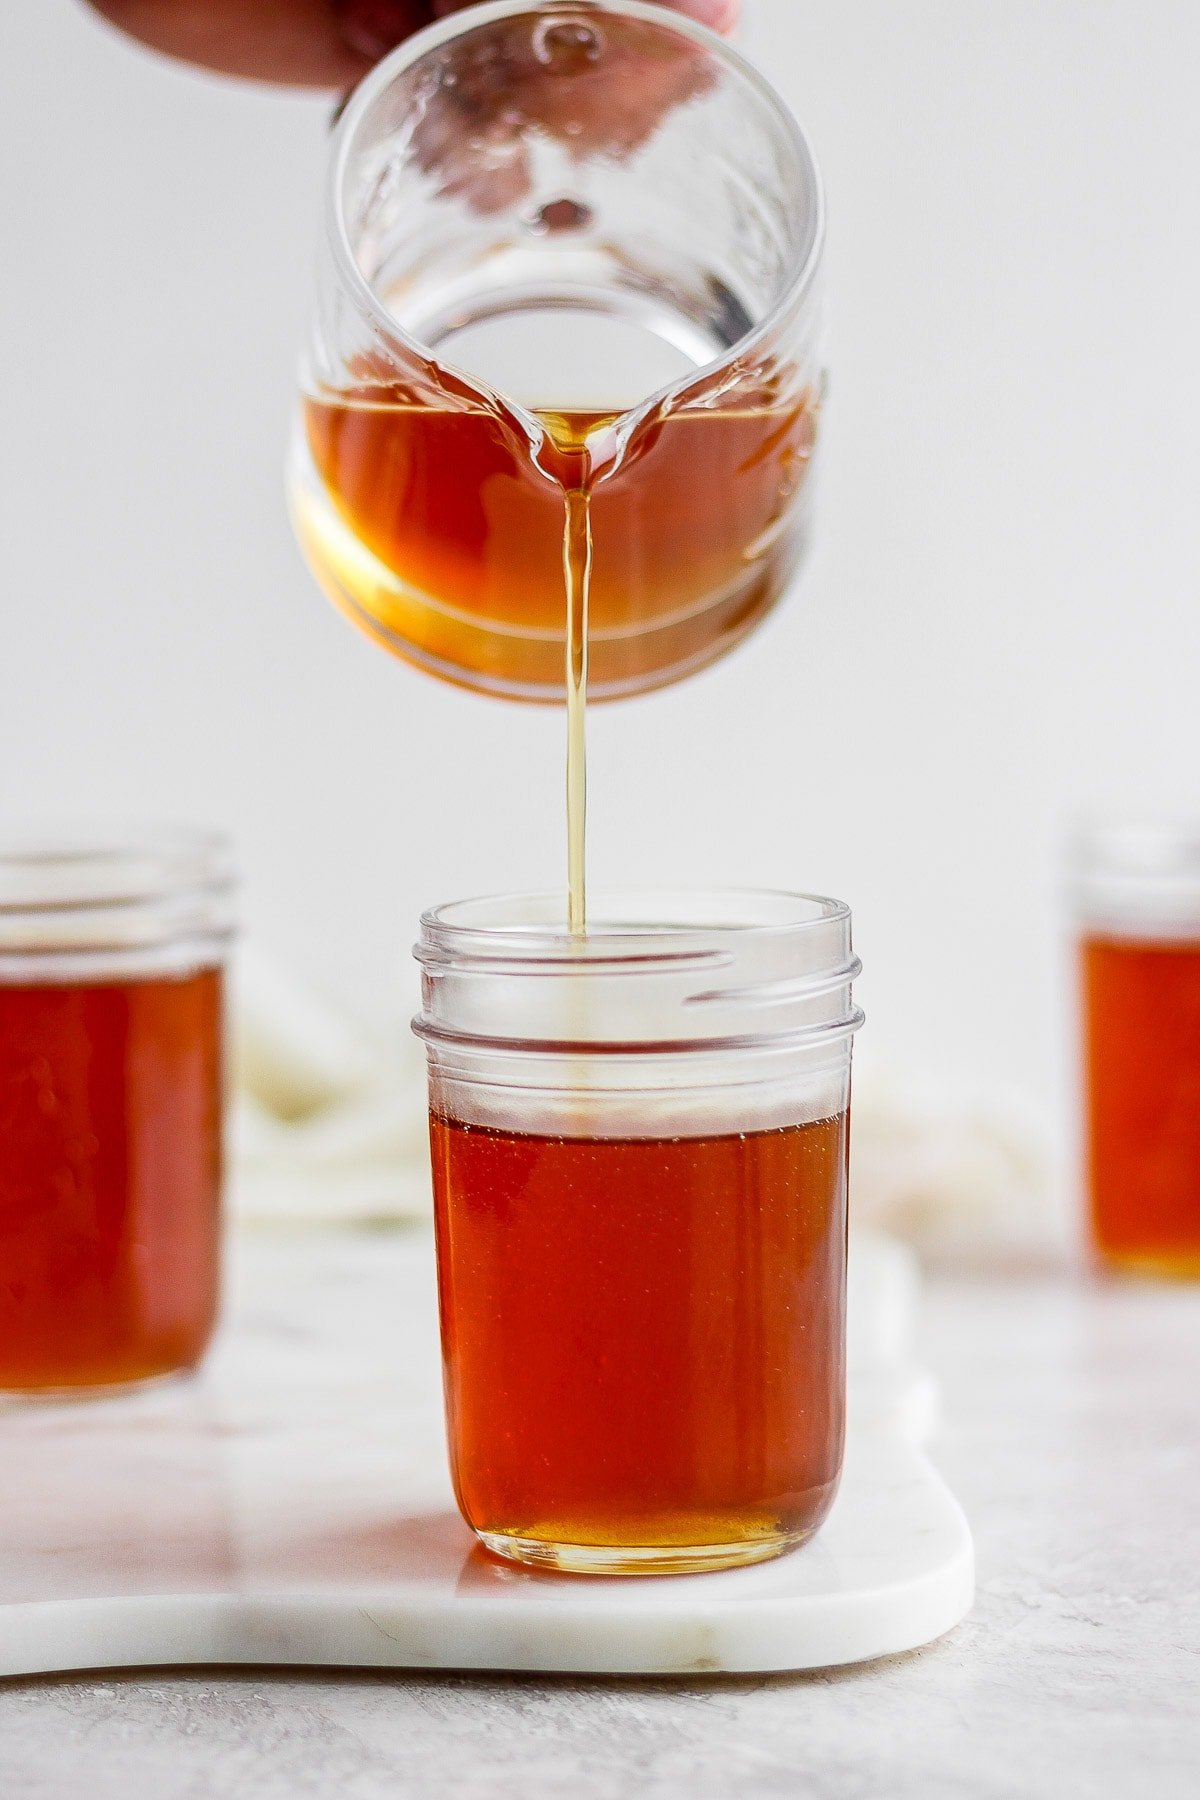
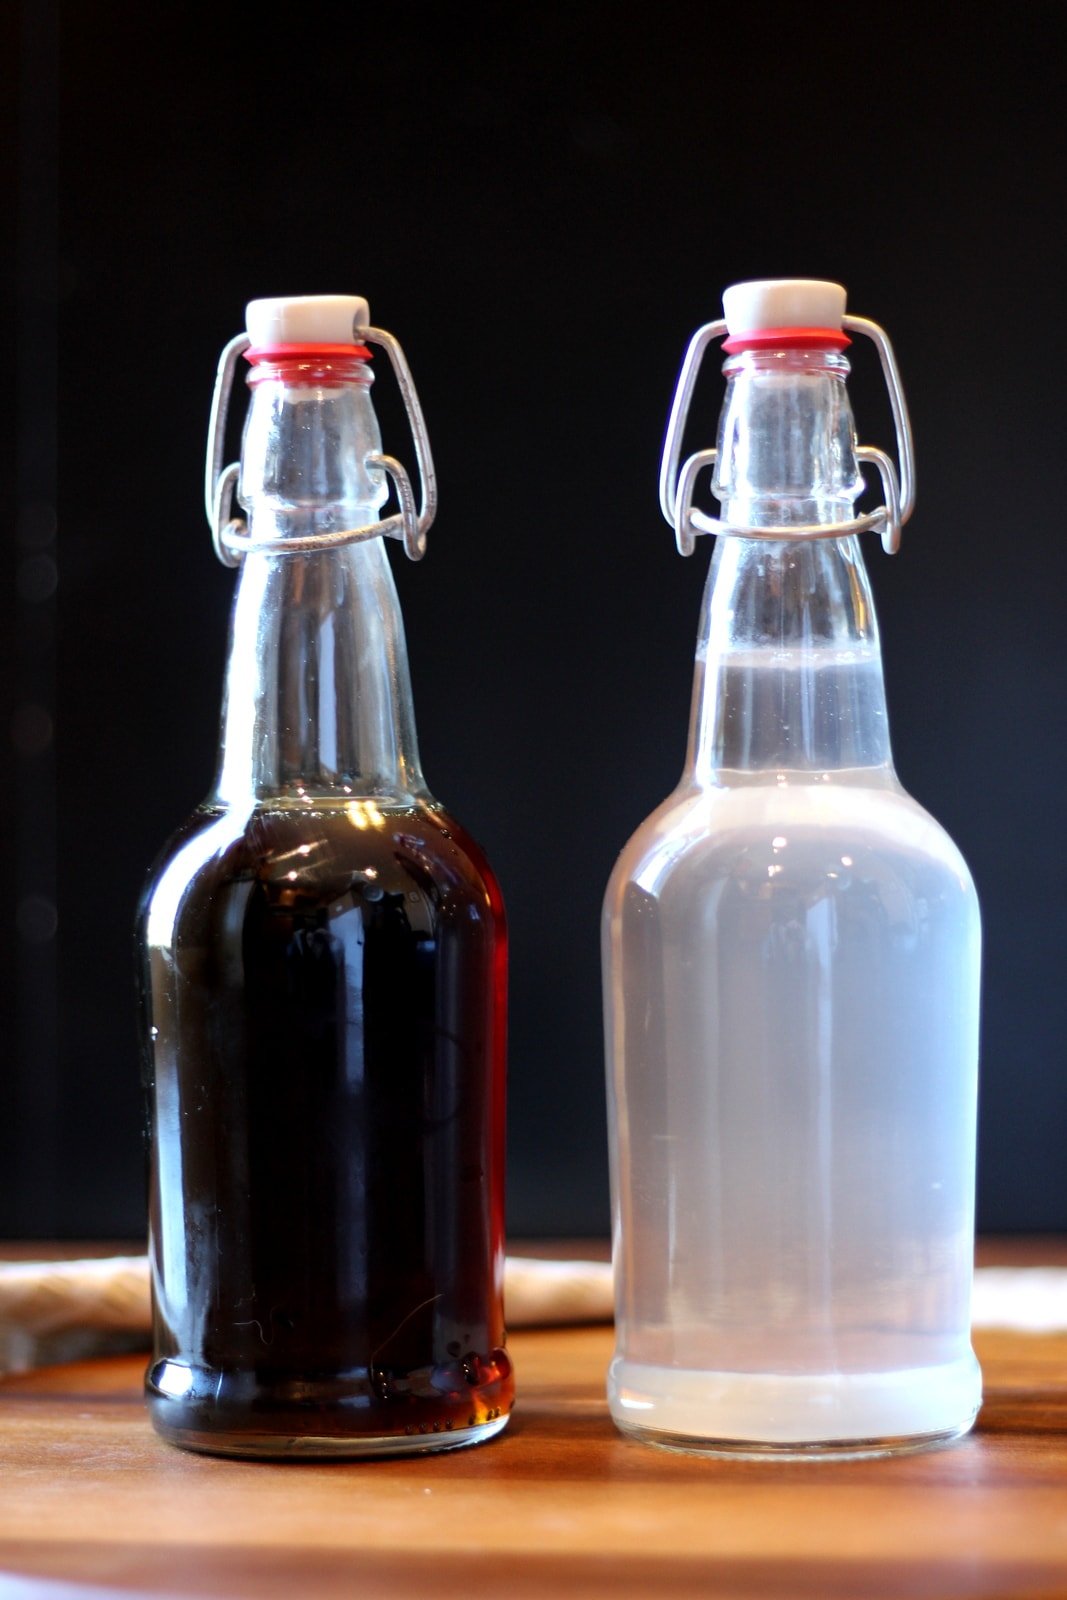
Maple Syrup vs. Sap
Clear bottle is sap and darker bottle is (obviously) the finished syrup – pretty cool! (this is a really old picture so please forgive me!)
Are there different grades of maple syrup?
A little bit about Grades of syrup. There has been a recent change to the different Grades – there used to be Fancy, Grade A Medium Amber, Grade A Dark Amber and Grade B. They changed them, in part, because a lot of people thought that Fancy would be better than Grade B, just because of their names – which was misleading.
Now, there is only Grade A, but with varying types within that Grade.
They are:
- Grade A Golden Color with Delicate Taste;
- Grade A Amber with Rich Taste;
- Grade A Dark with Robust Taste;
- Grade A Very Dark with Strong Taste.
What impacts the resulting Grade: it has nothing to do with your boil-down method and really just has to do with how early/late in the season you are and maybe what type of tree you are using.
The picture above of the side-by-side before and after is most likely a Grade A Dark with Robust Taste or even a Grade A Very Dark with Strong Taste. I am by no means a syrup-expert, but it is my understanding that while you can get varying Grades at any point in the season, you would most likely get Grade A Golden Color with Delicate Taste at the beginning of the season and Grade A Very Dark with Strong Taste as the end of the season.
No one type of syrup is superior to the other – it all depends on your own preferences and tastes. I happen to really like the robust flavor of the syrup above and probably prefer it to the delicate grade.
Other Recipes You Might Like
Made this recipe and loved it?! We would love it if you would take a minute and leave a star rating and review – it is also helpful if you made any substitutions or changes to the recipe to share that as well. THANK YOU!
Make sure to check out my Instagram account for some behind-the-scenes action or give me a follow on Facebook or see what I am pinning on Pinterest
Ingredients
- 5 gallons sap
Instructions
- Simmer in Fryer: Add 5 gallons sap to a turkey fryer. Cover and bring to a boil. Once boiling, remove cover and continue to simmer uncovered until the temperature reaches 218-219℉.
- Simmer on Stove Top: Pour reduced sap into a large saucepan and place on the stove top. Bring back to a simmer, but keep a very careful on eye on the temperature. Ensure it does not boil over. Once the temperature reaches 220℉ remove from heat.
- Hydrometer: If you want to confirm the correct sugar content you can use a hydrometer to test that it is under 61 bricks.
- Filter: Pour the reduced sap through cheesecloth or an Orlon filter into a mason jar.
- Store: Keep the finished syrup in sterilized mason jars.
Notes
- Larger quantities: if you are dealing with more than 5 gallons of sap then simply do this in batches OR you can do your initial boil down in a syrup pan.

Warren Mohar says
no need to let the syrup cool before putting it in jars. pour it in hot, hold the jar with a wet cloth, tighten down the lid. in about 5 minutes you will hear the lid pop and the jar will be sealed just like in canning.
Brad says
Love this. Perfect blog for a family friendly spring event.
Erin says
Thanks, Brad!!! 🙂