

Quick Look at these Easy Key Lime Cheesecake Bars
- Ready In: 2 1/2 hours
- Chill Time: 2 hours
- Serves: 24
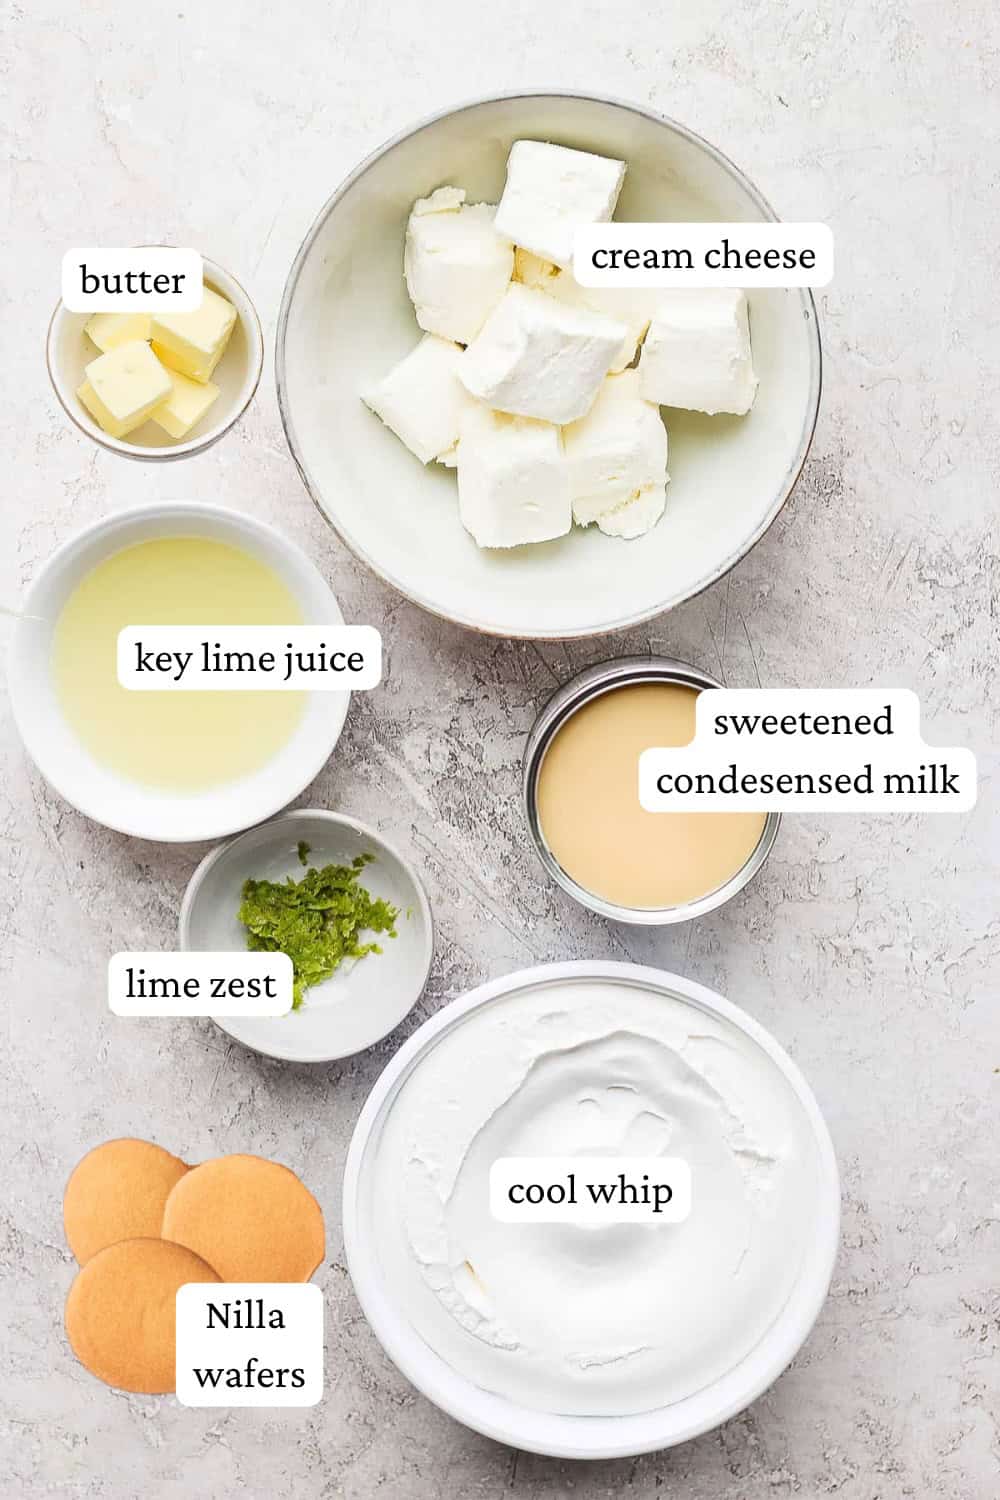
- Main Ingredients: cream cheese, Nilla wafers, butter, condensed milk, lime juice + zest, and Cool Whip!
- Flavor + Texture: light and refreshing flavor, just like a key lime pie, but with the most fluffy texture!
- Dietary Info: vegetarian, dairy-free friendly, gluten-free friendly
- Best For: serving a crowd on hot summer days (like the 4th of July)!
Share and summarize this recipe:
Why You’ll Love These Refreshing Dessert Bars

- Tastes just like key lime pie, but so much easier to make!
- Light + Refreshing flavor – thanks to the key limes.
- So simple – only 7 real, simple ingredients.
- The most light & fluffy texture!
- Perfect for entertaining – serve up this dessert to help cool everyone on hot summer days.
Key Ingredients + Substitutions
Be sure to see the recipe card below for a full listing of ingredients, instructions, and estimated nutritional information.
- Nilla Wafers – option to swap these out for graham crackers or gluten-free graham crackers, if needed.
- Sweetened Condensed Milk – sub sweetened condensed coconut milk, if desired.
- Cool Whip – adds the most light and fluffy texture to the filling!
- Key Lime Juice + Zest – highly recommend looking for both at your local grocery store, but regular lime juice and zest can be used if you can’t find key limes.
Key Limes vs. Traditional Limes
They most typical lime varieties at the grocery store are called Persian Limes and Key Limes. Persian limes are larger and have an oval shape, while key limes are rounder and smaller. Persian limes tend to be more tart, while key limes are a tad sweeter. Some grocery stores sell bottled key lime juice, but regular lime juice will work too.
How To Make Key Lime Cheesecake Bars
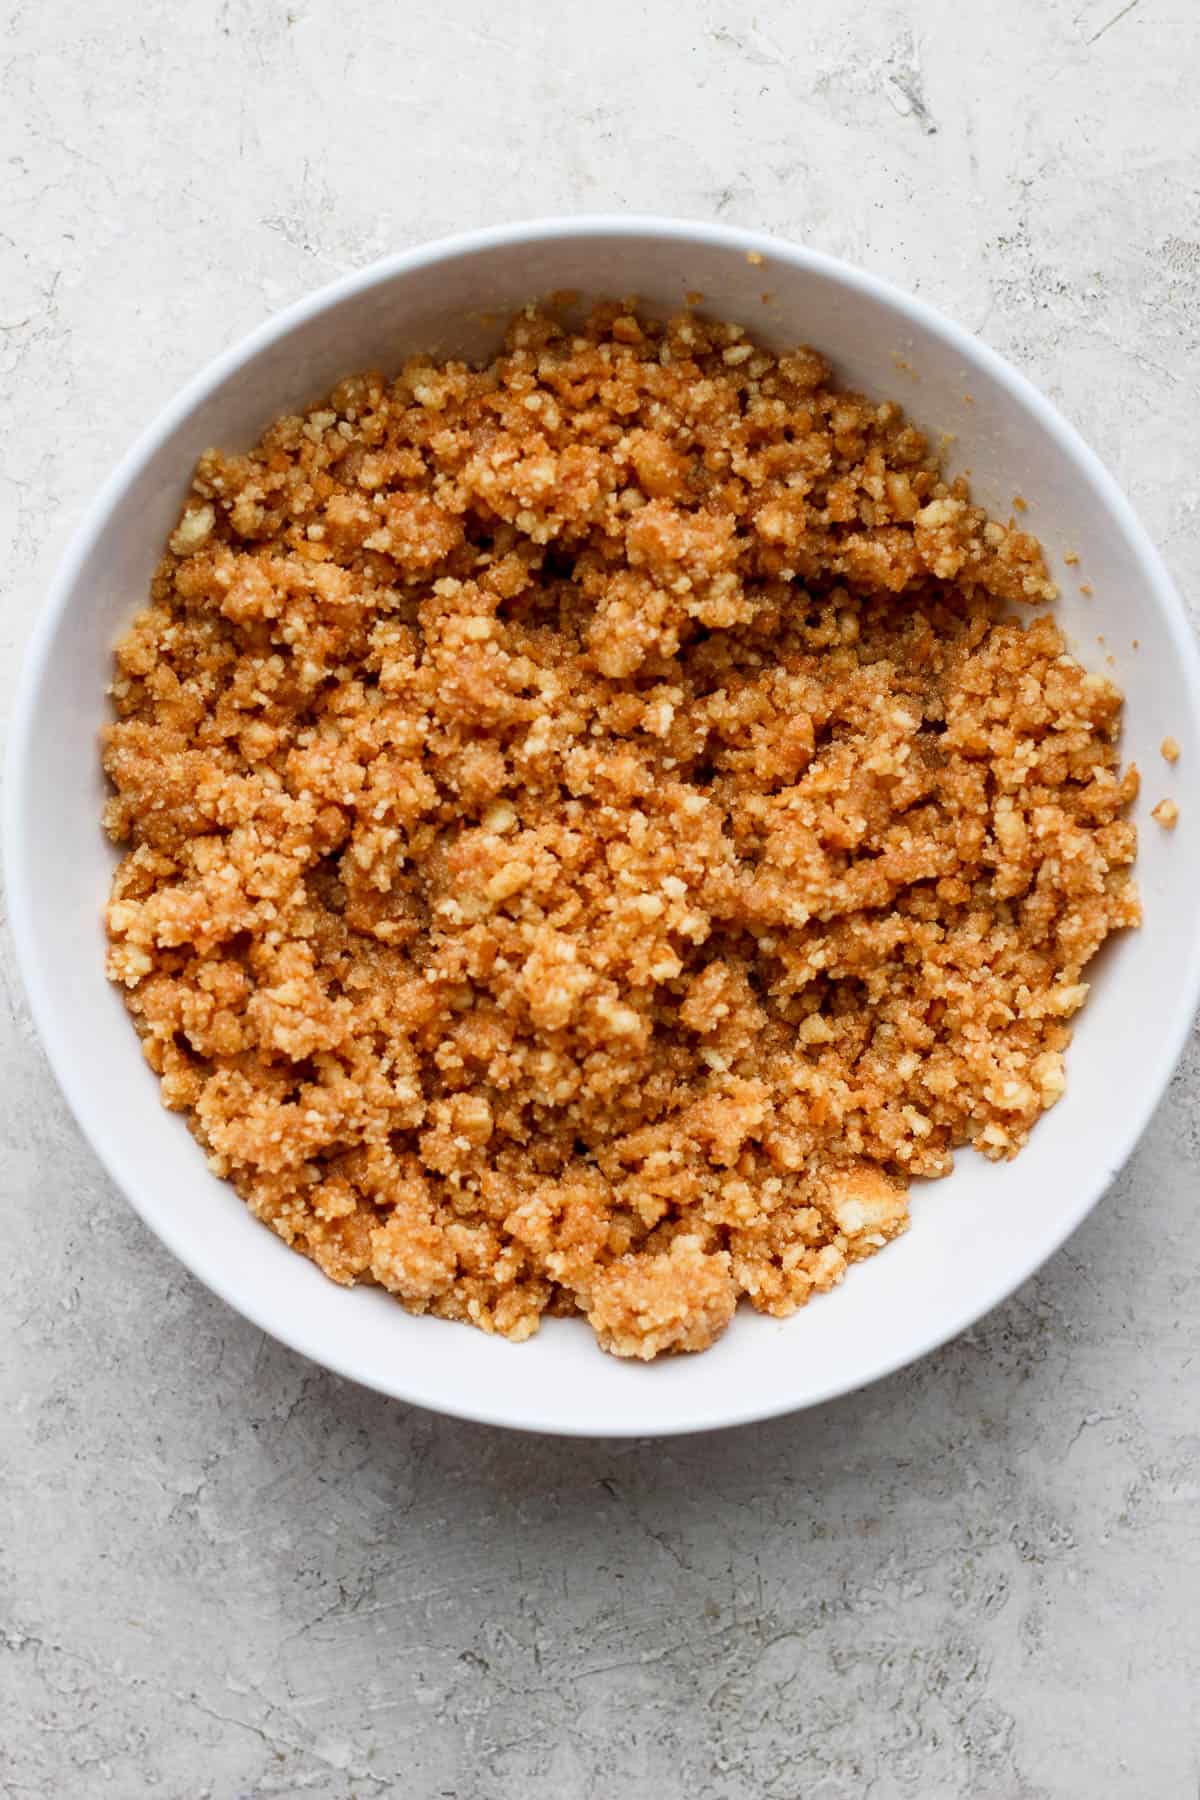
Step 1 – Mix crushed Nilla wafers with melted butter.

Step 2 – Press this mixture firmly into a 9×13 pan and bake.
Pro Tip
Make sure that you use enough parchment paper to fold over the baking sheet sides for easy bar removal once they’ve been baked and cooled.
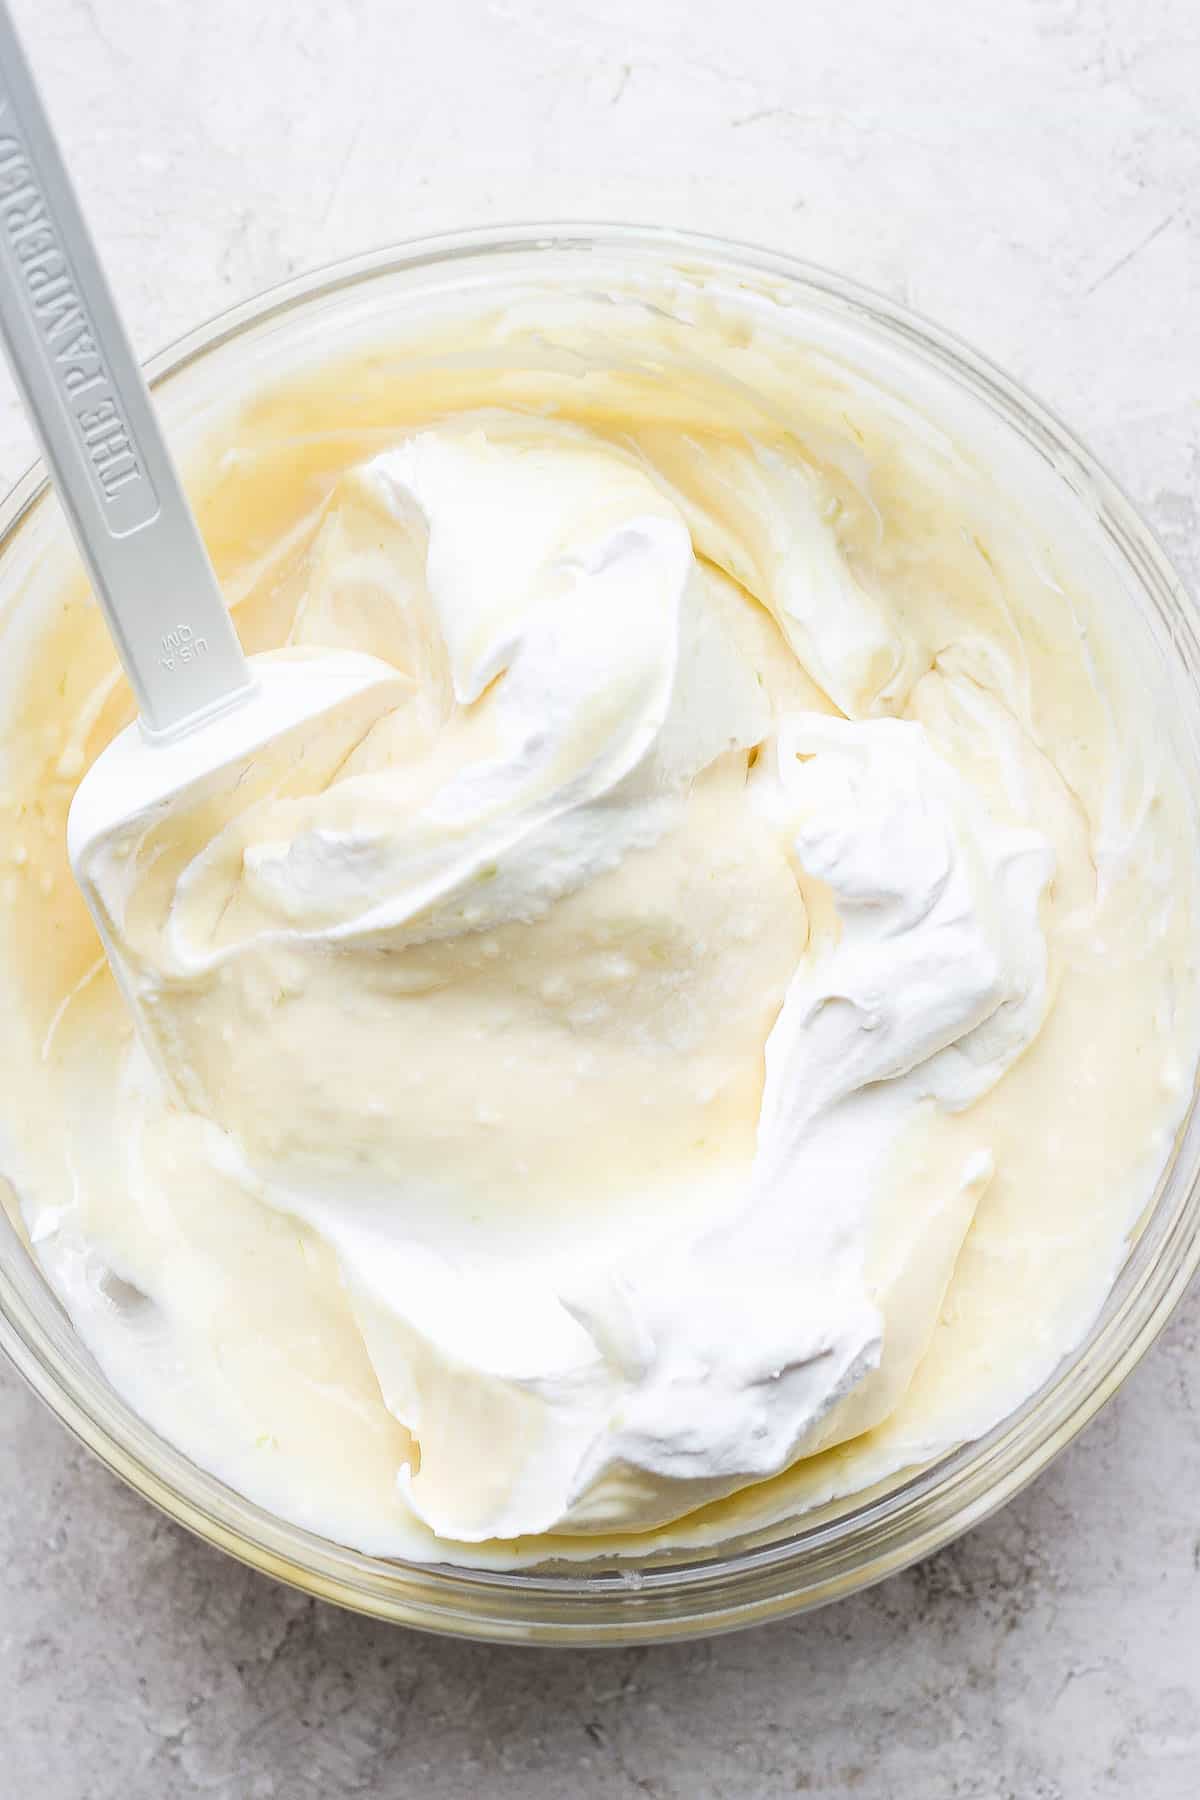
Step 3 – Whisk together the filling ingredients and then gently fold in the Cool Whip.
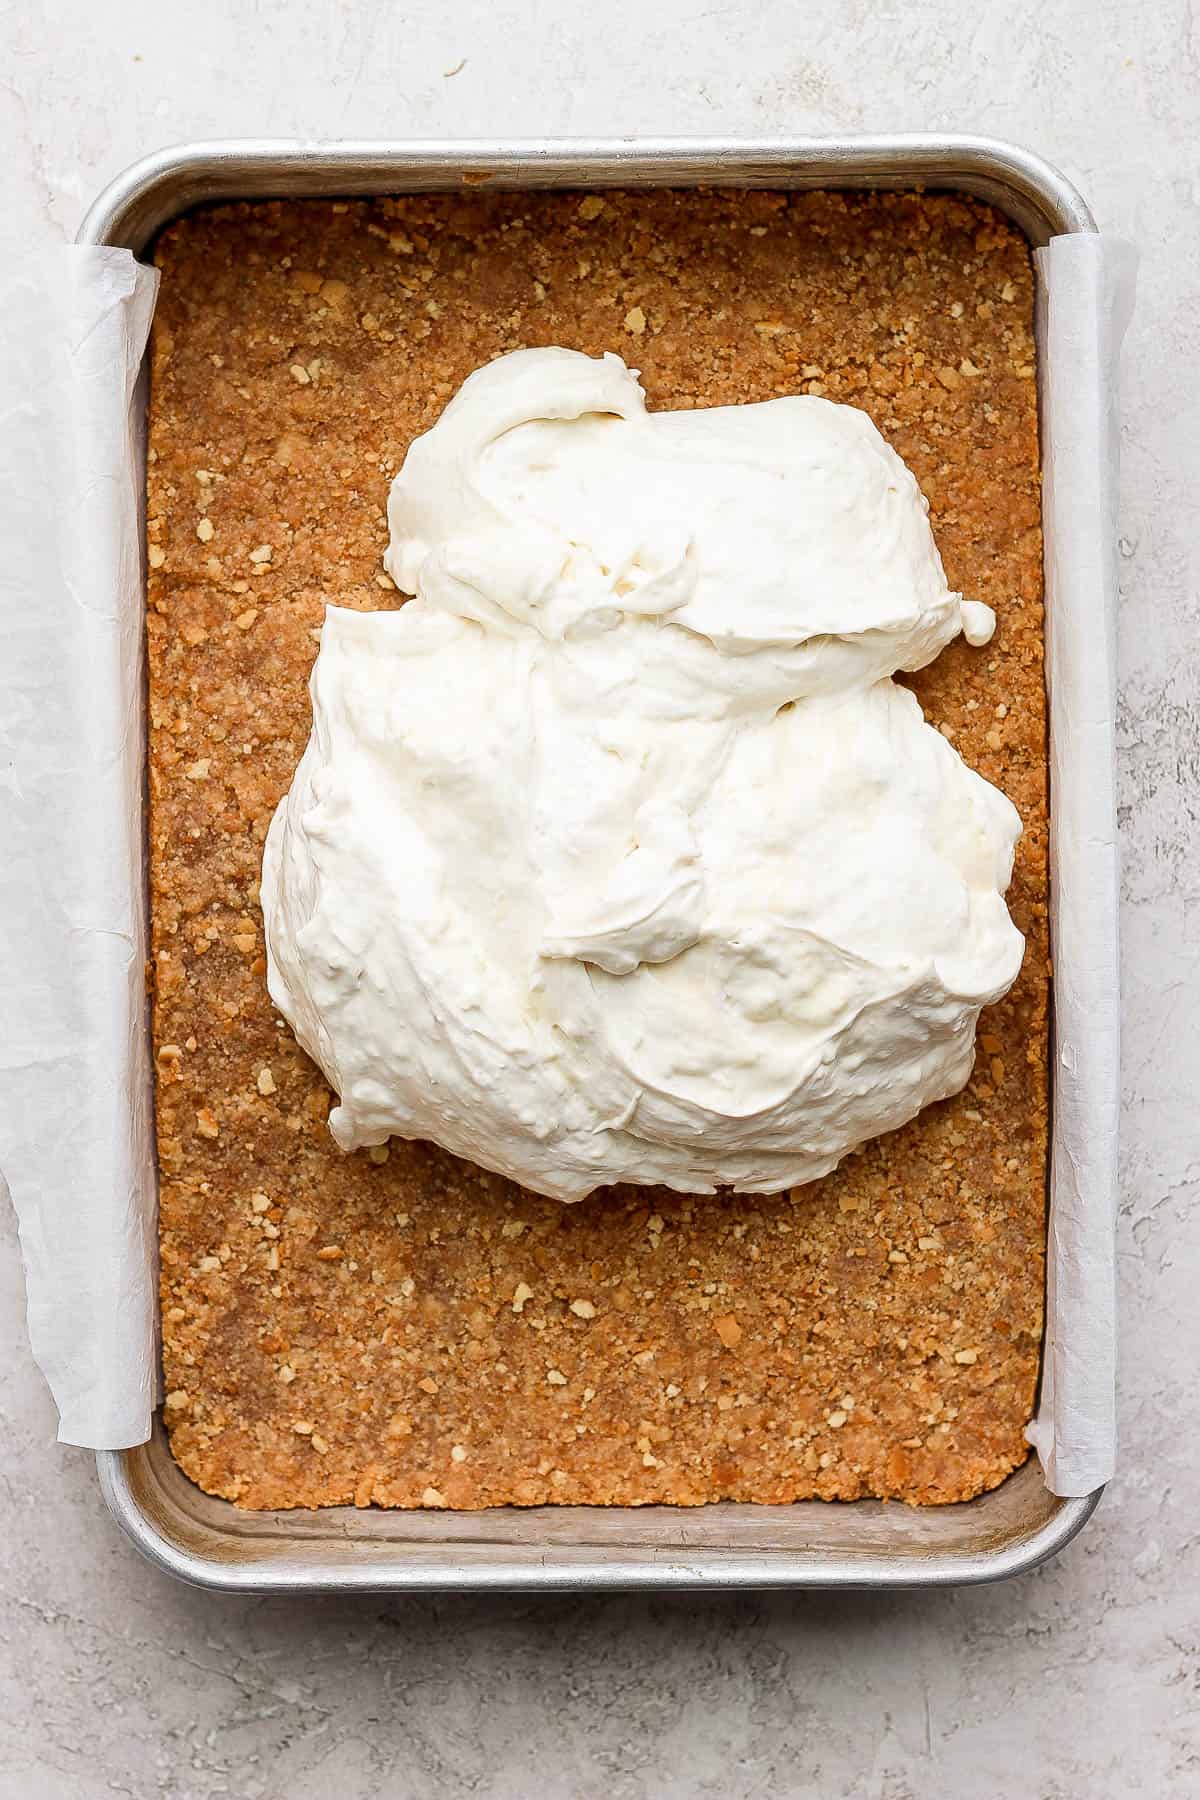
Step 4 – Pour this mixture on top of the crust.

Step 5 – Spread in an even layer and chill in the fridge for at least 2 hours.
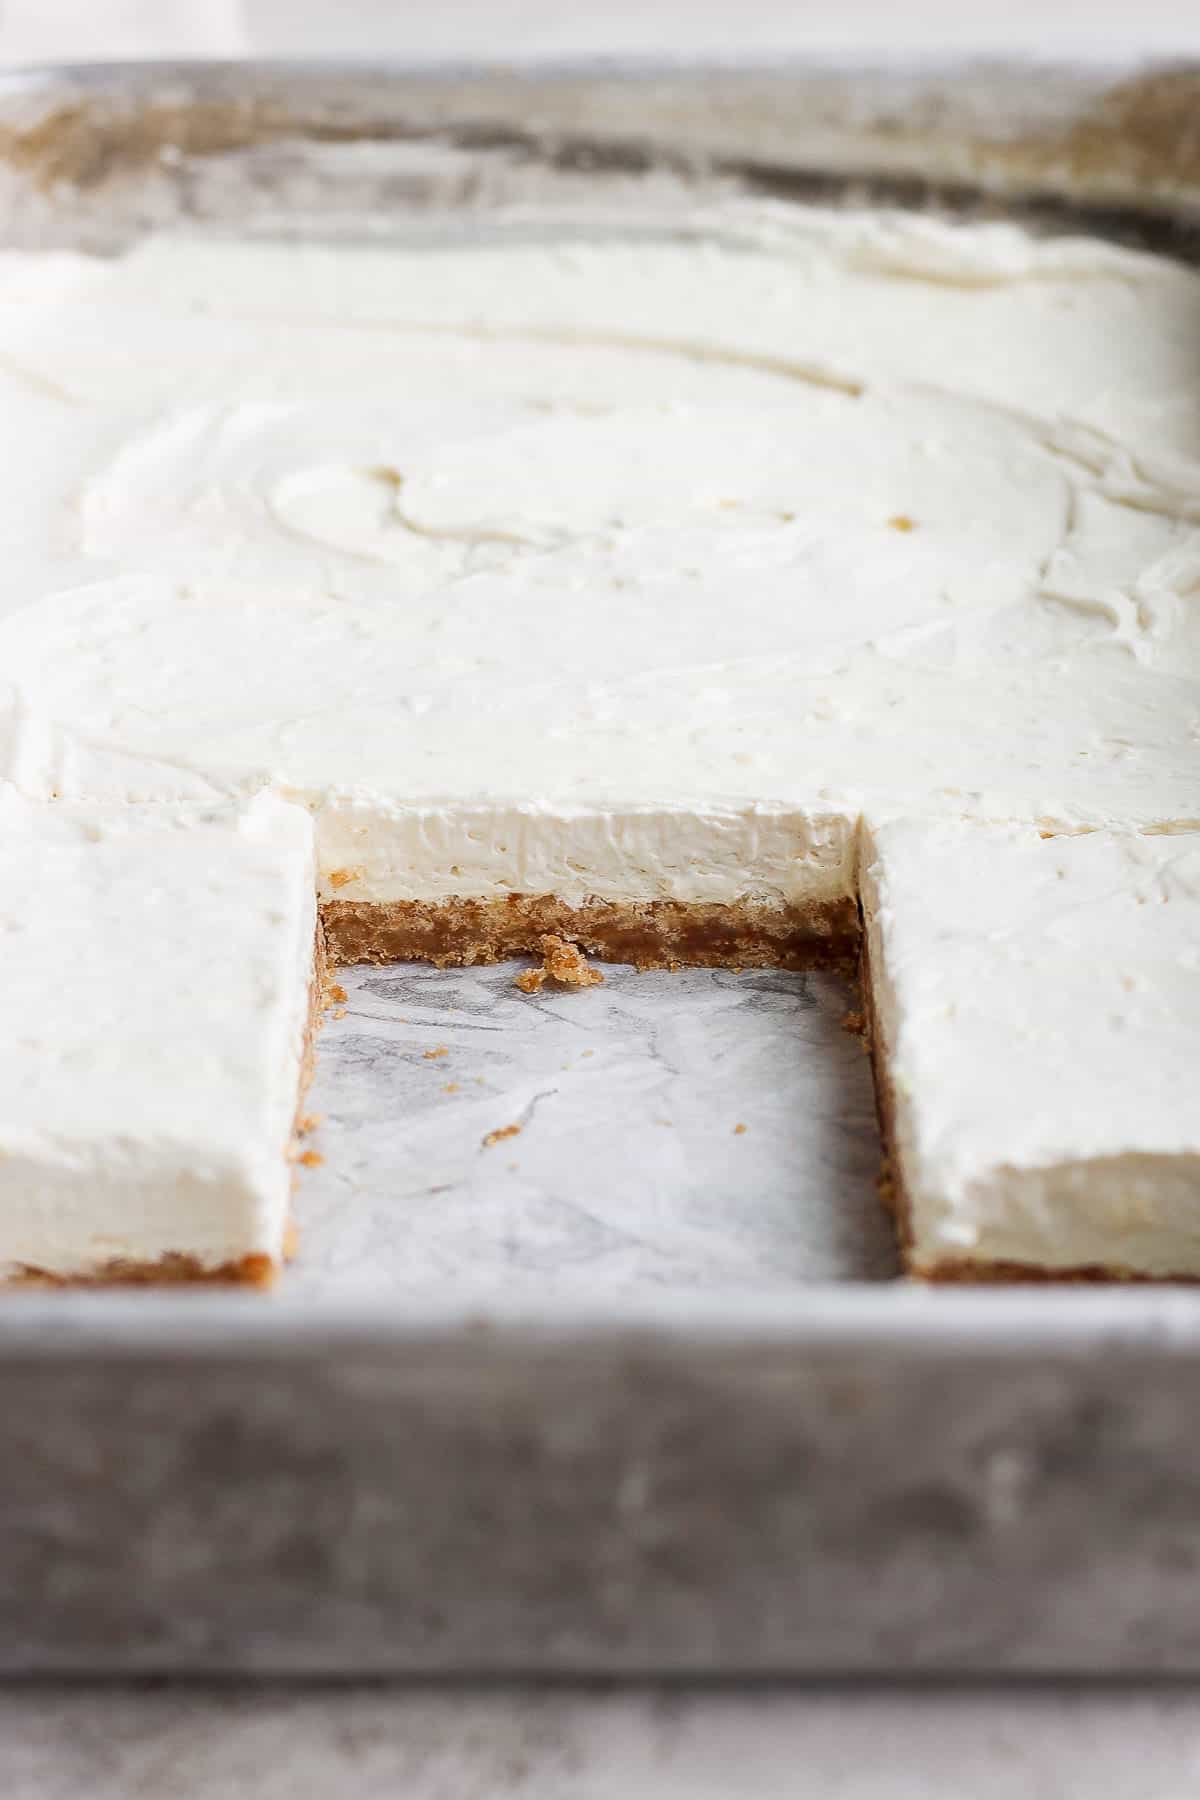
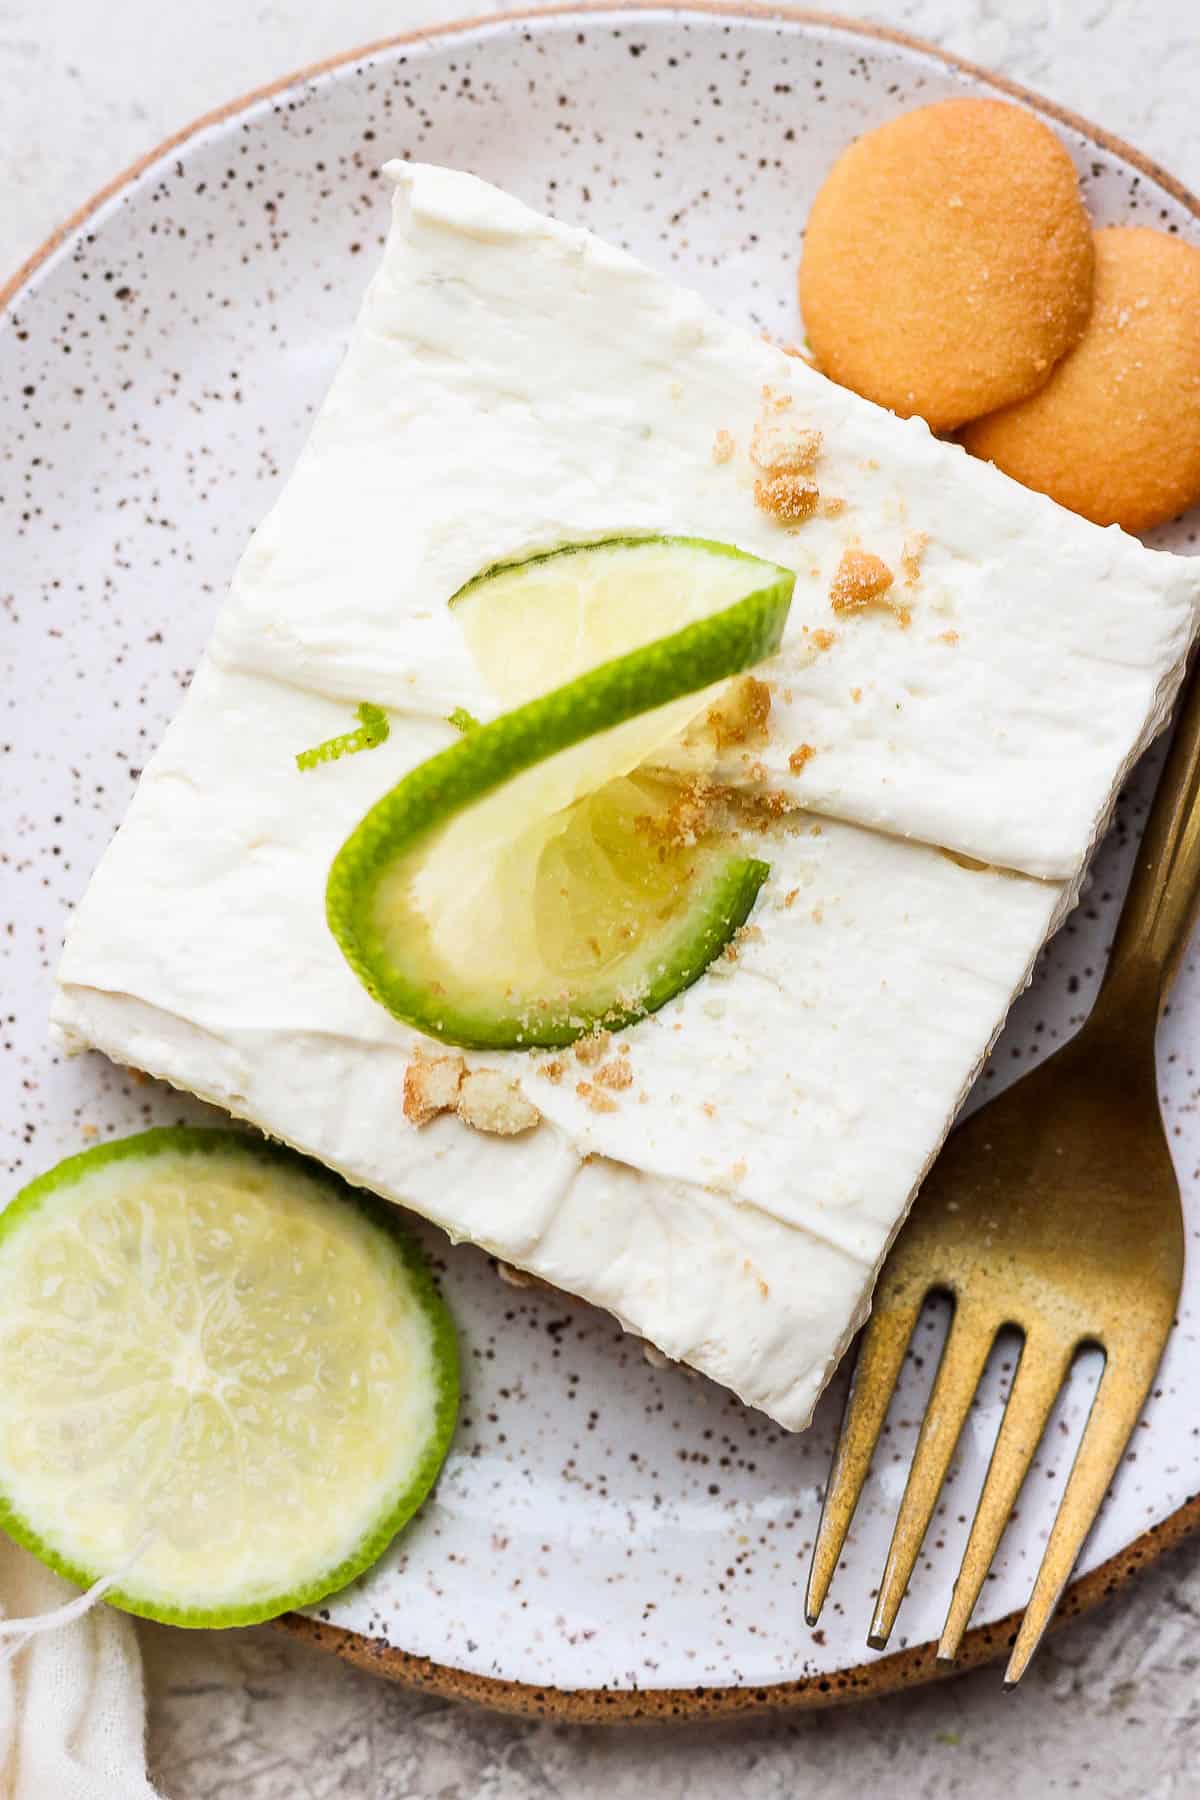
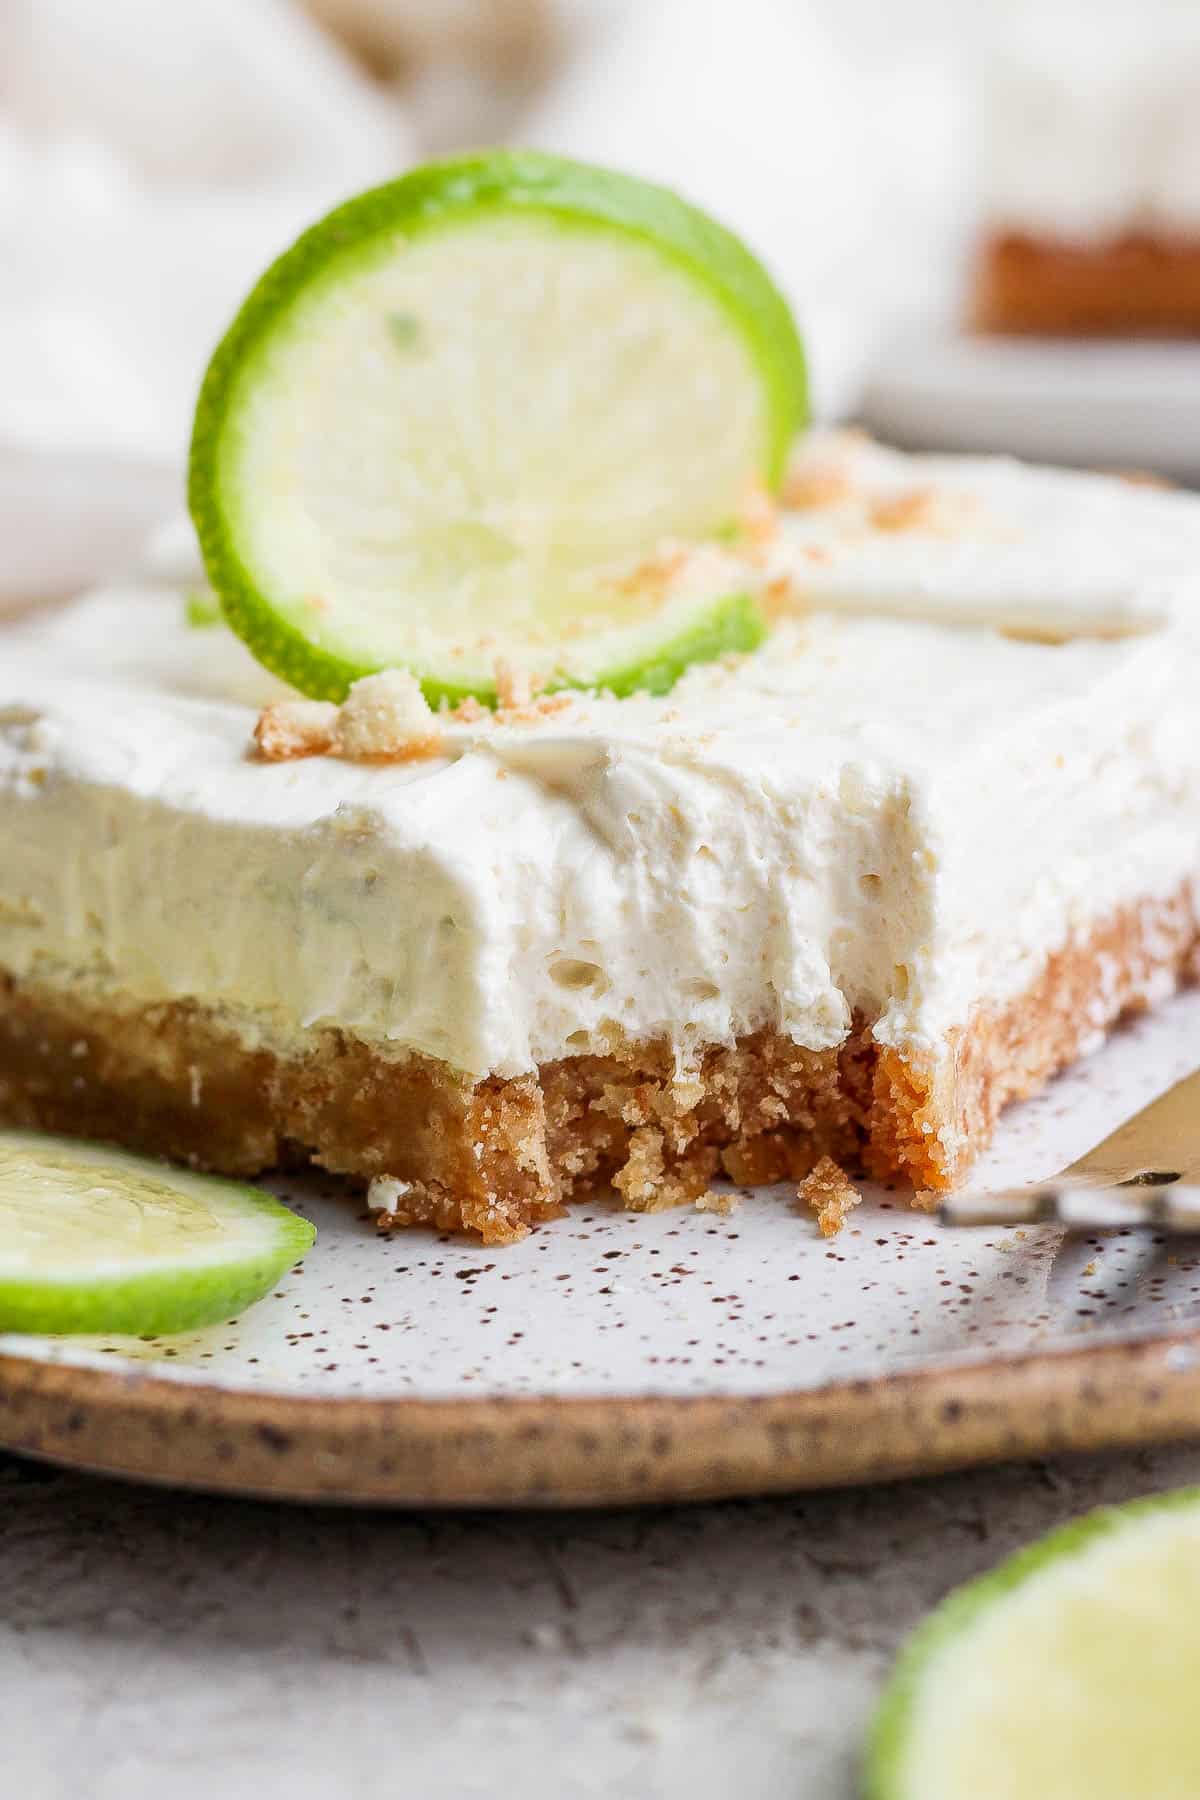
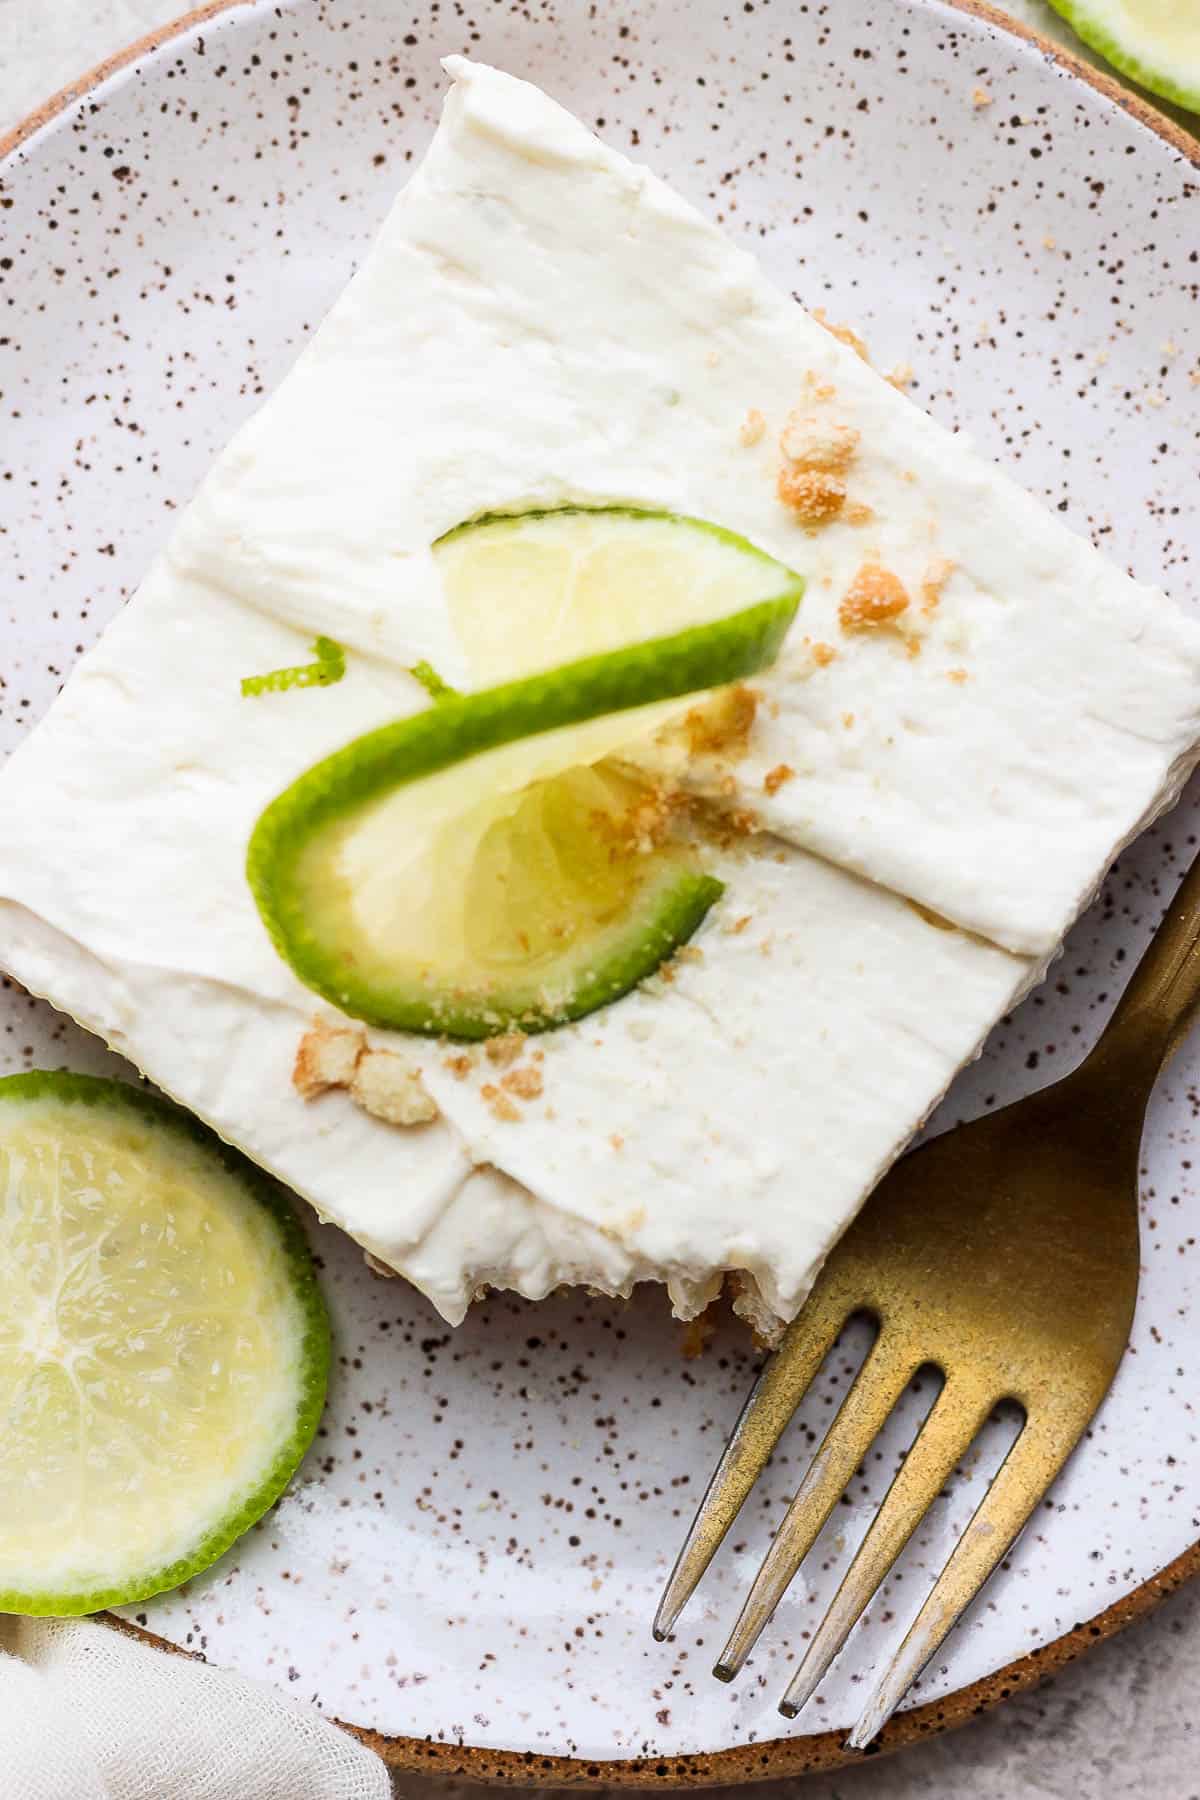
Step 6 – Cut and serve when ready!
Best Ways To Serve Key Lime Cheesecake Bars
If presentation is your thing, be sure to top each bar with a little slice of key lime and zest to wow a crowd. And while these bars pair great with any summer meal, some of our favorites are bbq chicken tacos, easy grilled brats, or our delicious smoked pork shoulder recipe.
Can You Freeze Key Lime Cheesecake Bars?
Yes, make sure that they are in a freezer safe and airtight container. If you only have a few bars left, it is best to wrap them with plastic wrap and then store in an airtight bag in the freezer for up to 1 month. Set them on a countertop to thaw for a few hours prior to serving.
Erin’s Testing Tips: What We Learned
A few things to keep in mind for best results:
👉 Line the pan with parchment paper for easy bar removal!
👉 Chill this pan of bars in the fridge for at least 2 hours. Overnight is best, if you can.
👉 We love the flavor with KEY limes, but if they aren’t available regular limes will work too.
Other Simple Dessert Bar Recipes You Might Like


Made this recipe and loved it?!
We would love it if you would take a minute and leave a star rating and review – it is also helpful if you made any substitutions or changes to the recipe to share that as well. THANK YOU!
Follow Us on Social

Ingredients
- 4 cups vanilla wafers, crushed
- 1 cup butter, melted
- 8 ounces cream cheese, softened
- 14 ounces sweetened condensed milk
- ⅓ cup fresh key lime juice
- zest of 1 key lime
- 8 ounces cool whip
Instructions
- Prep: Preheat oven to 350℉. Prepare a 9×13 pan by lining it with parchment paper, ensuring it folds over the sides to allow for easily removal of the bars.
- Make Crust: Combine 4 cups vanilla wafers and 1 cup butter (melted) in a medium-sized bowl; use a fork to combine. Pour wafer mixture into the prepared pan. Spread out evenly and use your hands to press down firmly to create a crust. Place in oven, middle rack, and let bake 15 minutes. Remove and let cool. Set aside.
- Make Filling: In a large mixing bowl, add softened 8 ounces cream cheese and 14 ounces sweetened condensed milk. Use a whisk to combine until smooth (it's okay if there are still very small chunks of cream cheese). Add ⅓ cup fresh key lime juice and zest of 1 key lime. Whisk to combine. Use a large spatula to fold in 8 ounces cool whip gently – you don't want to stir or the cool whip will lose some of this volume.
- Add Filling: Pour cool whip mixture on top of the crust. Spread out evenly.
- Refrigerate: Place in the refrigerator for a minimum of 2 hours – preferably overnight.
- Serve: Cut into squares and enjoy!
Notes
- Dairy-Free: use sweetened condensed coconut milk, plant-based butter, dairy-free cream cheese alternative, and a dairy-free whipped topping.
- Gluten-Free: you can sub gluten-free graham crackers for the vanilla wafers.
- Storage: cover pan with foil and place in the refrigerator for up to 5 days. For freezing, wrap in plastic wrap and place in a freezer safe container. Store in the freezer for up to 1 month.


Bridget says
So simple and the perfect dessert for our summer cookout!
Stefanie T says
Love this recipe sooo much!! I made it last summer for the first time. Made them again yesterday. It is soo delicious.. I used key lime juice because my store didn’t have any fresh key limes. Also used (2) Family Size Nilla wafers to get a thicker crust. This is a great summertime dessert that will be on repeat!! Thank you Erin.
Erin says
So glad you enjoyed this one, Stefanie!! One of my favorite recipes!