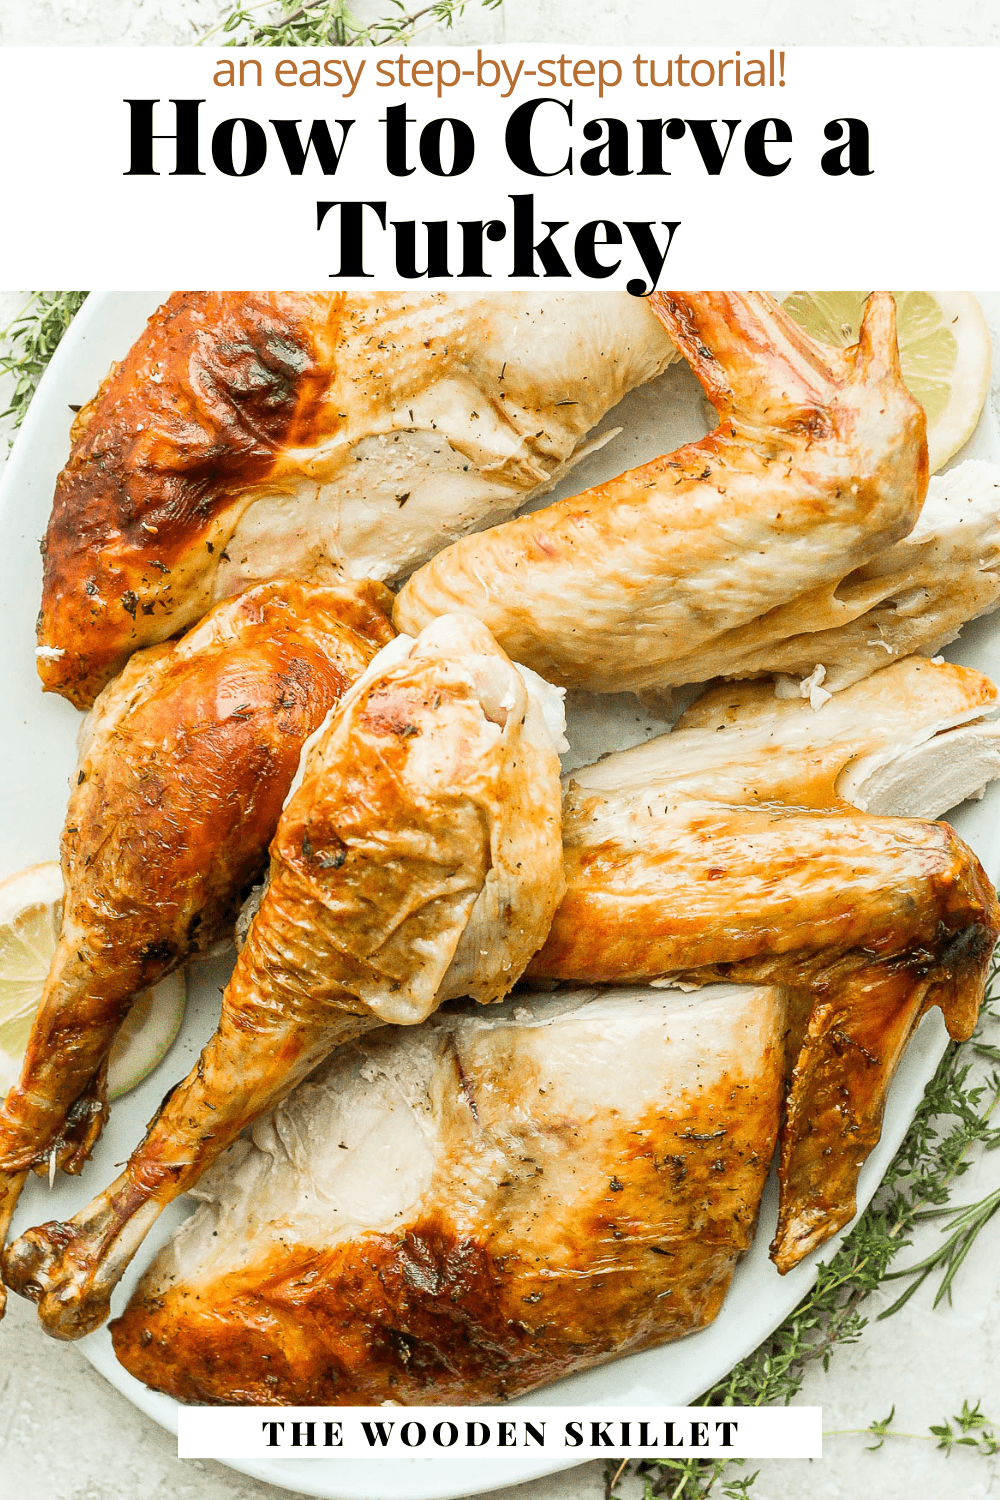
Follow these simple steps to learn How to Carve a Turkey like a pro! We will show you an easy step-by-step process, through photos and video, on how to perfectly carve a holiday or Thanksgiving Day turkey in minutes!
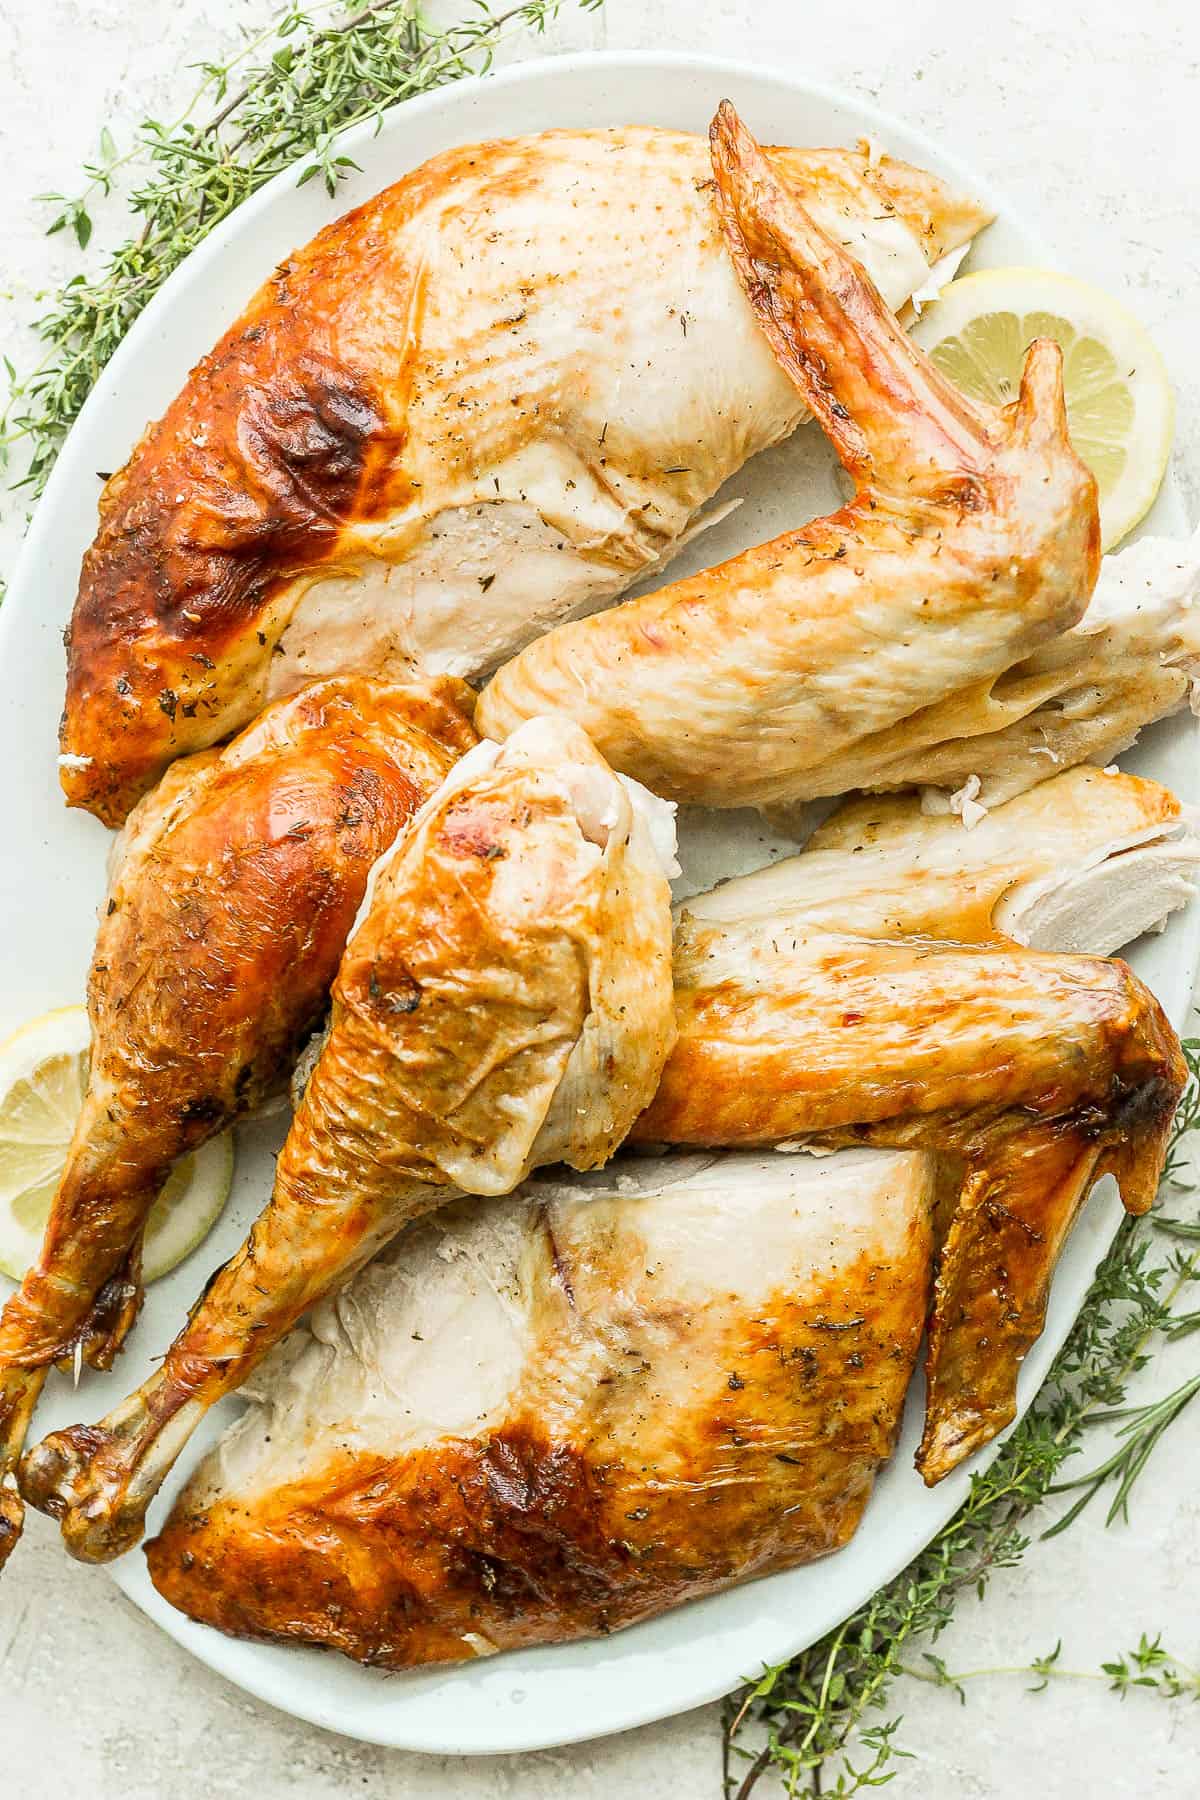
The Best Way To Carve A Turkey
You just cooked a perfectly brown and juicy whole turkey, now what? Looking at the turkey needing to be carved can be very intimidating, especially with the whole family getting hungry and ready to sit at the Thanksgiving dinner table. Well let us assure you that carving a turkey is not as intimidating as it may look. Whether this is your first time or you are veteran who just needs a refresher, we have a lot of experience in this department so let us take you through the process and you will have a platter of perfectly carved turkey in minutes!
What You Will Need
- whole cooked turkey – there are a variety of ways to cook the perfect holiday turkey, we especially love our classic Butter & Sage Roasted Turkey.
- large cutting board or carving board – this will provide the perfect workspace for carving up your bird!
- large, sharp knife – some say that you need a sharp carving knife or electric knife (either will work), but we typically just use a sharp chef’s knife.
Best Ways To Cook A Turkey Before Carving
There are so many great ways for how to cook a turkey, both in the oven and out of the oven. Some of our favorite turkey recipes are Herb-Citrus Roast Turkey, Grilled Turkey, Smoked Turkey, & Deep-Fried Turkey. No matter how you cook your bird, the carving process will be the same.
How To Easily Carve A Whole Turkey
After the turkey has been cooked, the first step is to be patient and let the bird rest for at least 30 minutes. This allows time for the juices to redistribute throughout the meat. Now you can set-up your carving station and the work begins! First, cut the twine or remove the hock lock that is holding the turkey legs together and make sure the cavity is facing you.
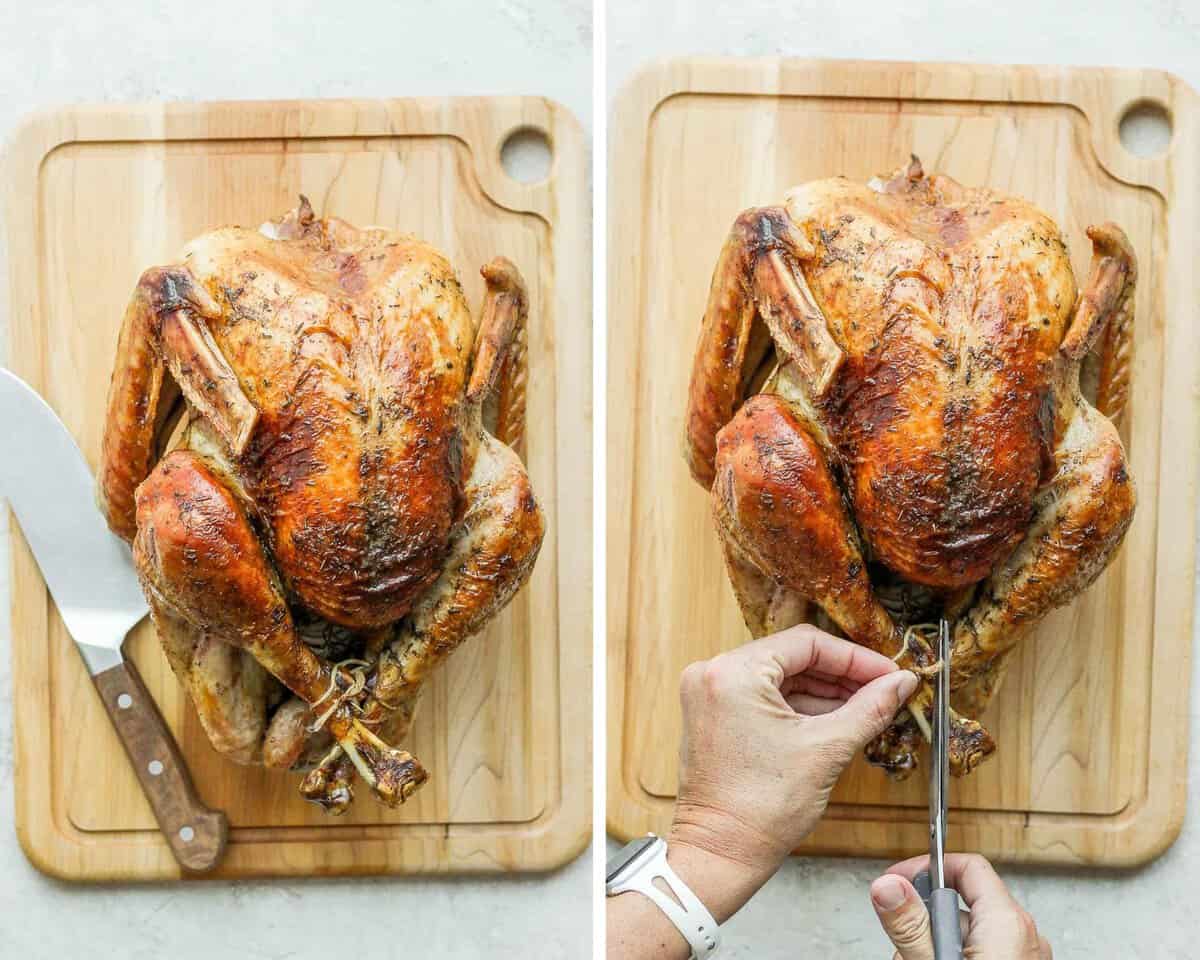
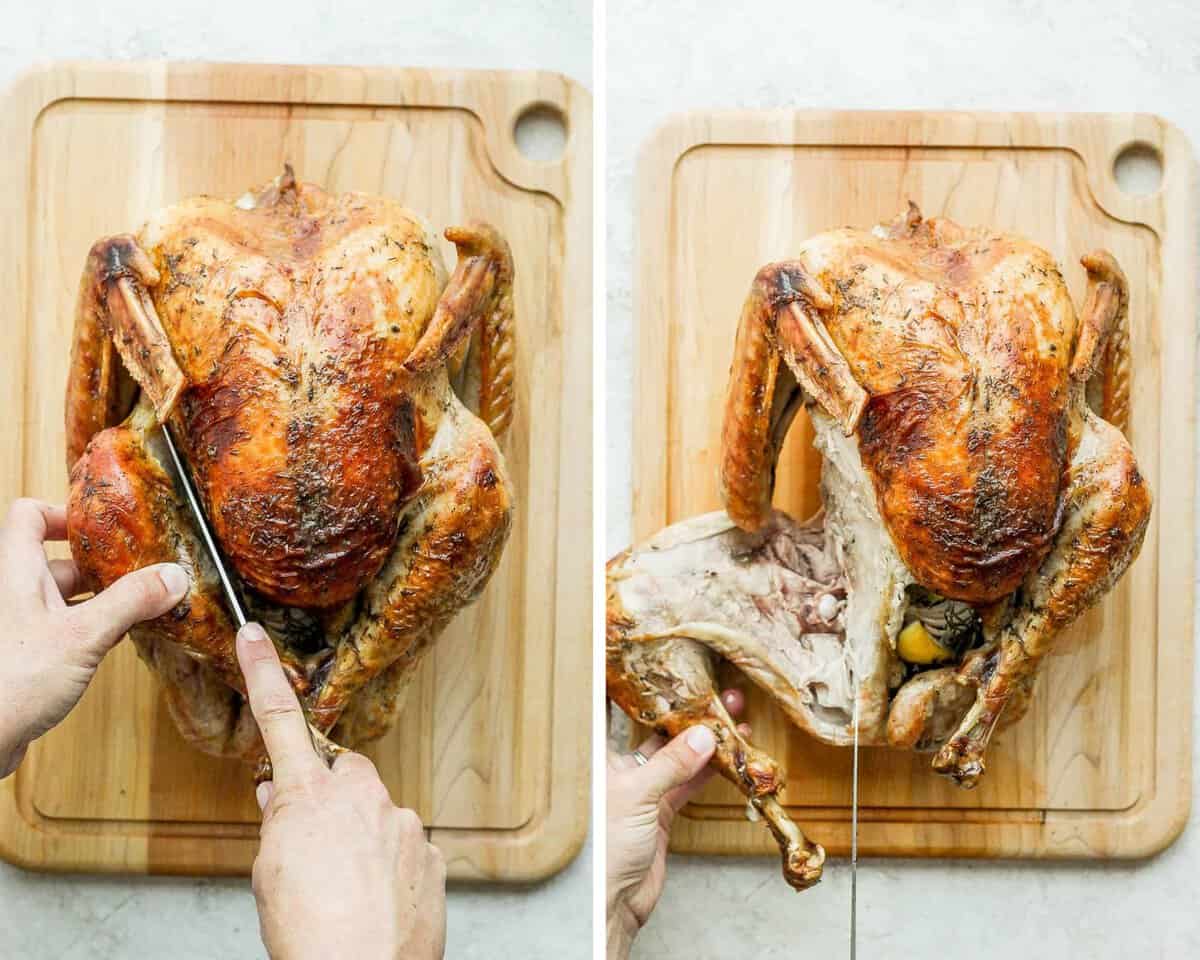
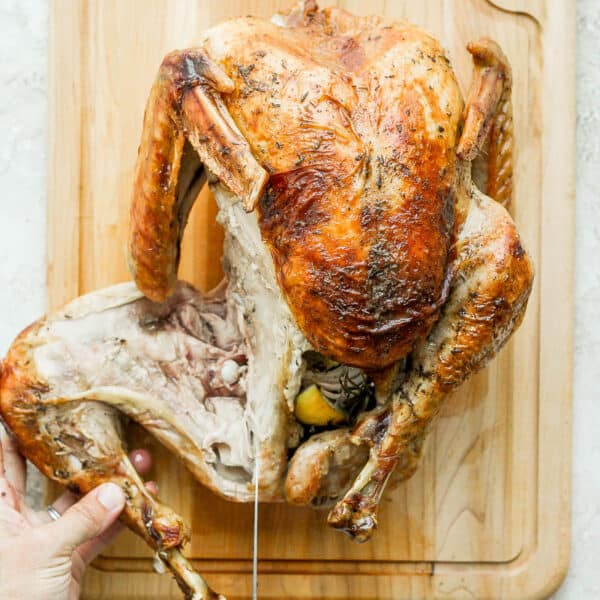
Next, use the tip of your knife to make your first cut through the skin between the turkey breast and leg. Use your hand to gently pull the entire leg down, helping it separate from the rest of the bird. As you cut your way down you will see the joint, continue to cut down separating the leg fully from the body. Set the leg aside on a platter.
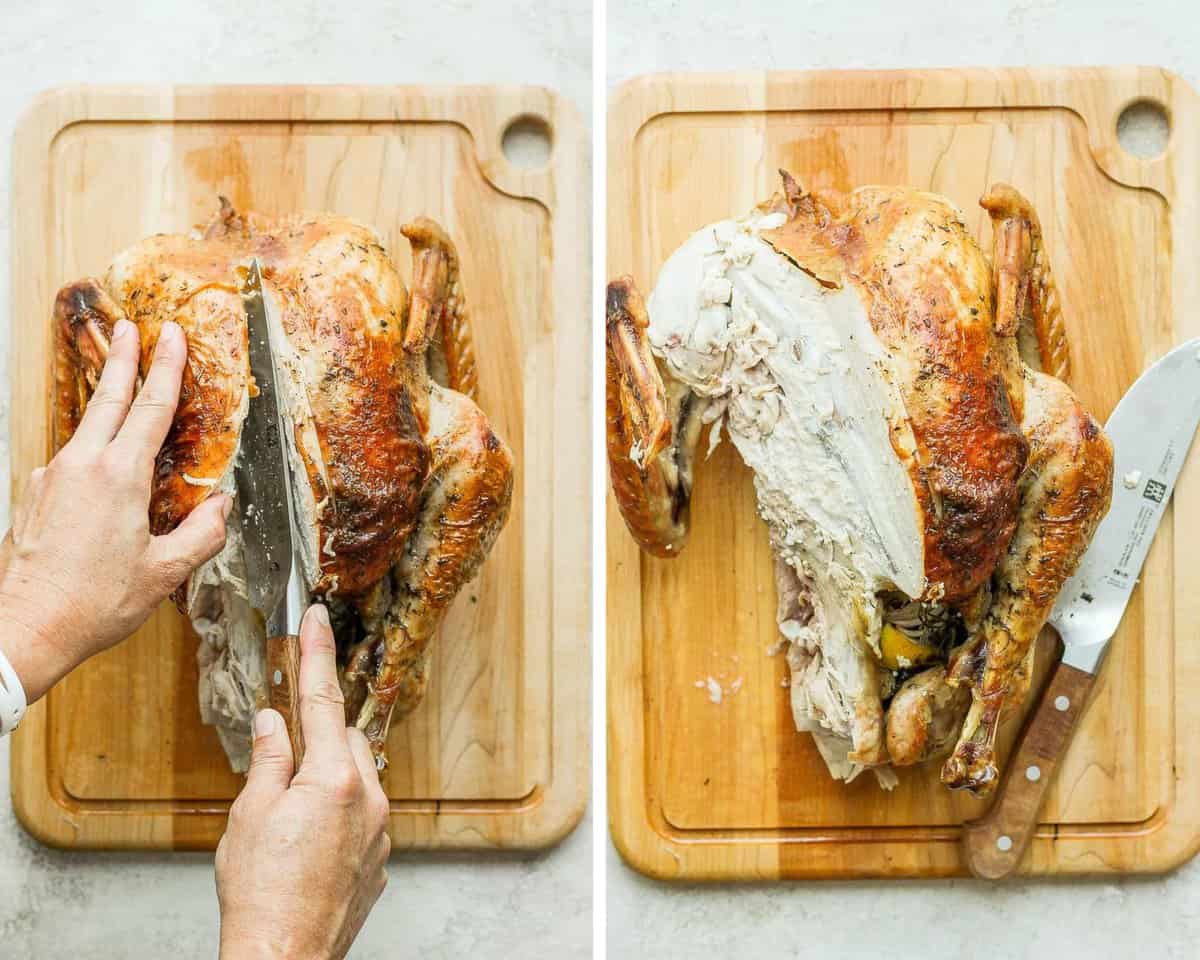
Now it is time to remove the turkey breast. The breastbone runs down the middle of the turkey, identify where that is and place your knife just to the side of the breast bone. Cut from one end of the turkey to the other, staying as close to that breastbone and rib cage as possible. Continue until you are able to fully remove the whole breast. Set aside on the serving platter.
Next comes the turkey wings! Again, use your hand to pull the wing away from the bird revealing the wing joint, where it connects to the body of the turkey. This is where you will cut to fully remove the wing.
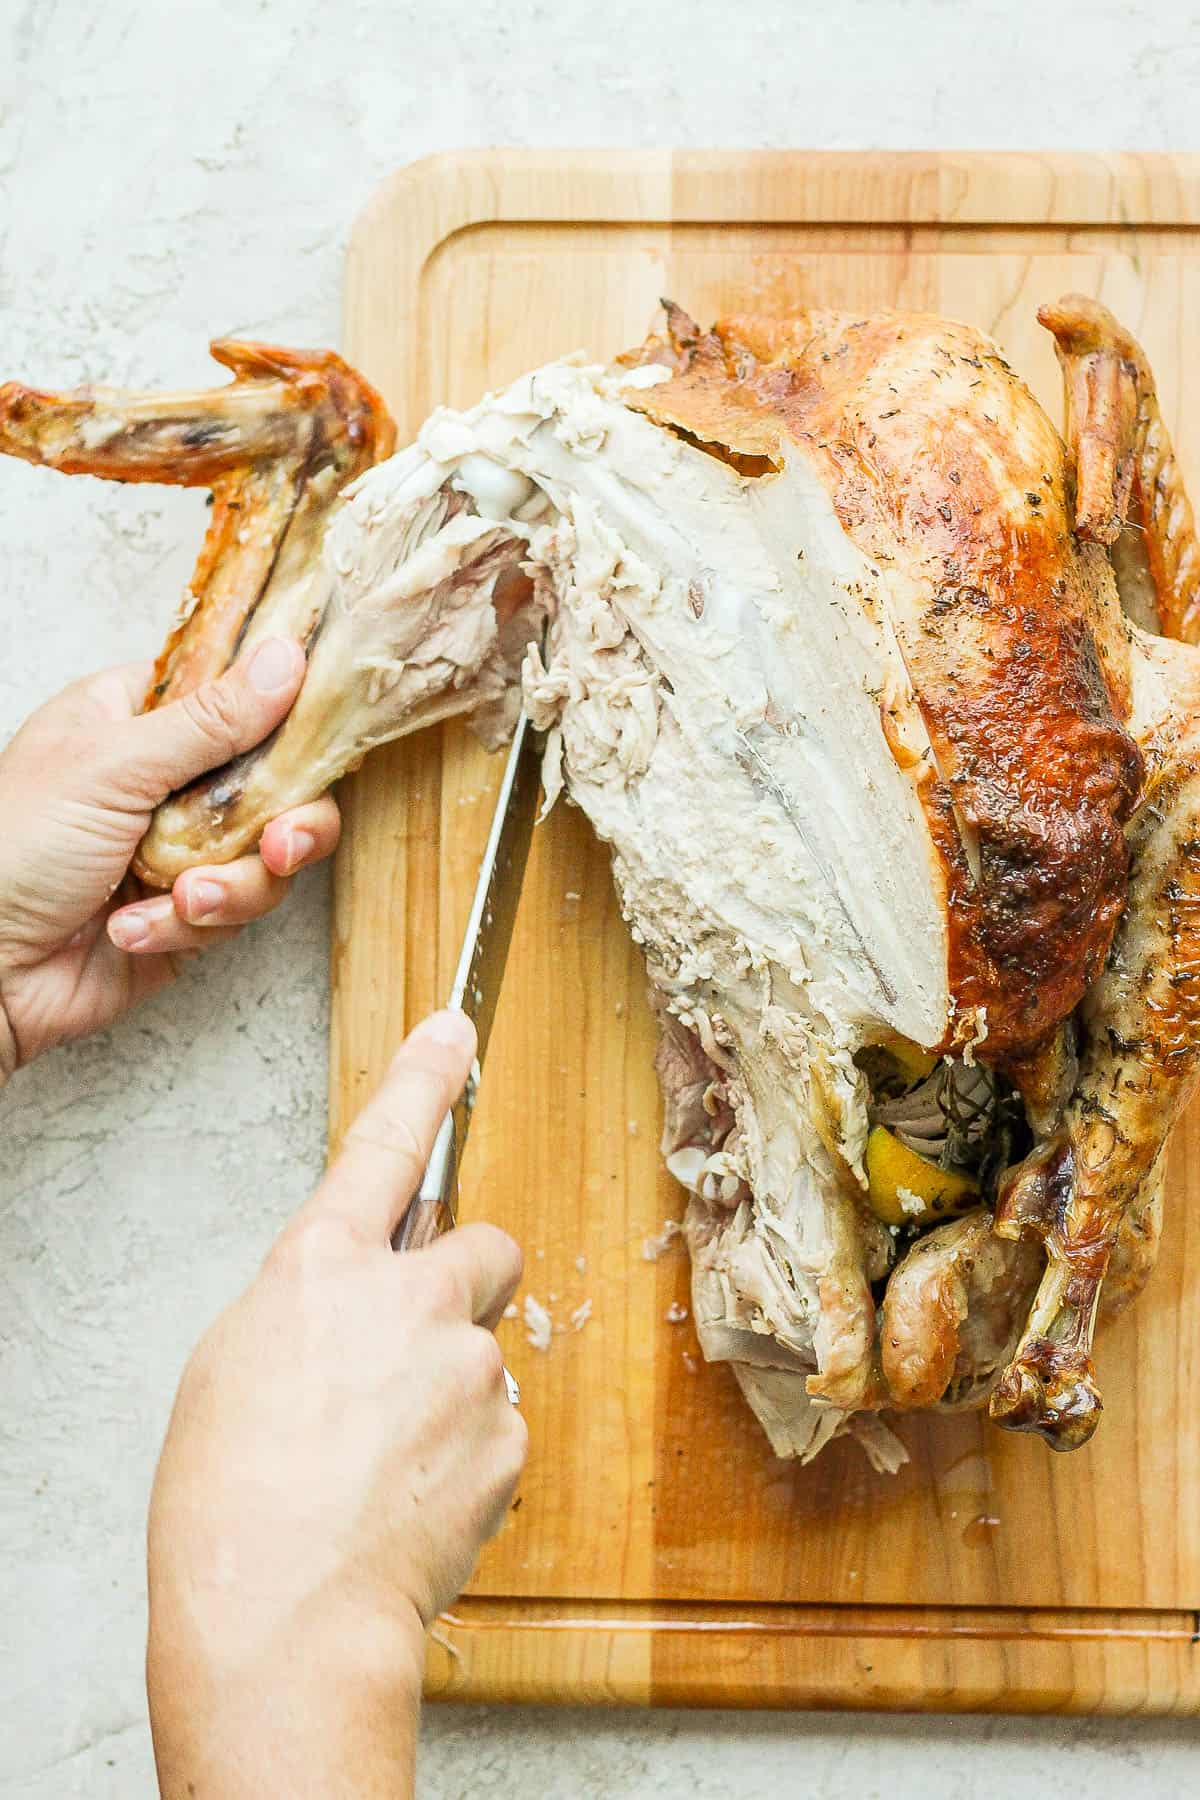
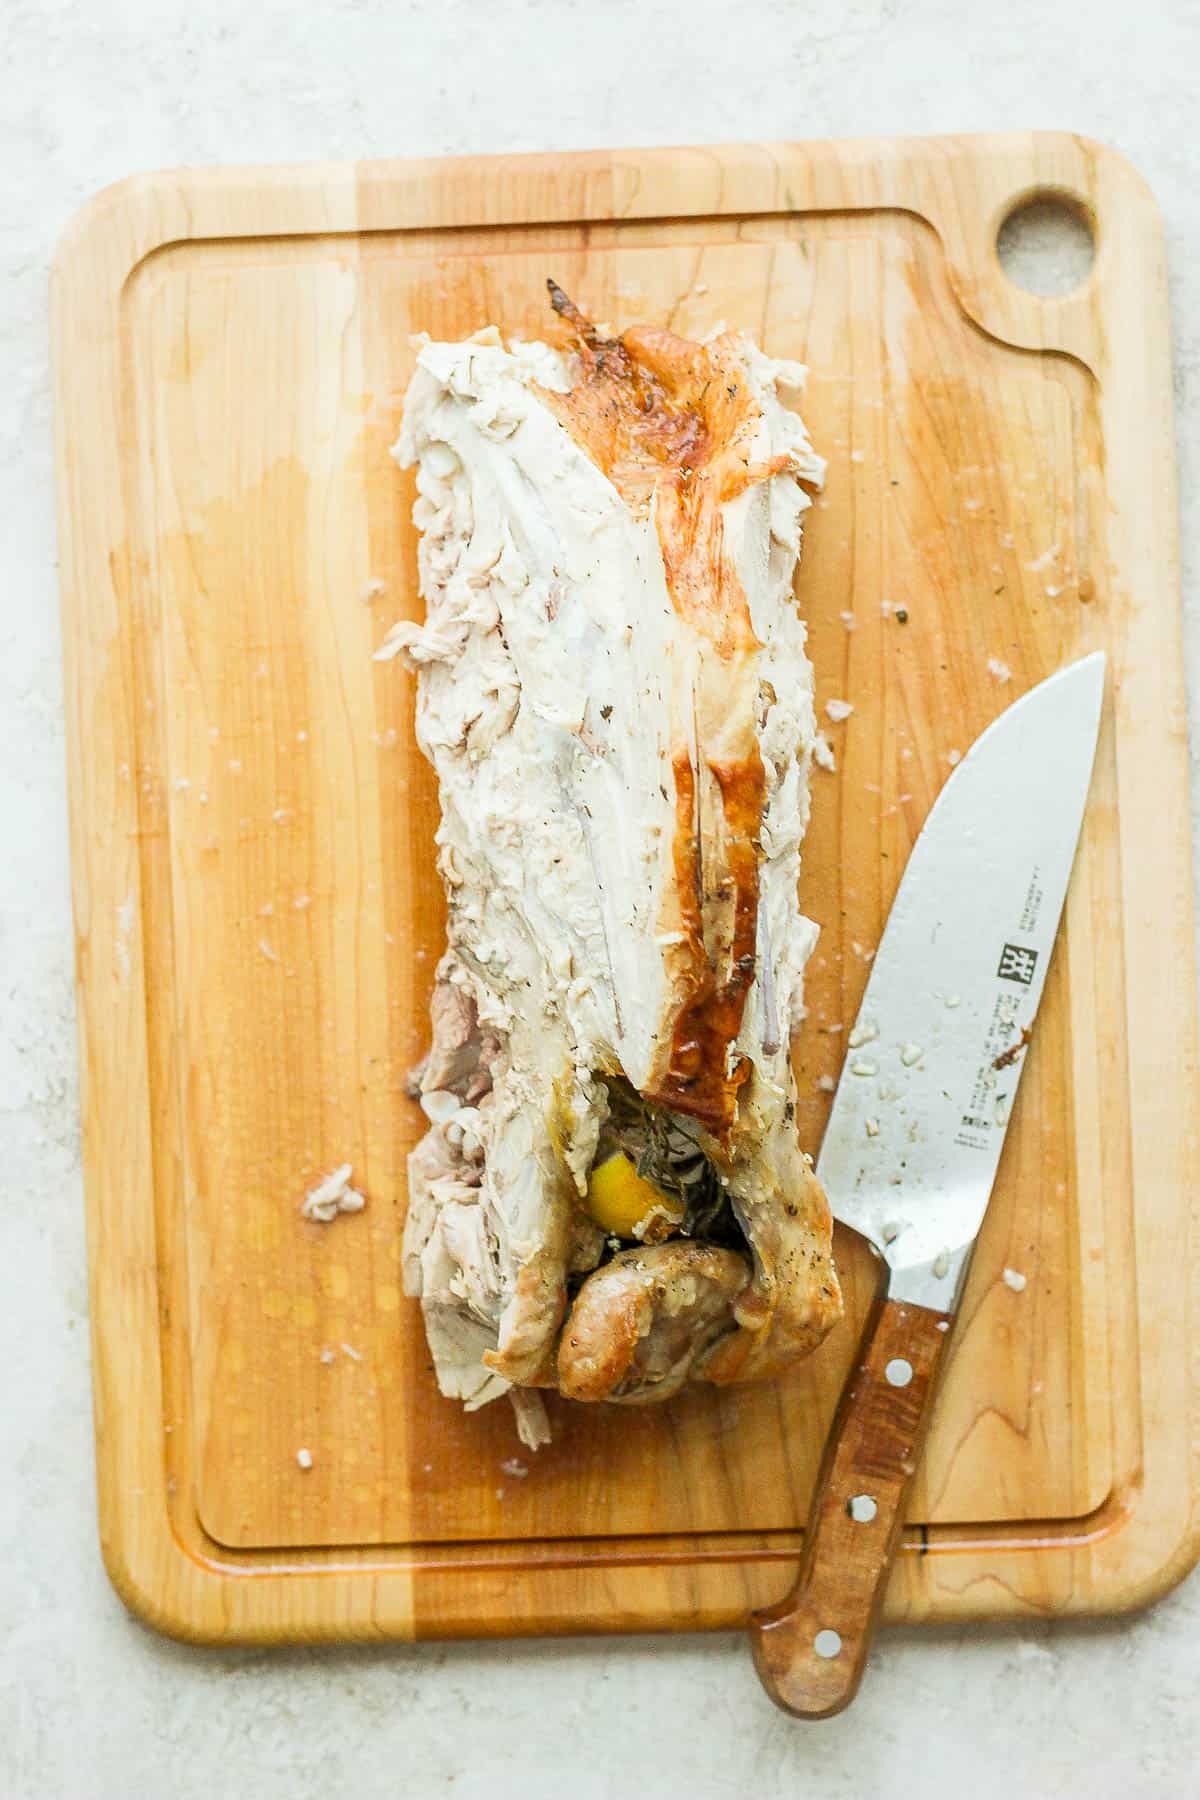
Now that you have worked your way down half of the turkey, it is time to do the exact same process on the other side of the turkey. What you have left is the turkey carcass.
Pro Tip
Use the leftover turkey carcass to make the most flavorful homemade turkey stock! Simply place the carcass in a large ziplock bag or wrap in aluminum foil, store in the freezer for up to 3 months, and make some stock for soup when you have time.
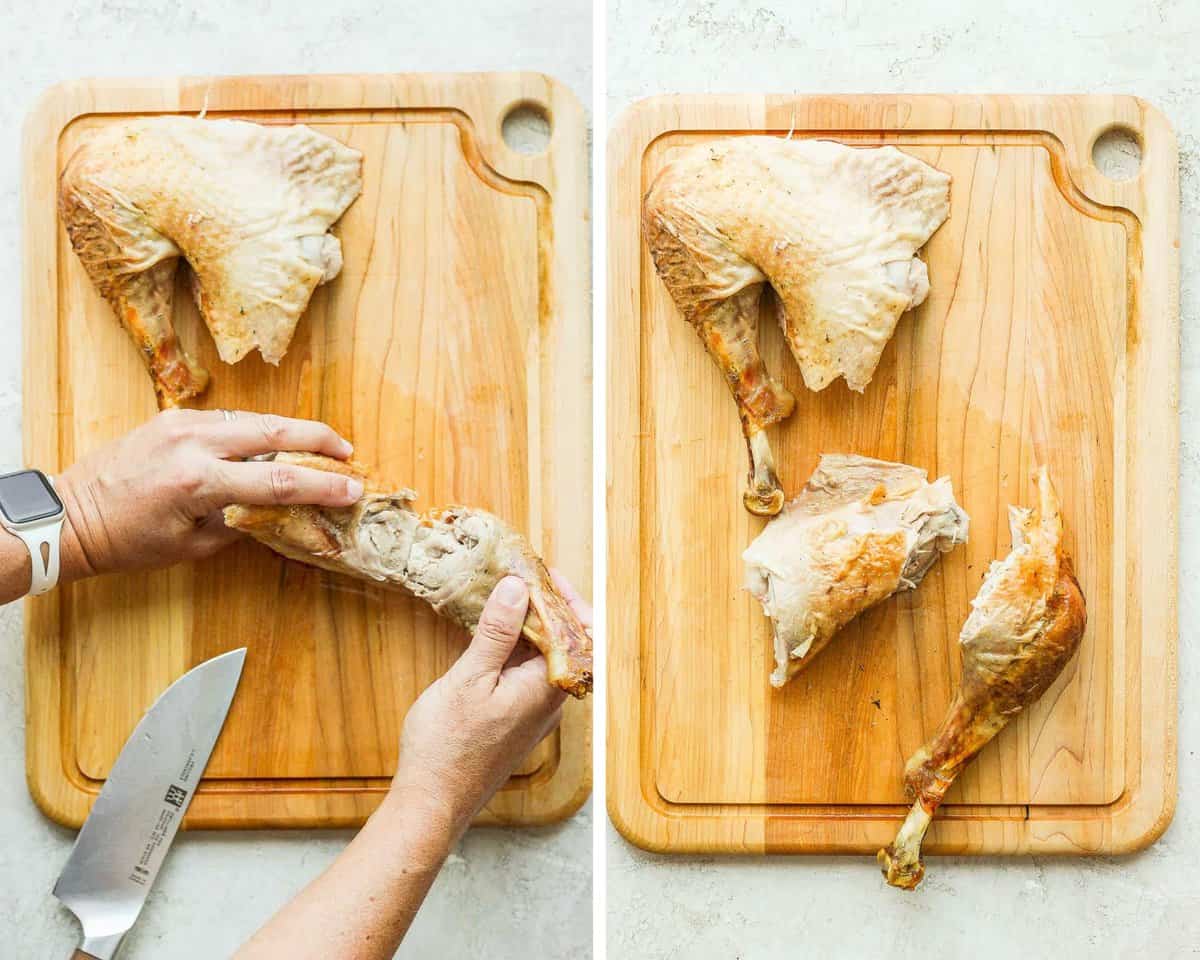
Finally, remove the turkey thigh from the leg. Simply use your hands to pull them apart at the thigh joint and then use the knife to fully separate. This will result in a thigh, full of juicy dark meat, and a turkey drumstick, which is always a crowd favorite.
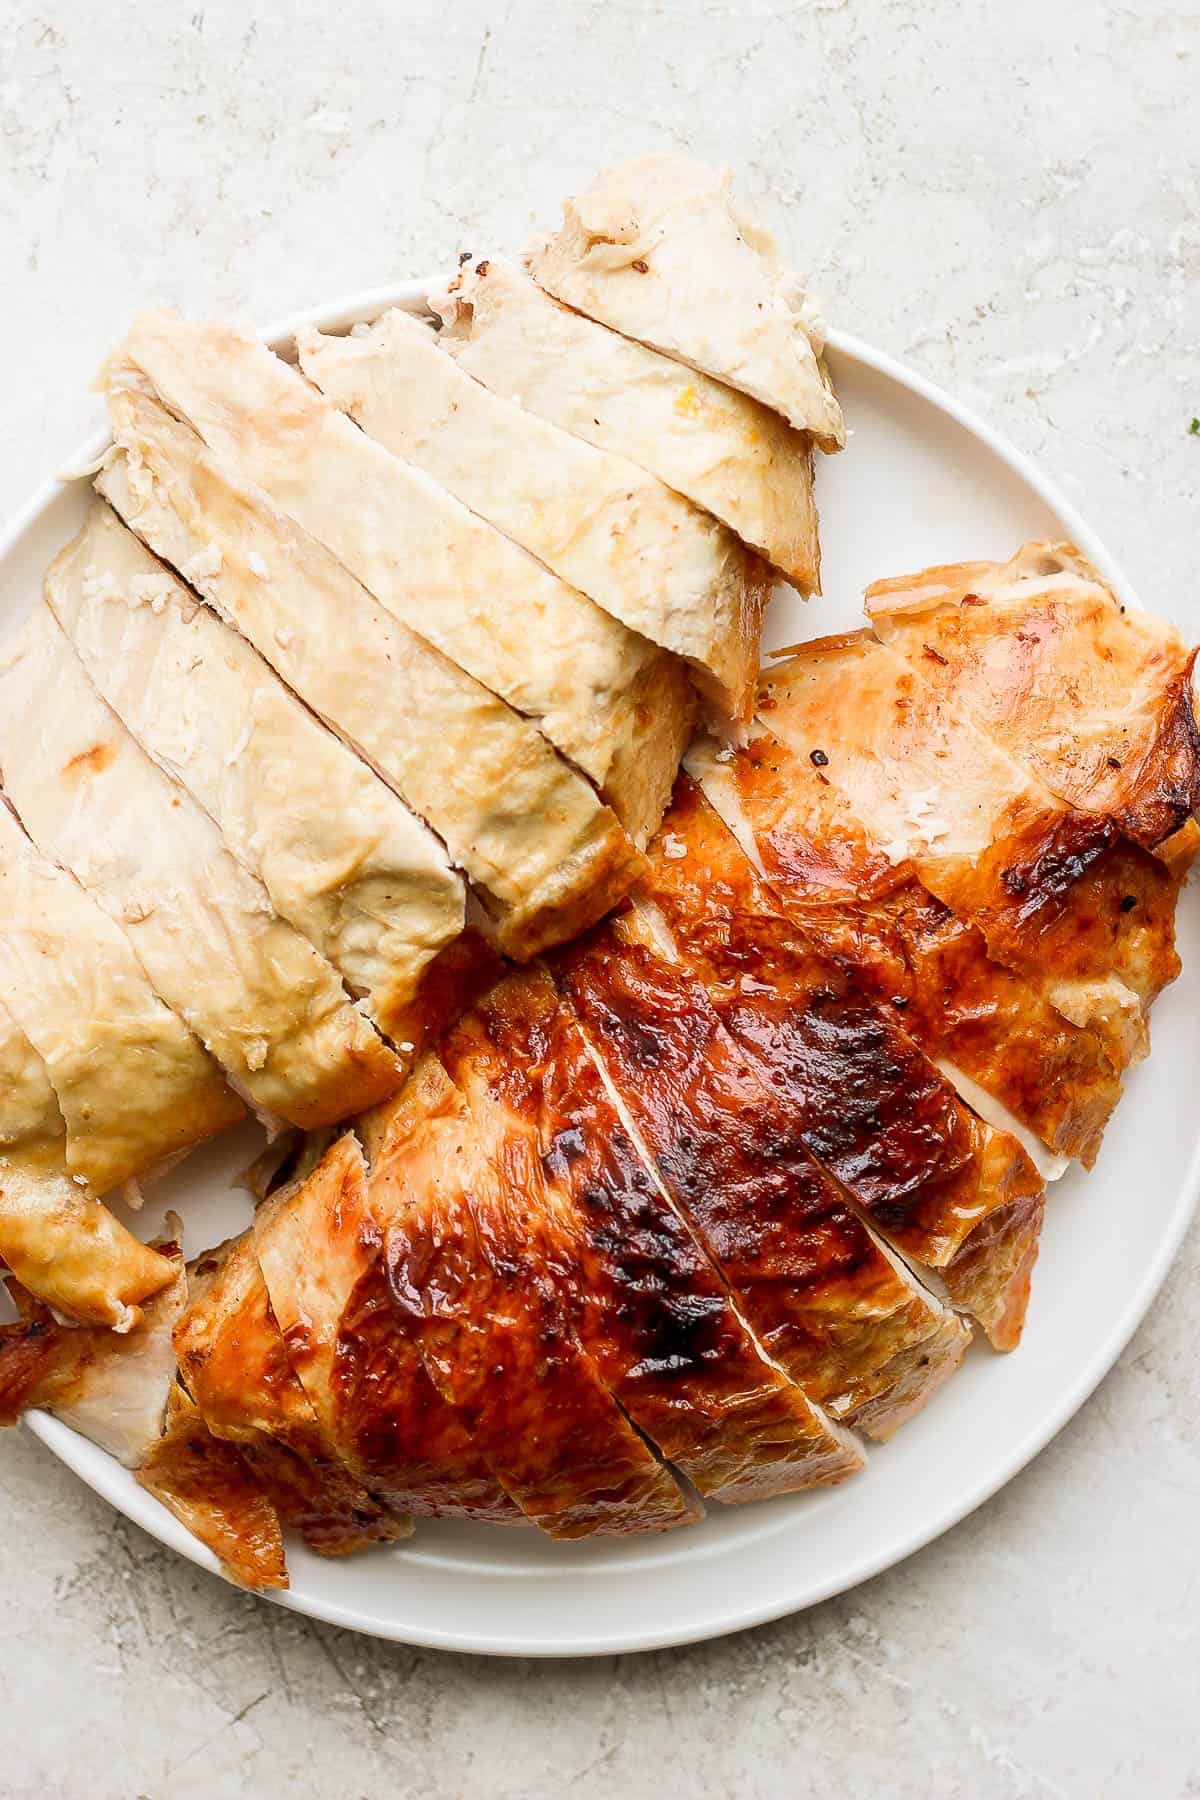
The turkey breasts can be simply sliced into large pieces for anyone that loves the white meat.
Best Ways To Serve A Carved Turkey
You will want to assemble all of the carved meat on a large Thanksgiving platter for everyone to enjoy! Once the turkey is removed and on a platter it will begin to cool very quickly so you will want to serve immediately or cover with aluminum foil and place in a warm oven until you are ready to serve.
And if you are looking for some great side dishes to serve with your turkey, we’ve got you covered:
- Instant Pot Mashed Potatoes
- Dairy-Free Green Bean Casserole
- Wild Rice Stuffing
- Sweet Apple Cinnamon Yam Bake
- Cranberry Sauce
- Gluten-Free Cornbread Muffins
We have plenty of other delicious Thanksgiving recipes too, if you need them!
Storage & Freezer
Fridge: store leftover turkey in an airtight container in the refrigerator for up to 3 days.
Freezer: fully cooked turkey can also be kept in a freezer-safe container for up to 3 months.
Made this delicious recipe and loved it?! We would love it if you would take a minute and leave a star rating and review – it is also helpful if you made any substitutions or changes to the recipe to share that as well. THANK YOU!
Don’t forget to check out my Instagram and TikTok account for some behind-the-scenes action! Or give me a follow on Facebook or see what I am pinning on Pinterest!
Other Turkey Recipes You Might Like
How to Carve a Turkey
- Prep Time: 10 minutes
- Cook Time: 0 minutes
- Total Time: 10 minutes
- Yield: 10 servings 1x
- Category: How-To
- Method: Counter Top
- Cuisine: American
Description
Follow this easy, step-by-step tutorial on How to Carve a Turkey that teaches you how to carve up your holiday turkey in a matter of minutes!
Ingredients
- 1 whole turkey, fully cooked
- cutting board
- sharp chef’s knife or carving knife
Instructions
- Rest: Ensure turkey has rested 30 minutes after cooking (this allows the juices to redistribute).
- Prep Turkey + Carving Station: Place turkey on a large cutting board (breast side up) and ensure you have a sharp chef’s knife or carving knife. Remove any hock or kitchen twine and ensure the legs are point towards you. Having paper towels and a serving platter on hand will be helpful through the process.
- Remove Leg: make a cut through skin right where the breast and leg meet. Continue cutting through the meat until your knife connects with bone. Set your knife down and use your hands (feel free to use a paper towel) to bend the leg back until the joint pops out. Then use your knife again to cut through the joint until it fully separates. Set aside on the platter.
- Remove Breast: The breast bone runs down the middle of the turkey. Position your knife just next to the breast bone (staying on the same side as your previous cut) and make a cut from one end of the turkey to the other. Continue cutting down removing as much meat as possible. Disconnect the breast meat from the turkey and set aside on the platter.
- Remove Wing: similar to the leg, use your hands to pull back the wing until the joint pops then use your knife to cut through separating the wing from the turkey. Set aside on the platter.
- Repeat on other side: repeat these steps on the other side of the turkey removing the other leg, breast and wing.
- Separate leg from thigh: take the whole turkey leg and make an initial cut where the joint bends. Then use your hands to pop open the joint. Use your knife to make a final cut through the joint separating the thigh from the drumstick.
- Slice and Serve: feel free to take the thigh and/or breast and cut into slices before serving.
Notes
- Chef vs. Carving Knife: feel free to use either here – an electric knife works too!
- Gravy: save those drippings and we will show you how to make turkey gravy!
- Leftovers: use the turkey leftovers to make Turkey + Wild Rice Soup, Turkey Cranberry Wraps, Turkey Noodle Soup or Turkey Pot Pie!
- Keep the bones: keep those turkey bones and make some turkey stock!




Leave a Rating & Comment