
Quick Look: Roasted Broccolini Tips
- Massage the oil in → ensures even coating (tested vs tossing)
- Trim → trim ends and cut in half lengthwise if needed for even cooking
- Use high heat (425°F) → helps the edges crisp, not steam
- Spread out evenly on the pan → prevents soggy broccolini
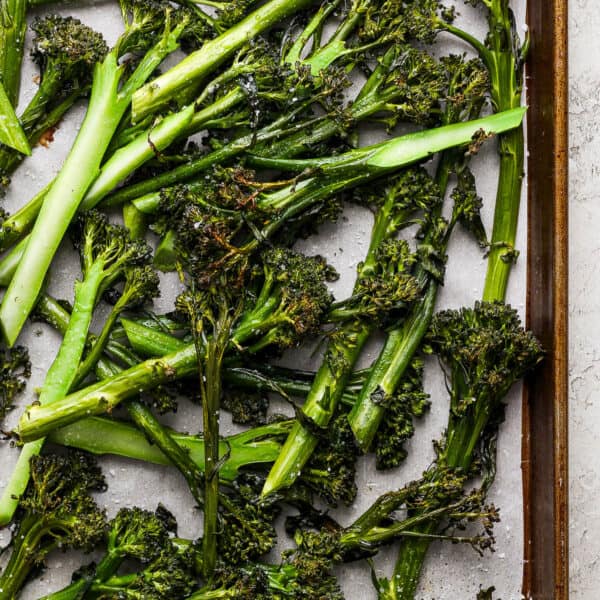
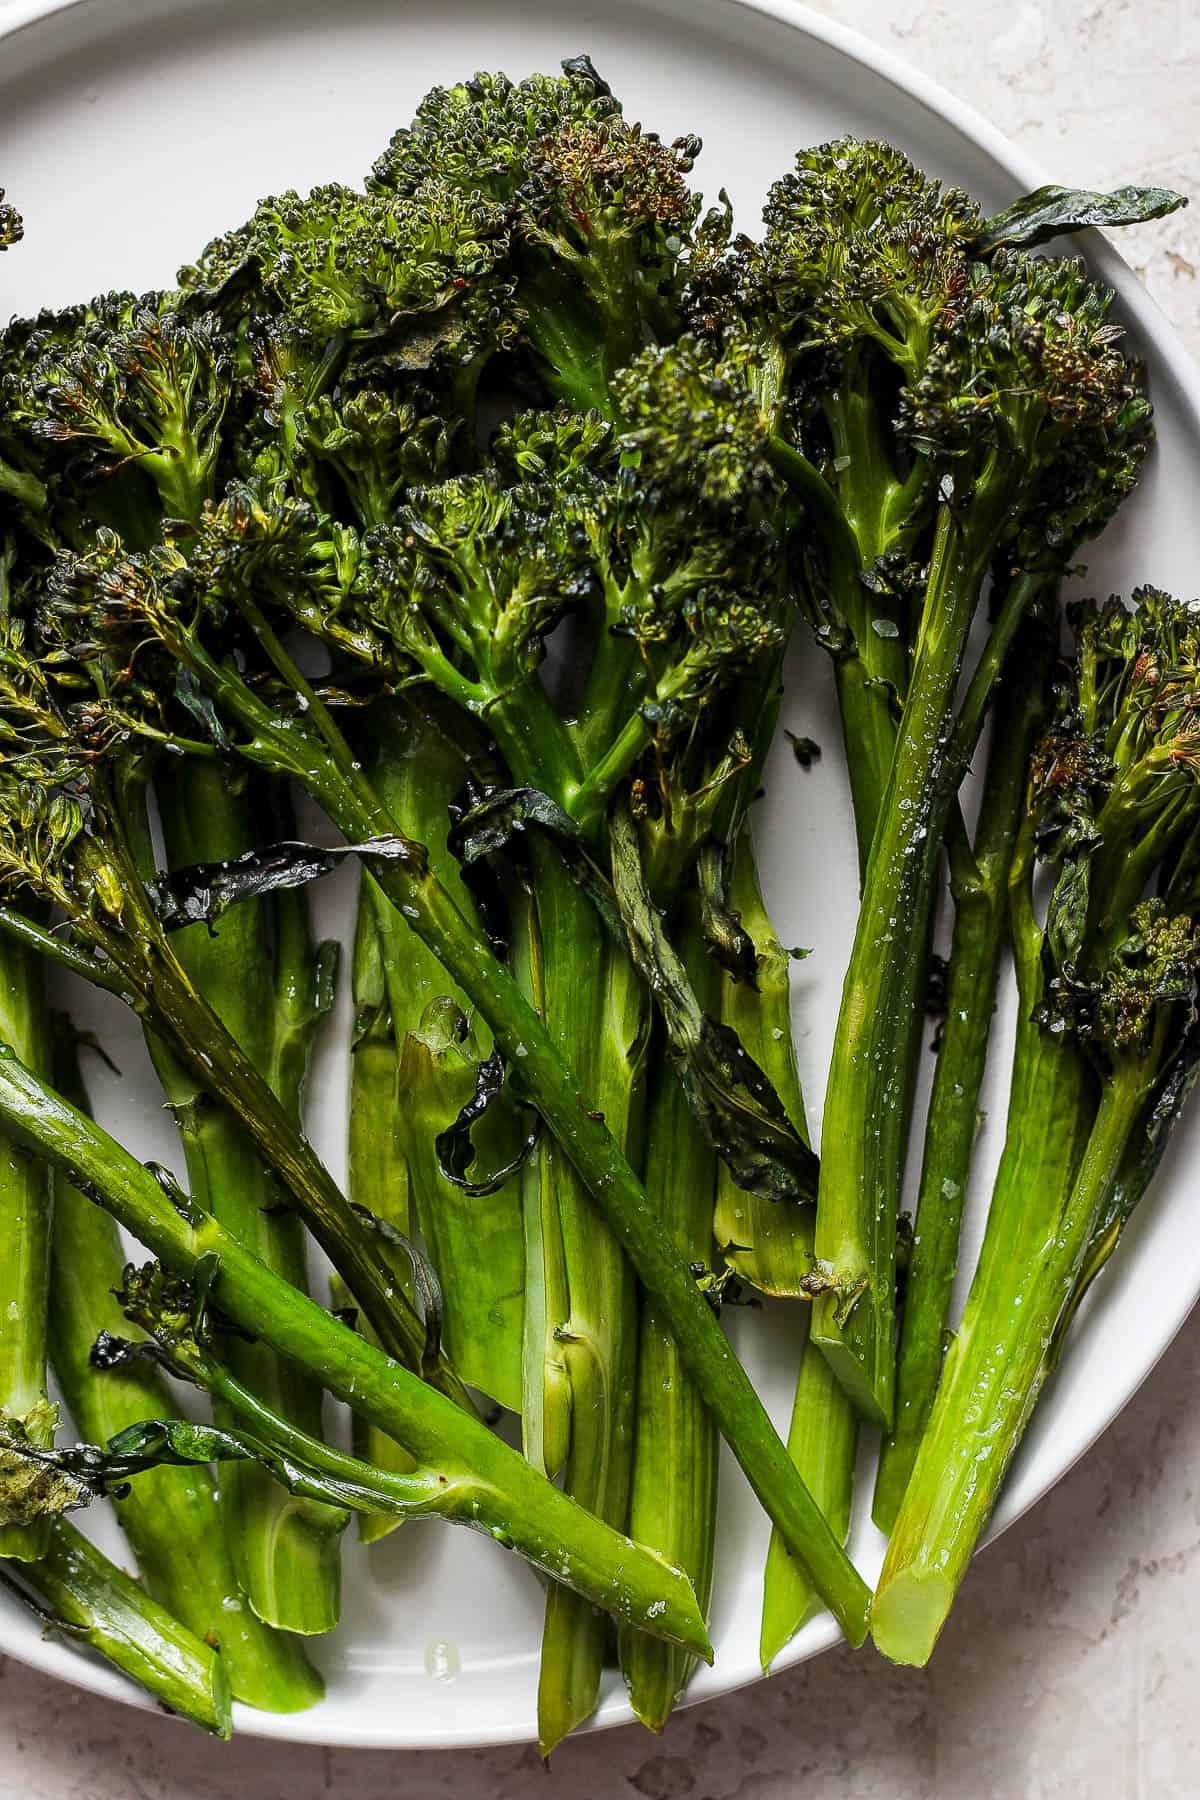
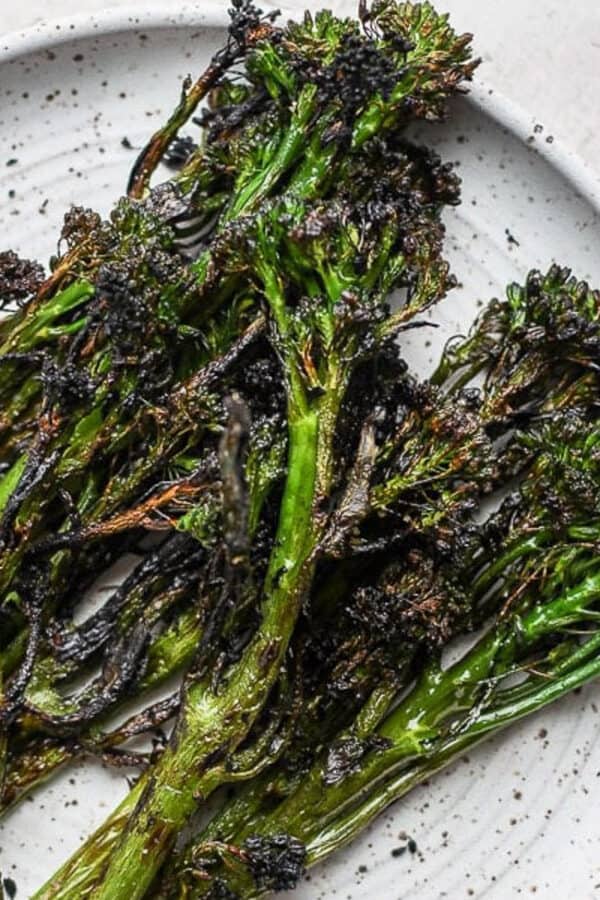
- Roast until lightly charred → best flavor and texture
Share and summarize this recipe:
I am finally sharing my absolute favorite roasted broccolini recipe with you guys! This is the best way to make this easy side dish and my entire family loves it.
We love eating it in the morning with eggs and homemade sausage patties, tossing it in my lunch (which is generally leftovers), and we probably have it as a simple dish with dinner about 2-3 times per week. My kids love it and actually request it and ask for seconds. Definitely our favorite vegetable!
Can’t find broccolini? You can also easily roast broccoli right in your oven or steam broccoli on the stovetop!
Key Ingredients
Be sure to see the recipe card below for a full listing of ingredients, instructions, and estimated nutritional information.
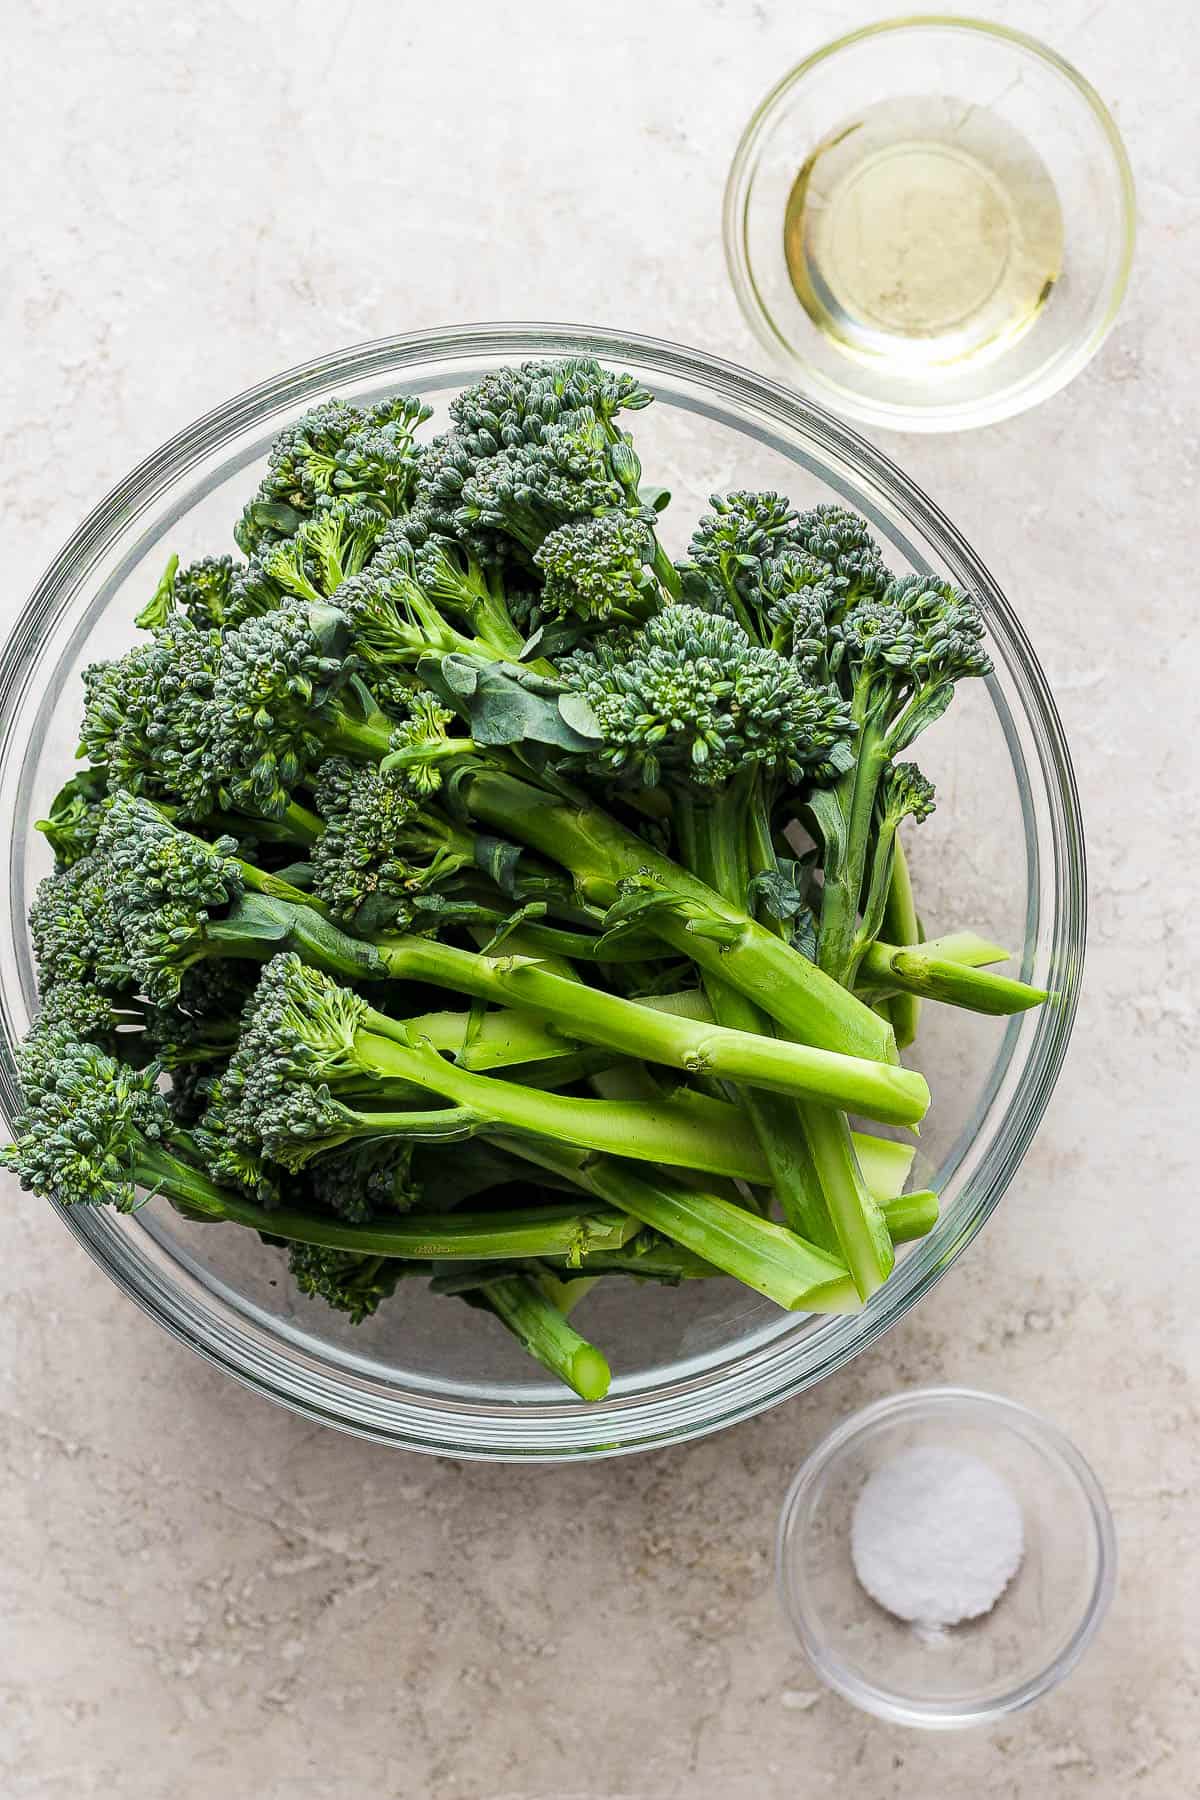
- fresh broccolini spears – our local grocery store has packages of these in the produce section or try your local farmer’s market.
- olive oil – we highly recommend rubbing some oil over every piece to help roast them to perfection!
- kosher salt – a simple seasoning that’s a must for all cooked vegetables.
How To Roast Broccolini
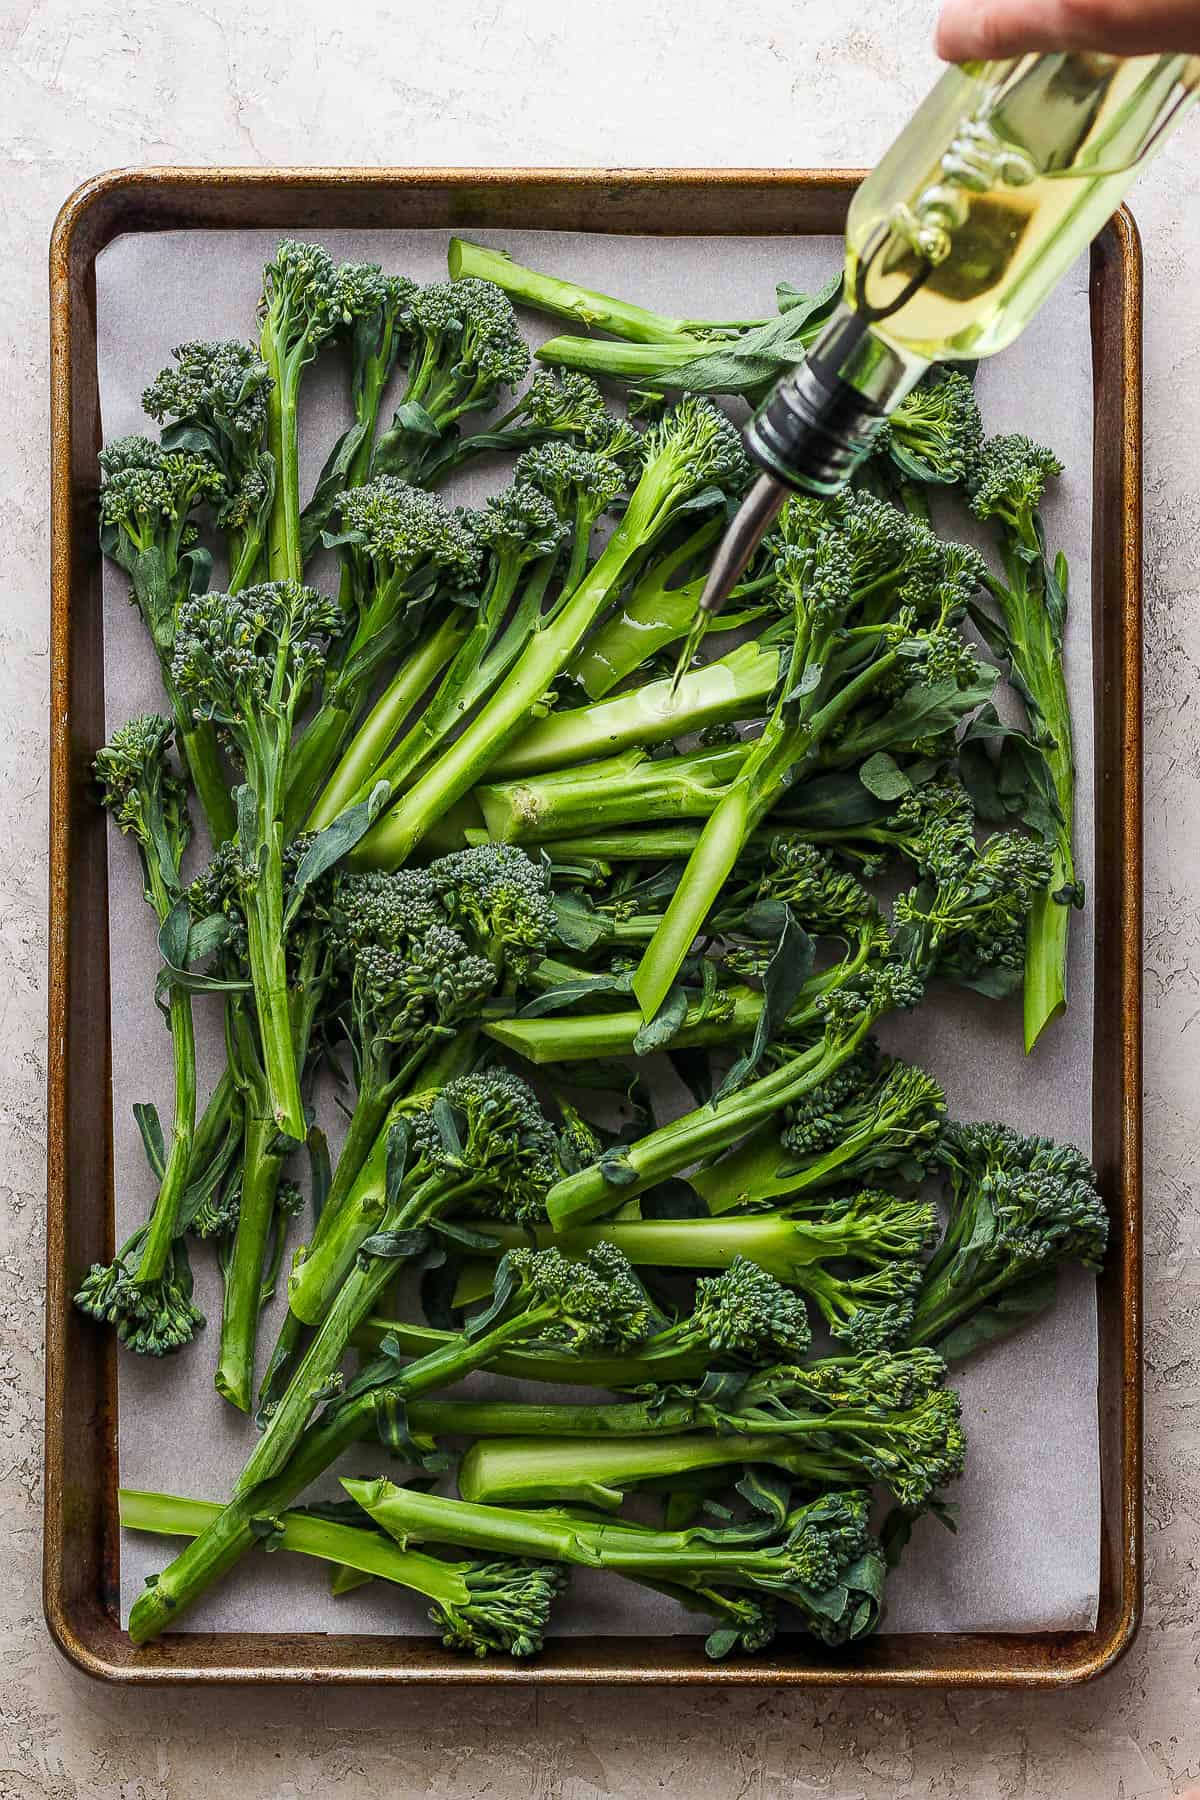
Step 1: Trim the bottom 1/2 inch to 1 inch off of each broccolini stem. Place all of the trimmed broccolini on a parchment-lined sheet pan and drizzle the olive oil and sprinkle with kosher salt.
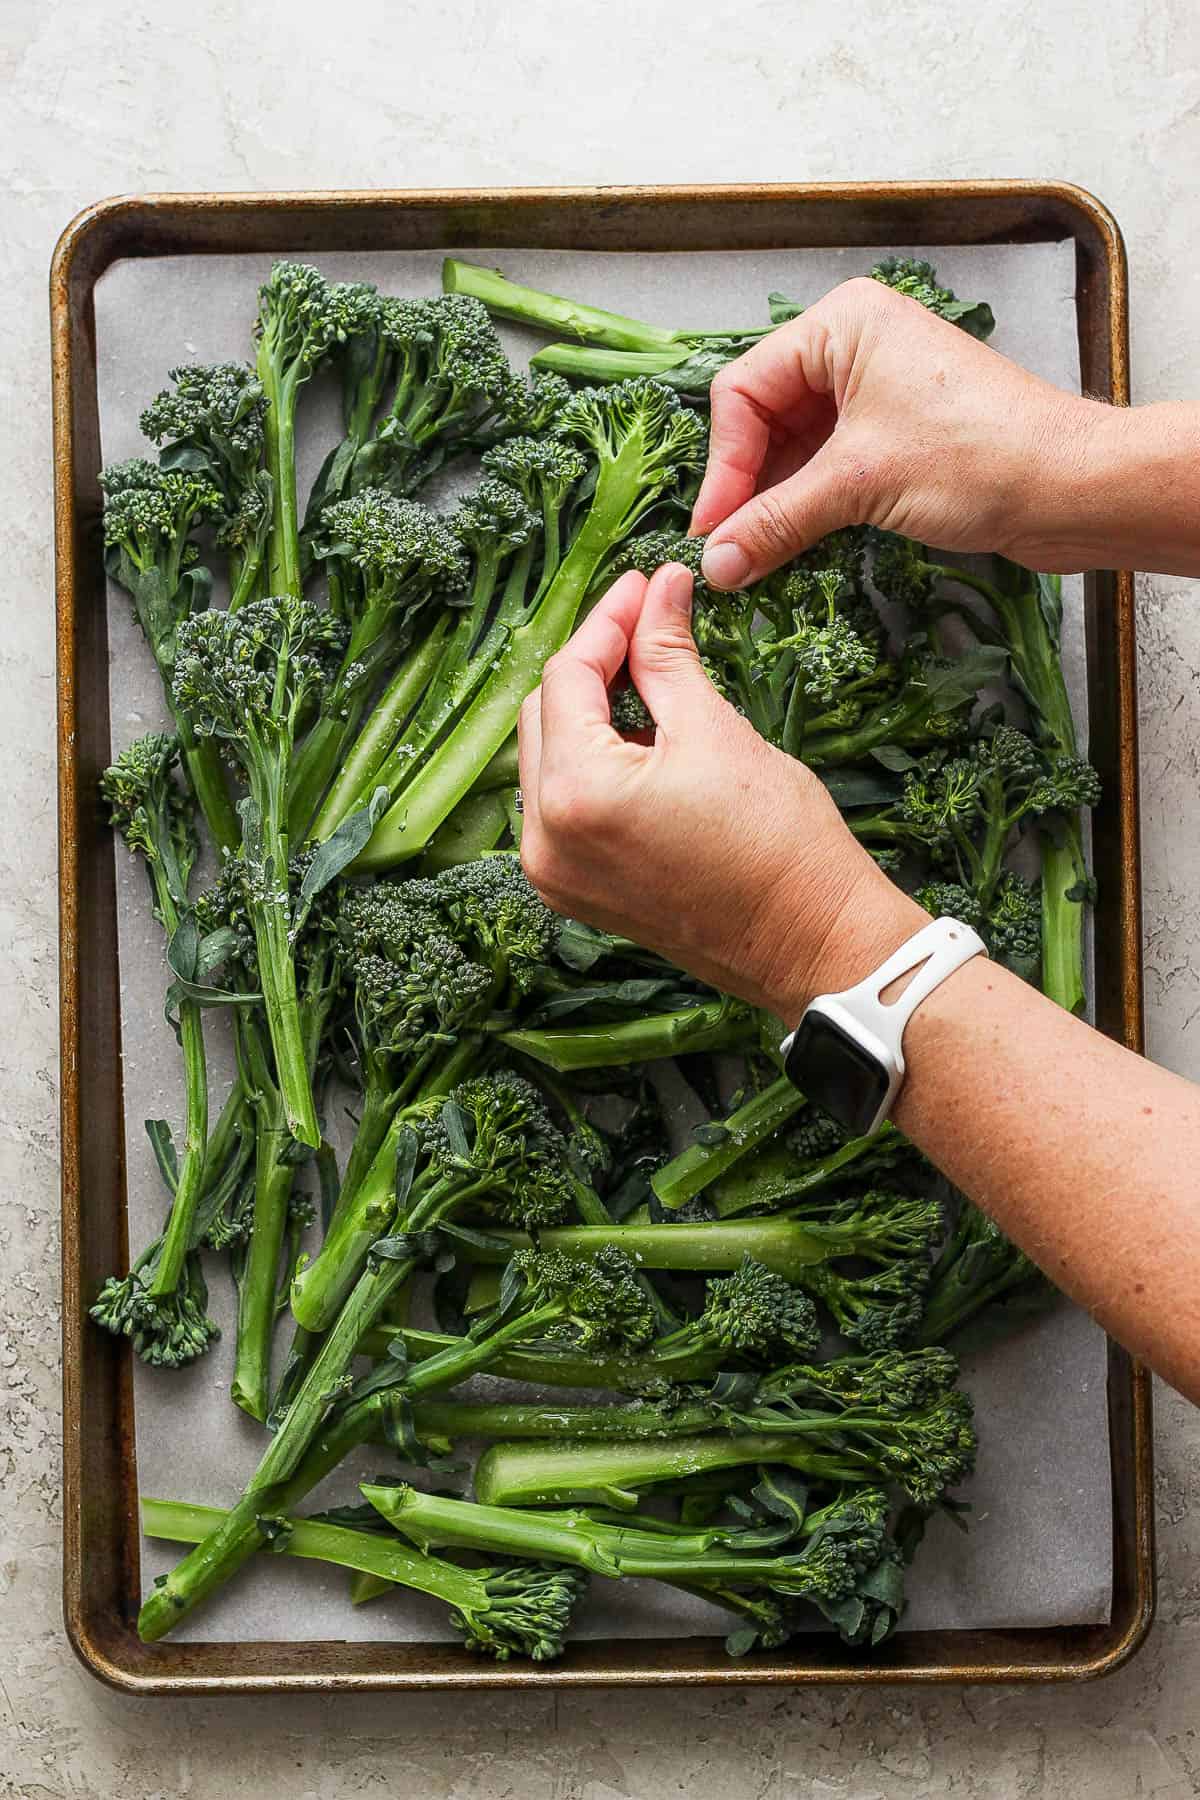
Step 2: Use your hands to really rub the oil into every little piece of the broccolini. This is so important to get the best results and even cooking.
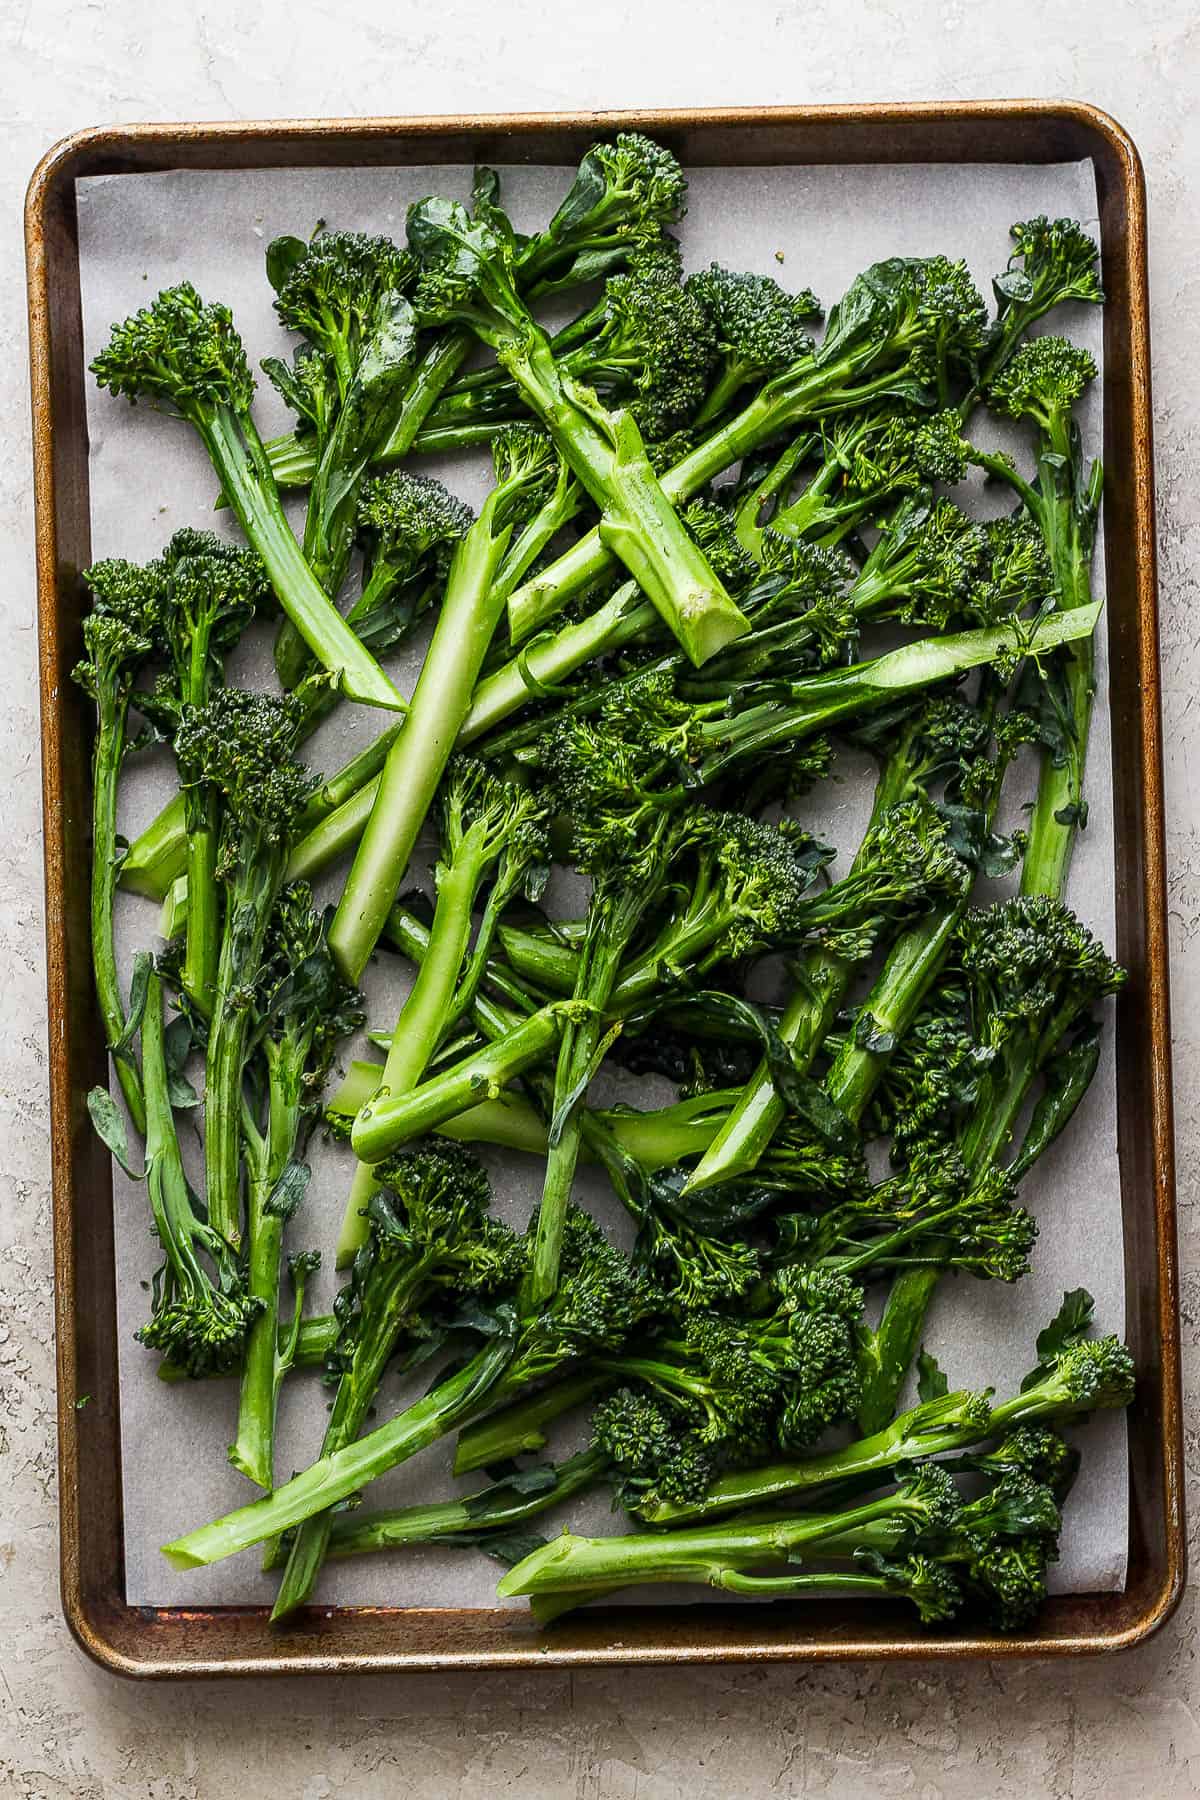
Step 3: Place broccolini in a single layer with minimal overlap.

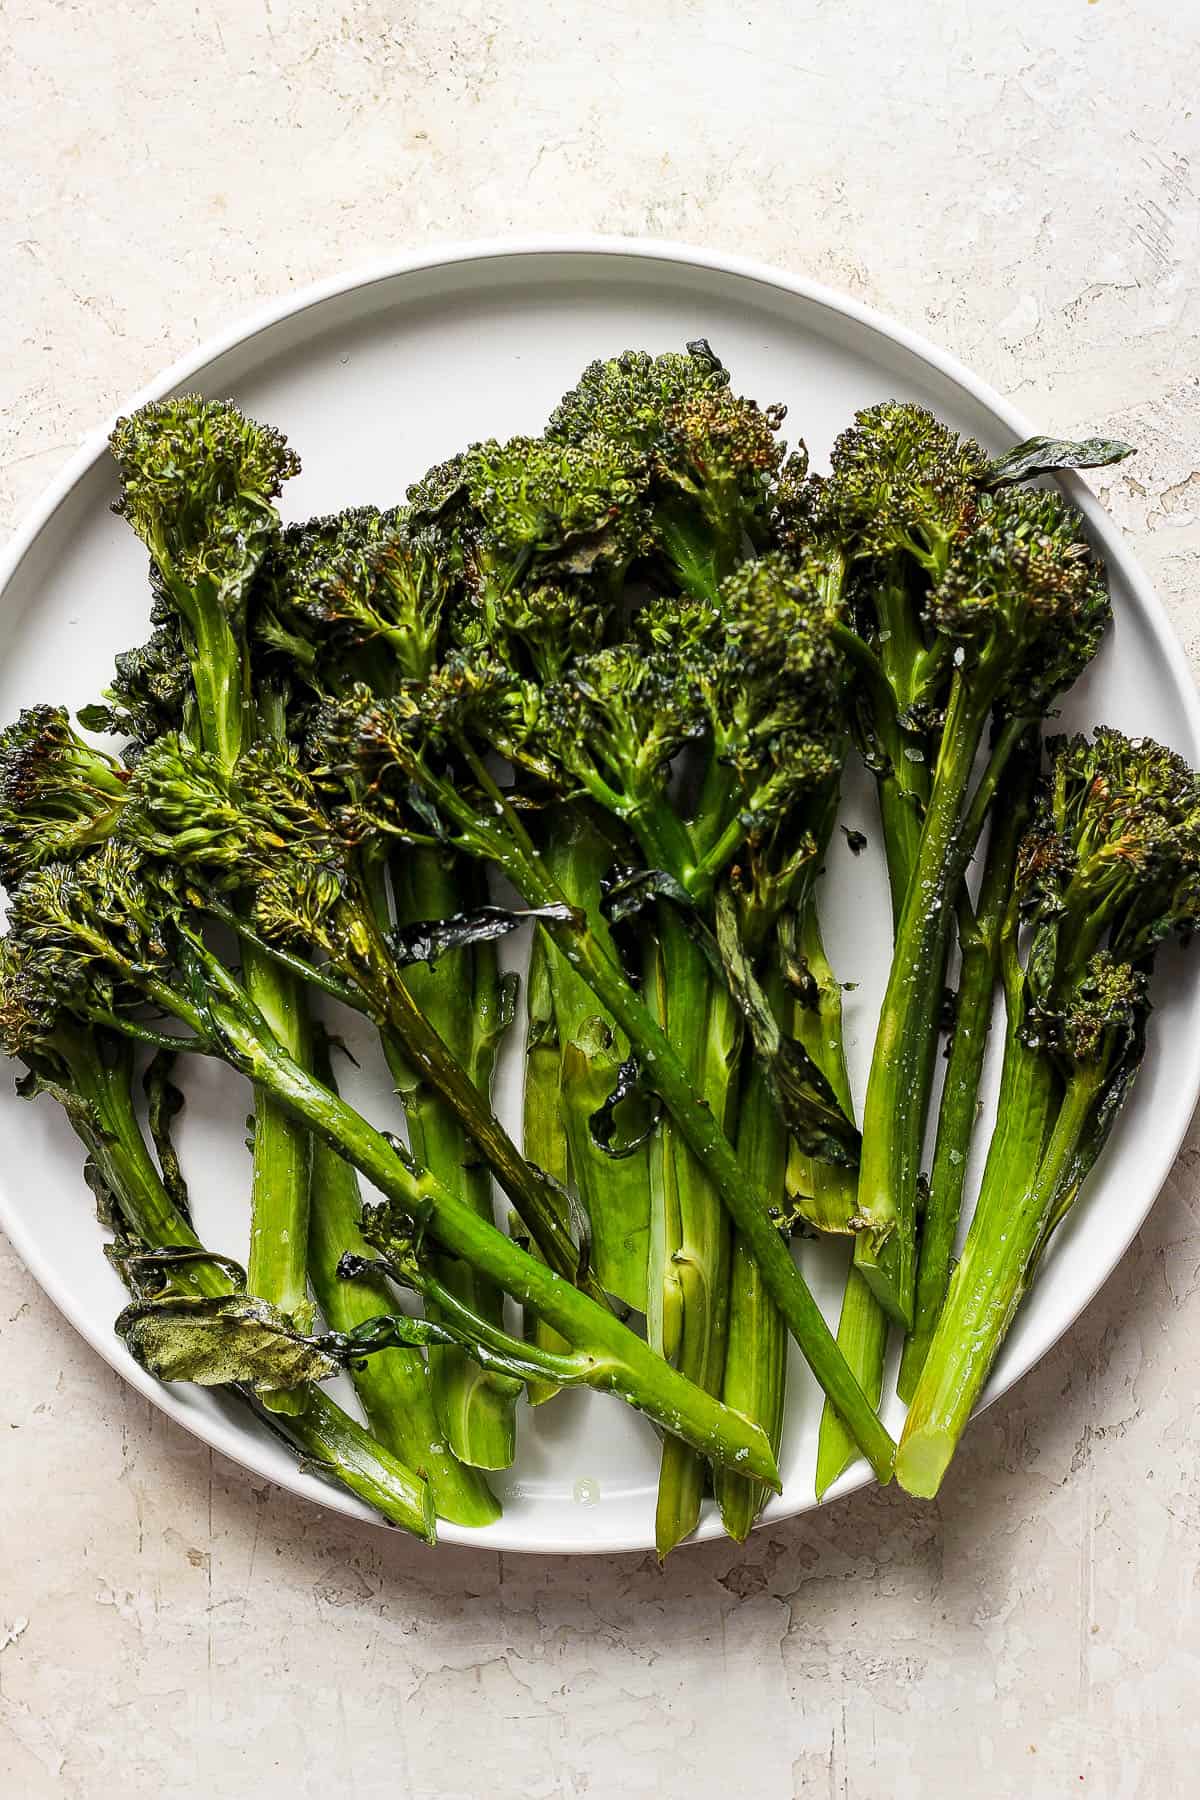
Step 4: Roast broccolini in the 425 degree F. oven for about 10-15 minutes of cook time. The longer they cook, the more crispy edges they will have!
Why Massaging the Oil Works (Our Tested Method)
We tested two methods:
- drizzling + tossing
- massaging the oil directly into the broccolini
The difference was noticeable.
Broccolini has lots of small branches and uneven surfaces, which makes it harder for oil to coat evenly when you just toss it. By massaging the oil in, you:
- get into every nook and crevice
- prevent dry spots
- help the broccolini roast evenly
- create better caramelization
It takes an extra 30 seconds, but the texture payoff is worth it.
How Long to Roast Broccolini
The ideal roasting time depends on your oven temperature:
- 425°F: 10–15 minutes (best for crispy edges)
- 400°F: 15–18 minutes (slightly softer texture)
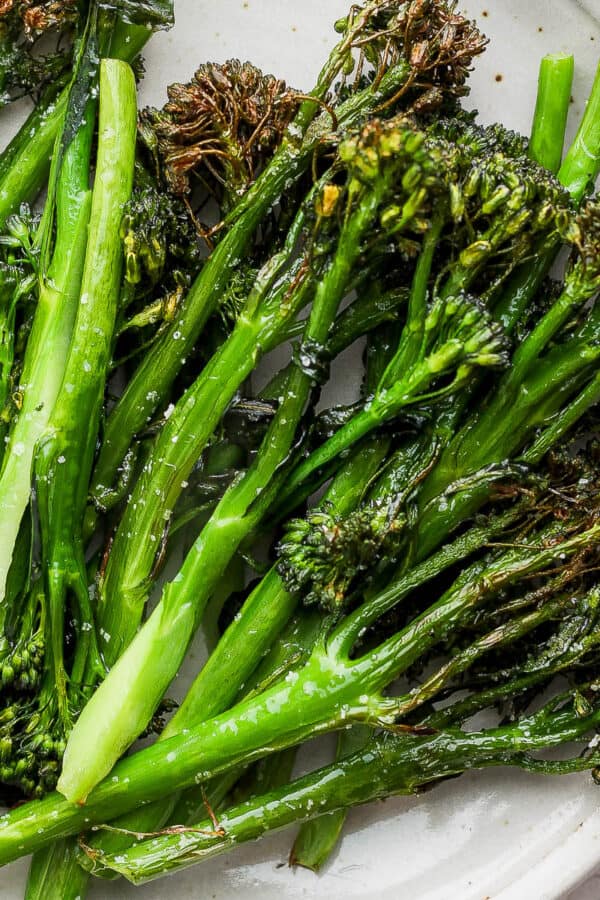
You’ll know it’s done when:
- everything is evenly roasted (no pale or soggy spots)
- the edges are lightly charred
- the stems are fork-tender
Best Ways To Serve Roasted Broccolini
The options are endless! This simple roasted broccolini makes a perfect side dish for any main dish. We love serving them with air fryer salmon, cast iron chicken thighs, or perfectly grilled steaks. And if you are looking to add more vegetables to your daily menu, try serving them for breakfast! Seriously, don’t knock it until you try it!
Recipe FAQ
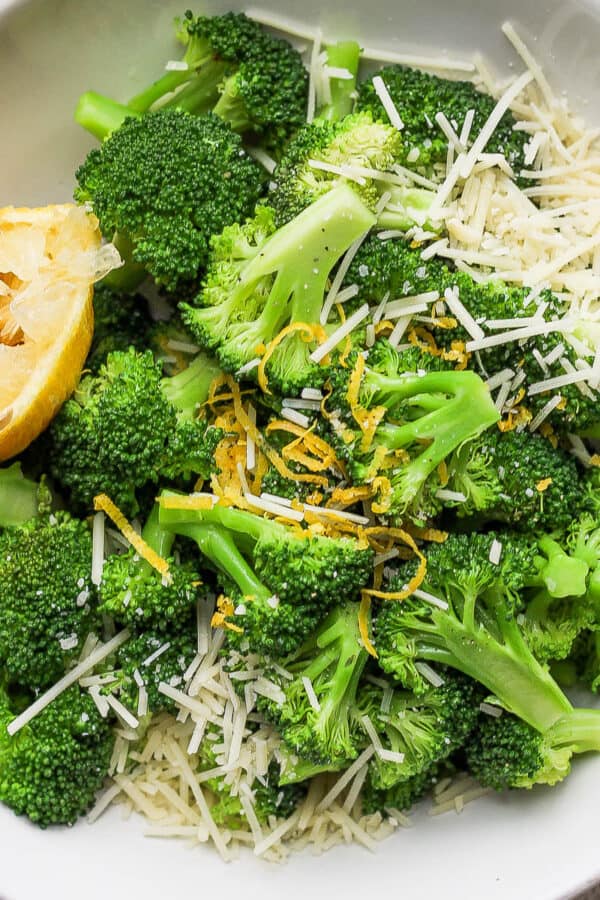
We kept the recipe card simple with just oil and salt, but you can easily add some other delicious flavors! Some options to add before roasting would be a squeeze of lemon juice (or lemon zest), minced fresh garlic, or red pepper flakes for a little kick. After they have roasted you could add a drizzle of balsamic glaze or sprinkling of parmesan cheese or sesame seeds!
Absolutely! You can easily make grilled broccolini on a gas grill or charcoal grill. Or make some easy air fryer broccolini, if you have one!
Other Broccoli Recipes You Might Like

Made this recipe and loved it?!
We would love it if you would take a minute and leave a star rating and review – it is also helpful if you made any substitutions or changes to the recipe to share that as well. THANK YOU!
Follow Us on Social

Ingredients
- 1 lb fresh broccolini
- 2 tablespoons extra virgin olive oil, more if needed to fully coat, sub avocado oil
- 1/2 tablespoon kosher salt
Instructions
- Preheat oven to 425 ℉.
- Line a rimmed baking sheet with parchment paper and set aside.
- Cut off the bottom inch or so of each broccoli and discard. If a piece of broccolini is extra thick, cut in half the long way (possibly more than once if necessary) to make the pieces thinner and somewhat uniform in thickness so they all cook more evenly.
- Place broccolini on prepared baking sheet. Drizzle with olive oil and then use your hands to massage it into every inch (very important) – add more oil, as needed, to ensure every nook and cranny of the broccolini is coated. Sprinkle with salt and repeat massaging. Spread out broccolini so it is in an even layer.
- Place in oven on middle rack and bake for 10-15 minutes – start checking at 10 minutes mark (I generally leave mine in for around 12 minutes, but every oven is different).
- If you want it a little more crispy or charred, place back in the oven for 2-3 minute increments – totally personal preference.
- Serve immediately.
Notes
- Amount of Broccolini: I kept the recipe to 1lb of broccolini, but I know I have fit at least 2lb of broccolini on a large sheet pan before – super flexible recipe – of course just use more olive oil and salt and try to keep them in an even layer.
- Storage: leftover broccolini can be stored in an airtight container for up to 5 days.
- Extra crispy: If you want your broccolini extra crispy, feel free to increase cooking time up to 5 minutes.

Holly says
Best Broccolini Recipe out there!! Erin knows her stuff – when she says to “massage it into every inch and crevice” she means it! And it makes a huge difference!
Erin says
Aw thanks, Holly!! I appreciate that! 🙂
Natalie says
Had never made broccolini before and I was a little worried how it would turn out. I also felt kind of silly massaging my food, BUT it was so absolutely delicious, and it tastes great reheated too. It was quickly become one of my weeknight staples (and I’ve learned not to skip the massage – trust me).
Erin says
yay!!! So happy to hear that, Natalie! And thank you so much for taking the time to leave a review + feedback – I really appreciate it!
Shandie says
So simple yet so delicious! Easily one of favourite things to throw in the oven for a super tasty and healthy side.
Erin says
Thank you, Shandie!! I really appreciate the feedback! 🙂